8×7 Garage Door Rough Opening: Exact Dimensions & Framing Guide
Framing a garage door with the wrong rough opening is one of the most expensive mistakes a DIY builder can make — and it happens constantly because installers confuse the door’s nominal size with the actual 8×7 garage door rough opening required for proper fit and hardware clearance.
Most framing errors come down to one problem: builders frame to the door’s labeled dimensions instead of the larger opening the manufacturer specifies, leaving too little room for the door jamb, weatherstripping, and torsion spring hardware.
This guide gives you the exact rough opening dimensions for a standard 8×7 door, explains why every margin exists, and walks you through the framing sequence so your opening is right before the door ever arrives on site.
Rough Opening vs. Finished Opening: Where the Confusion Starts
The rough opening is always larger than the finished opening. The rough opening is the framed hole in your wall before any trim, jamb, or hardware goes in. The finished opening is what remains after all that material fills the gap.
Why the Frame Needs Extra Space
Framing lumber runs small. A 2×6 stud measures 1.5 inches actual thickness, not 6 inches. When you nail a door jamb against the rough framing, that jamb consumes space. Add weatherstripping, door stops, and shim space for getting the frame plumb and level, and you lose another inch or more on each side and across the top.
For an 8×7 garage door, that gap between rough and finished isn’t cosmetic — it’s structural. The torsion spring hardware mounts above the door, and the tracks run inside the framed opening. There’s no room to fudge these clearances.
How Trim Boards Shrink the Final Dimension
Interior casing and exterior trim boards reduce both the visible width and height of the opening after installation. Most standard exterior trim runs 3/4 inch to 1 inch thick. That’s material you must account for before framing, not after.
The Most Costly Measurement Mistake
Framing to the door’s labeled size — 8 feet wide by 7 feet tall — instead of the required 8×7 garage door rough opening dimensions causes the door to bind, prevents proper track alignment, and can void the manufacturer’s warranty. Clopay, Wayne Dalton, and Amarr all publish framing specifications in their installation guides that differ from the nominal door size. Always pull those specs before you cut a single stud.
The 8×7 Rough Opening Breakdown: 8’3″ × 7’1.5″ Explained
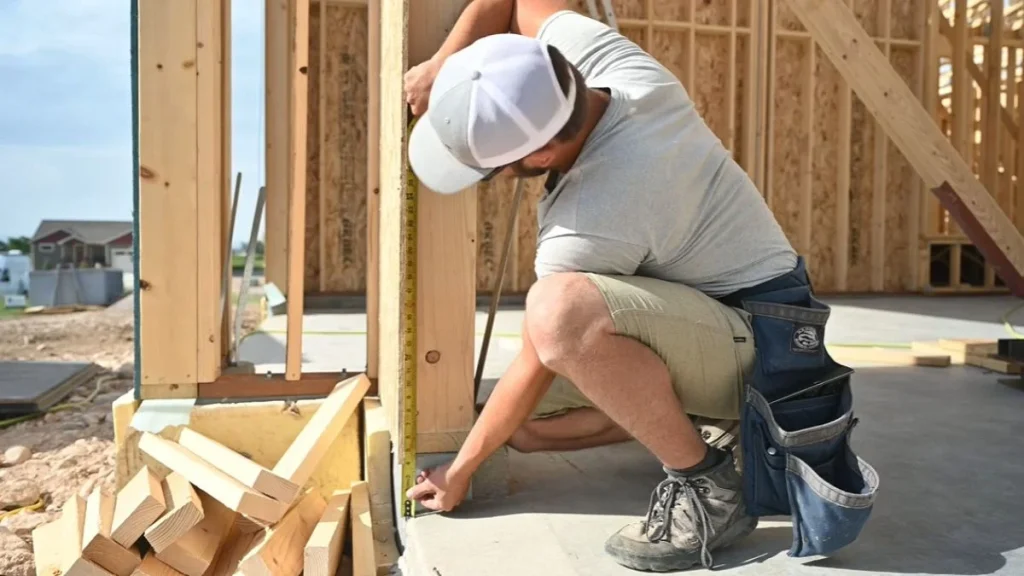
The standard rough opening for an 8×7 garage door is 99 inches wide by 85.5 inches tall — that’s 8 feet 3 inches wide and 7 feet 1.5 inches tall. Those extra inches aren’t guesswork; every fraction accounts for a specific framing component.
Where the Extra Width Comes From
The finished door is 96 inches wide. The rough opening adds 1.5 inches on each side, totaling 3 extra inches. That space accommodates the door jamb, door stops, and shim room to get the frame perfectly plumb. Without that clearance, you cannot align the vertical tracks correctly, and a misaligned track will cause the door to bind or jump the rollers within weeks.
Where the Extra Height Comes From
The finished door stands 84 inches tall. The rough opening adds 1.5 inches at the top — enough for the door stop, the horizontal flag angle bracket that anchors the track, and minor shimming to level the header. The bottom of the opening sits at the slab or grade beam surface. There is zero tolerance needed at the bottom because the door seals against the floor with a rubber bottom seal, not framing lumber.
Manufacturer Variation: Always Verify Before You Cut
Not every manufacturer lands on identical 8×7 garage door framing specifications. Clopay specifies a rough opening width tolerance of plus or minus 0.25 inches. Wayne Dalton and Ideal Door publish similar but not identical clearance requirements in their installation manuals. The typical variance is small — usually within 0.25 inches on width and 0.5 inches on height — but it matters. Pull the installation guide for your specific door model before framing. A quick check now prevents a full reframe later.
Framing an 8×7 Door Opening: Installation Sequence
Framing the correct rough opening requires more than hitting the right dimensions — the frame must be plumb, level, and square or the door will never operate smoothly, regardless of how accurate your measurements are.
Step 1: Layout and Structural Members
Mark your top and bottom plates at exactly 99 inches apart for the inside face of your king studs. King studs run full height from bottom plate to top plate. Jack studs — also called trimmer studs — sit inside the king studs and carry the header load. Cut and install both before setting the header. Double-check your layout marks with a tape measure diagonally across the opening: equal diagonal measurements confirm a square opening.
Step 2: Header Sizing for an 8-Foot Span
A garage door header size for an 8-foot span requires a minimum double 2×10 dimensional lumber header, or an engineered LVL (laminated veneer lumber) beam of equivalent depth. The header must bear fully on both jack studs with no gaps. If your wall framing sits below a roof load, consult your local building code or a structural engineer — the International Building Code sets minimum header requirements based on load path, not just span. Add cripple studs between the header and top plate to transfer that load correctly.
Step 3: Verify Before You Order
Before calling in your door order, confirm the frame with three checks:
- Plumb: Both side jambs must read vertical with a 4-foot level or laser level — zero tolerance for lean.
- Level: The header face must be perfectly horizontal across the full 99-inch span.
- Square: Diagonal measurements from corner to corner must match within 1/8 inch.
Shim behind the jack studs where needed to correct any deviation. These checks cost ten minutes now and prevent a full reframe after the door arrives on site.
Reference Chart: Standard Door Sizes & Rough Openings
Use this table to confirm rough opening dimensions across all common residential garage door sizes. The pattern is consistent: add 3 inches to the finished width and 1.5 inches to the finished height to get your rough opening target. Header sizing scales with span.
| Finished Size | Rough Opening (W × H) | Typical Header | Common Lumber |
|---|---|---|---|
| 6×7 | 75″ × 85.5″ | Double 2×8 | SPF or Douglas Fir |
| 7×7 | 87″ × 85.5″ | Double 2×8 | SPF or Douglas Fir |
| 8×7 | 99″ × 85.5″ | Double 2×10 | SPF or Douglas Fir |
| 8×8 | 99″ × 97.5″ | Double 2×10 | SPF or Douglas Fir |
| 9×7 | 111″ × 85.5″ | Double 2×10 or LVL | LVL recommended |
| 10×7 | 123″ × 85.5″ | LVL beam | LVL required |
| 12×7 | 147″ × 85.5″ | LVL beam | LVL required |
Always verify against your specific manufacturer’s installation manual before cutting. Print this table and keep it on site.
Why the 8×7 Is the Most Common Residential Choice
The 8×7 finished opening fits a standard single-car bay and accommodates most full-size trucks and SUVs with clearance to spare. Its 99-inch rough opening width sits within the range where a double 2×10 dimensional lumber header handles the load without requiring engineered lumber, keeping material costs lower than the 9×7 and larger sizes.
The Rough Opening Adjustment Pattern
Across every size in the chart, the rough opening formula stays the same: finished width plus 3 inches, finished height plus 1.5 inches. The only variable that changes meaningfully is the header — spans beyond 9 feet shift from dimensional lumber to LVL beams to maintain structural integrity under roof and snow loads. Recognizing this pattern lets you frame any standard garage door opening with confidence, not just the 8×7.
Getting the rough opening size right upfront avoids the sizing problems covered in this guide.
FAQ
How much headroom do I need above an 8×7 garage door?
Standard torsion spring systems require a minimum of 12 inches of headroom — the vertical space between the top of the rough opening and the ceiling or lowest obstruction above it. Low-clearance torsion spring kits from manufacturers like Clopay and Wayne Dalton reduce that requirement to as little as 4.5 inches, but they cost more and require specific track configurations.
What’s the difference between rough opening and finished opening?
The rough opening is the framed hole in the wall before any jamb, trim, or hardware is installed. The finished opening is the usable space that remains after those components fill the gap. For an 8×7 garage door, the rough opening is 99 inches wide by 85.5 inches tall, while the finished opening matches the door’s nominal size: 96 inches by 84 inches.
Can I frame an 8×7 rough opening with 2×4 walls?
Yes, but only if the wall carries no structural roof load. Load-bearing garage walls typically require 2×6 framing to support the header depth needed for an 8-foot span. Check your local building code and confirm with your structural plans before framing with 2×4 stock.
Get Your Rough Opening Right the First Time
The single most expensive framing mistake is cutting to the door’s nominal size instead of the required rough opening — for an 8×7 door, that means 99 inches wide by 85.5 inches tall, not 96 by 84.
Before you cut a single stud, download the installation manual for your specific door model from the manufacturer’s website — Clopay, Wayne Dalton, and Amarr all publish free PDFs with exact framing specifications, tolerance ranges, and headroom requirements for every door in their lineup.