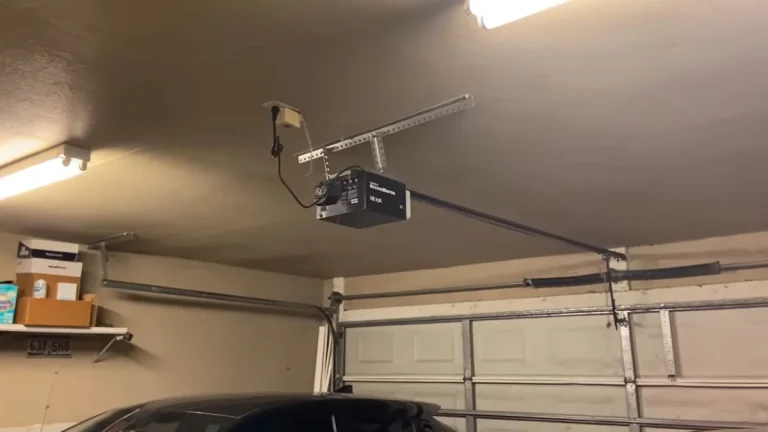
Genie Motor Running But Door Won’t Open: 5-Step Diagnostic

When your Genie garage door not opening but motor running, the fix is almost always one of five mechanical or electrical failures — most of which cost nothing to diagnose yourself.
The real frustration: a service call runs $150-300 before parts, yet the root cause is often something a homeowner can resolve in under 30 minutes with basic tools.
This guide walks you through a structured 5-step diagnostic that pinpoints the exact failure so you know whether to grab a screwdriver or call a pro.
Safety First: Critical Hazards Before You Start
Two hazards can seriously injure you during this diagnostic — torsion springs and live electrical components. Identify both before touching anything.
Torsion Springs: Do Not Touch Under Any Circumstances
The torsion spring is the large metal coil mounted horizontally above your garage door. It stores enough mechanical energy to cause severe injury or death if it releases suddenly — professional technicians measure this tension in the range of 10,000+ PSI.
If you see a gap in the coil, a visibly broken spring, or your door feels extremely heavy when lifted manually, stop immediately. Torsion spring repair requires specialized winding bars, a secured door, and trained hands. According to Genie’s official troubleshooting documentation at store.geniecompany.com, spring replacement is explicitly listed as a task requiring professional service — not DIY.
Do not touch, tap, or attempt to wind the spring yourself.
Electrical Shock Risk During Motor and Circuit Testing
Your Genie opener runs on standard 120V household current. Before testing any wiring connections, circuit boards, or the opener motor directly, unplug the unit from the ceiling outlet.
Safety sensors — the two small units mounted near the floor on each side of the door — also carry low-voltage current. They’re generally safe to handle, but the motor head unit and its internal circuits are not.
The rule is simple: unplug first, then inspect. Plug back in only when you’re ready to run a powered test with your hands clear of all moving parts — the drive chain, belt, carriage, and trolley assembly included.
Step 1: Emergency Release Cord Check
The single most common reason a Genie garage door opener motor running but door won’t move is an engaged emergency release — and most homeowners don’t realize it happened.
How the Emergency Release Gets Accidentally Triggered
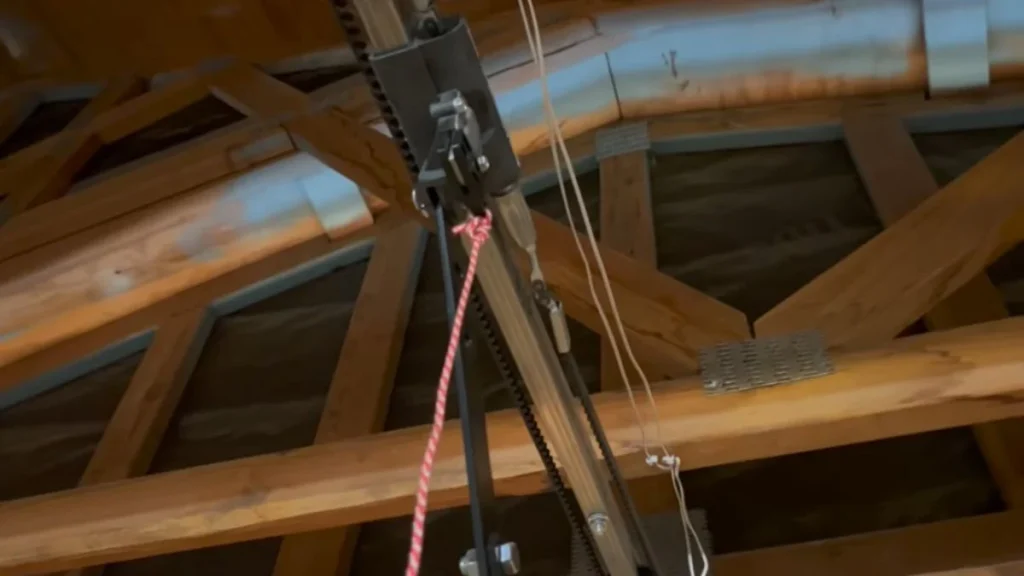
Every Genie opener has a red emergency release cord hanging from the trolley. Pulling it disconnects the carriage from the drive mechanism, allowing the door to move manually during a power outage. The problem: it’s easy to bump during a power outage, a panicked manual operation, or even when retrieving something stored near the ceiling.
When triggered, the trolley disconnects from the carriage. The opener motor runs, the drive chain or belt moves, but the carriage — the part physically attached to the door — sits completely still. The door won’t move an inch.
How to Identify a Disconnected Trolley
Look at the trolley assembly on the rail above the door. You’ll see a small metal hook or latch near the carriage connection point. If the trolley and carriage are visibly separated, or if the door moves freely by hand with almost no resistance from the opener, the emergency release is the culprit.
Re-Engaging the Trolley: Two-Step Process
- Pull the emergency release cord toward the door — not straight down. This repositions the trolley latch into the ready-to-engage position.
- Manually slide the door up or down until you hear or feel the carriage snap back onto the trolley.
Once re-engaged, press your remote. The opener should pull the door normally. If the motor runs but the door still won’t move after re-engagement, move to Step 2.
Step 2: Inspect Drive Mechanism Engagement
If the emergency release is fully engaged but the drive chain not moving the garage door opener, the problem sits in the drive mechanism itself — the chain, belt, or screw that physically transfers motor power to the carriage.
Visual Inspection: What to Look For
Stand beneath the opener and watch the drive mechanism while someone activates the opener. You’re checking for three things:
- A chain or belt that moves freely but doesn’t pull the carriage
- Visible slack in the chain — more than 1/2 inch of droop below the rail
- A screw drive (on models like the Genie SilentMax 1200) that spins without gripping
On chain-drive models like the Genie ChainLift 900, a loose or jumped chain is usually visible immediately. On belt-drive models, look for fraying or a belt that sits off its track.
Re-Engaging Common Genie Models
For chain-drive units, tighten the chain using the adjustment bolt on the front bracket of the rail until droop measures 1/2 inch below the bottom rail. For screw-drive models, inspect the trolley teeth for visible stripping — stripped trolley teeth produce a grinding sound as the screw spins without catching.
When Disengagement Signals a Deeper Problem
A drive chain not moving the garage door opener after adjustment points to a worn drive sprocket — the small gear inside the motor head that the chain wraps around. If re-engagement fails repeatedly, the sprocket is likely stripped and needs replacement.
Misaligned track is the other culprit. If the rail sits even slightly off-angle, the carriage binds and the motor runs against resistance until it stalls. Check that the rail runs parallel to the ceiling and adjust the hanging brackets if needed.
Step 3: Coupler and Trolley Assessment
A failed coupler is one of the most frequently misdiagnosed causes of a garage door opener motor running but door won’t move — because everything sounds normal until you look closely.
What the Coupler Does and How It Fails
The coupler is a small plastic or nylon component that connects the motor shaft to the drive mechanism. On Genie chain and screw-drive models, it’s the critical link between motor rotation and trolley movement. When it cracks or strips, the motor spins freely while the drive mechanism stays completely frozen.
Genie Coupler #35256R is the most commonly replaced variant across multiple Genie ChainLift and SilentMax models. Visual signs of failure include:
- Cracked or shattered plastic visible around the motor shaft
- Wobbling or rattling from the motor head during operation
- A grinding or whirring sound with zero drive mechanism movement
Stripped Trolley Teeth: A Different but Related Problem
Stripped trolley teeth produce a specific symptom — the drive chain or screw moves normally, but the carriage skips or stutters instead of pulling the door. Run your finger along the trolley’s gear teeth. Worn teeth feel flat or rounded rather than sharp and defined.
DIY Replacement vs. Professional Service
Genie coupler replacement DIY is genuinely achievable for most homeowners. The part costs $8-20, requires no special tools, and takes roughly 30-45 minutes following Genie’s model-specific instructions at store.geniecompany.com. Trolley replacement runs $25-50 in parts but involves disassembling the rail — moderately more complex. If you’re uncomfortable with either task, a technician typically charges $75-125 in labor alone.
Step 4: Door Balance and Spring Tension Test
An unbalanced garage door forces the opener motor to work against resistance it was never designed to handle — and the motor will stall, trip its thermal overload, or simply stop moving the door mid-cycle.
How to Perform the Manual Balance Test
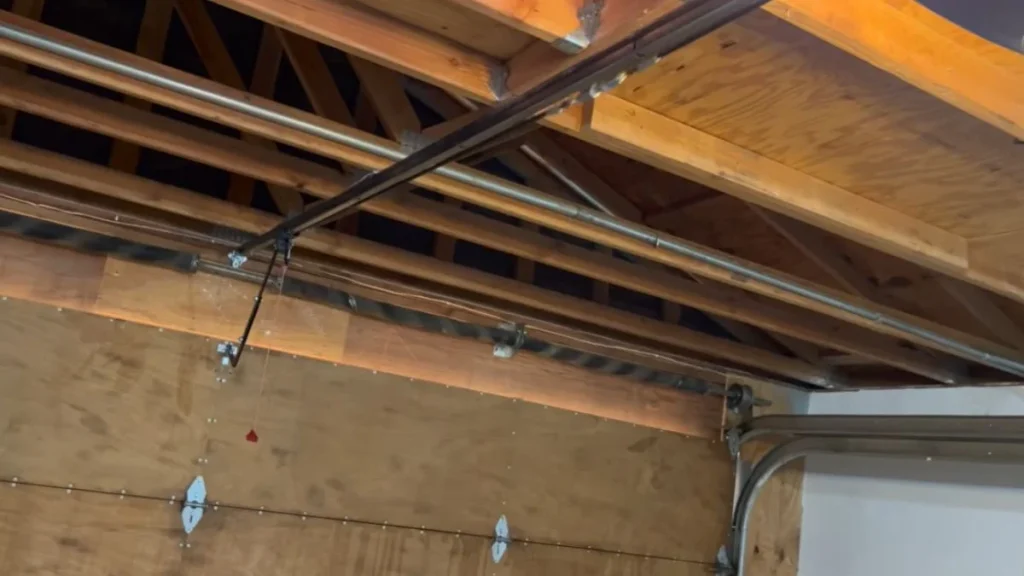
Pull the emergency release cord to disconnect the carriage from the drive mechanism. Manually lift the door to approximately waist height — roughly 3-4 feet off the ground — then let go completely.
A properly balanced door stays in place within 1-2 inches of where you released it. That’s the torsion spring doing its job, counterbalancing the full weight of the door panels.
What Failure Looks Like
- Door drops quickly to the floor: spring tension is insufficient or the spring is broken
- Door rockets upward: spring is over-tensioned
- Door drifts slowly in either direction: spring is weakening and nearing end of life
Any of these results means the opener motor is compensating for a mechanical imbalance — and running a garage door opener motor test won’t fix an underlying spring problem.
Why Spring Repair Is Strictly Professional Territory
Torsion springs store extreme mechanical energy even when the door is closed. Releasing that tension without proper winding bars, a secured door, and trained technique can cause the spring to unwind violently. Most U.S. states don’t legally require licensing for garage door work, but professional technicians carry liability insurance precisely because spring failures cause serious injuries. This is the one step in this diagnostic where “call a pro” is the only correct answer.
Step 5: Sensors and Reset Procedure
Misaligned safety sensors are the most overlooked cause of a Genie garage door not opening — the motor runs, the drive mechanism engages, but the opener’s logic board interprets a blocked beam as a safety hazard and refuses to close the door.
How Genie Safety Sensors Work
Two sensors sit roughly 4-6 inches off the ground on either side of the door frame. One sends an infrared beam, the other receives it. When the beam is interrupted — by a misaligned bracket, a dirty lens, or an actual obstruction — the opener motor either reverses immediately or won’t activate the downward cycle at all.
The sending unit typically has a solid amber light. The receiving unit should show a solid green light. Any blinking indicates misalignment or interference.
Cleaning and Realigning the Sensors
- Wipe both sensor lenses with a dry microfiber cloth — even a thin film of dust breaks the beam.
- Loosen the mounting bracket wing nut on the receiving sensor (green light unit).
- Slowly pivot the sensor until the green light goes solid, then retighten.
Genie Reset Procedure
Once sensors are aligned, perform a full opener reset. On most Genie models, press and hold the button labeled “Learn” or “Program” on the motor head unit for 10 seconds until the indicator light goes out. Release, then reprogram your remotes.
Sensor Failure vs. Obstruction Signal
A sensor that blinks even with a clear path and clean lens is likely failing internally — the photoelectric eye itself has degraded. That requires a sensor replacement, typically $15-30 for a compatible Genie part, rather than realignment.
Cost Breakdown: DIY vs. Professional Service
Knowing the actual numbers before you call a technician changes the conversation entirely — and in most cases, the DIY repair costs less than 15% of a full service call.
DIY Parts Costs by Repair Type
| Repair | DIY Parts Cost | DIY Time | Difficulty |
|---|---|---|---|
| Coupler replacement (e.g., Genie #35256R) | $8–$20 | 30–45 min | Easy |
| Trolley/carriage replacement | $25–$50 | 60–90 min | Moderate |
| Safety sensor replacement | $15–$30 | 15–20 min | Easy |
| Drive chain adjustment | $0 | 10–15 min | Easy |
| Torsion spring replacement | Not recommended | N/A | Pro only |
Professional Service Call Baseline
A standard Genie service call starts at $75–$95 for the visit alone, before any parts or labor. Full coupler replacement by a technician typically runs $120–$175 all-in. Trolley and gear replacement lands at $150–$225 depending on the model and local labor rates.
Here’s the real calculation: if your diagnosis points to a coupler or sensor, the DIY savings over a single service call range from $100–$160 — enough to justify the 45 minutes of work for most homeowners.
Spring Repair: Professional-Only Pricing
Torsion spring replacement by a licensed technician runs $150–$350 depending on spring type, door weight, and whether both springs need replacement. Double-spring systems on heavier doors push toward the top of that range. This is not a cost to avoid by attempting DIY — the injury risk and liability make professional service the only rational choice regardless of price.
When to Call a Professional
A broken torsion spring, a repeatedly failing drive sprocket, or any repair that requires disassembling the main rail beyond basic adjustment is professional territory — the injury risk and diagnostic complexity outweigh any DIY savings. Start with Steps 1 through 3 of this diagnostic today: check the emergency release, inspect the drive mechanism, and examine the coupler — these three steps alone resolve the majority of Genie motor-runs-but-door-won’t-move cases without spending a dollar.