How to Reinforce Garage Rafters for Storage: Complete Guide
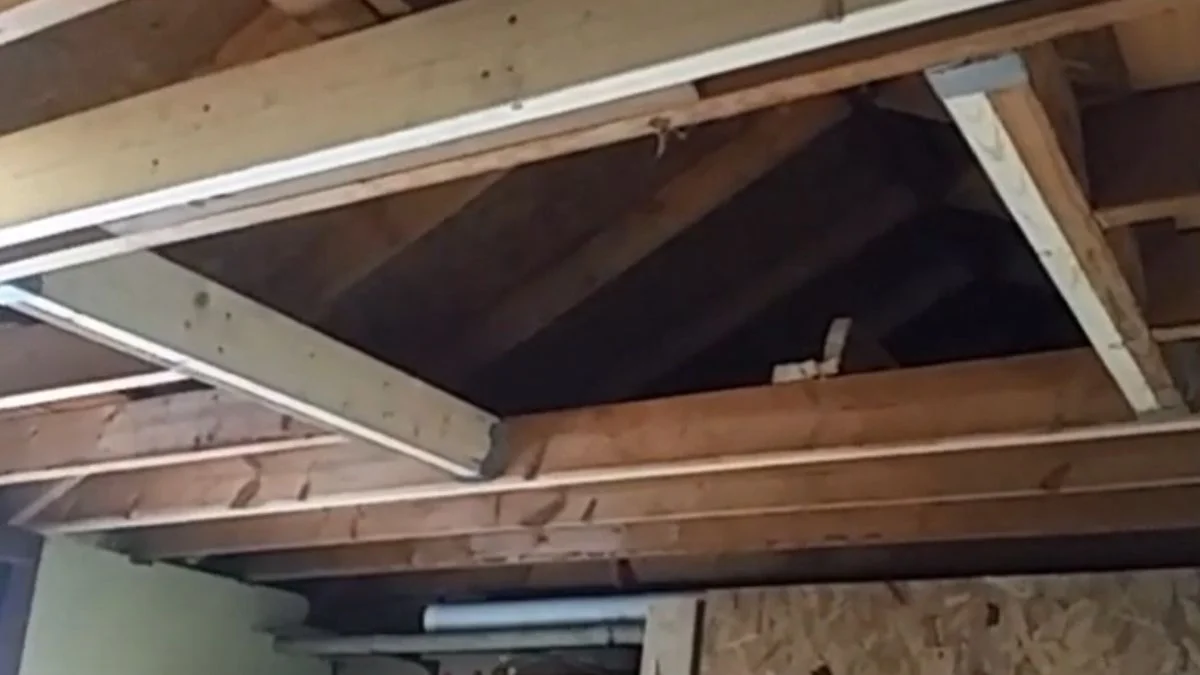
Reinforcing garage rafters for storage is one of the most misunderstood DIY projects — standard garage rafters are typically designed only for their own weight, not for hundreds of pounds of stored gear.
Most homeowners have no way to tell whether their rafters can handle added load, which rafter dimensions matter, or when a fix requires a licensed structural engineer rather than a weekend afternoon.
This guide walks you through a complete structural assessment, the exact reinforcement methods proven to work, and the clear warning signs that mean you should stop and call a professional before touching a single fastener.
Trusses vs. Rafters: Why This Distinction Changes Everything
Before any reinforcement work begins, you need to know exactly what’s holding up your roof. Getting this wrong is the single most common — and most dangerous — mistake DIY homeowners make.
Identifying Your Roof Type
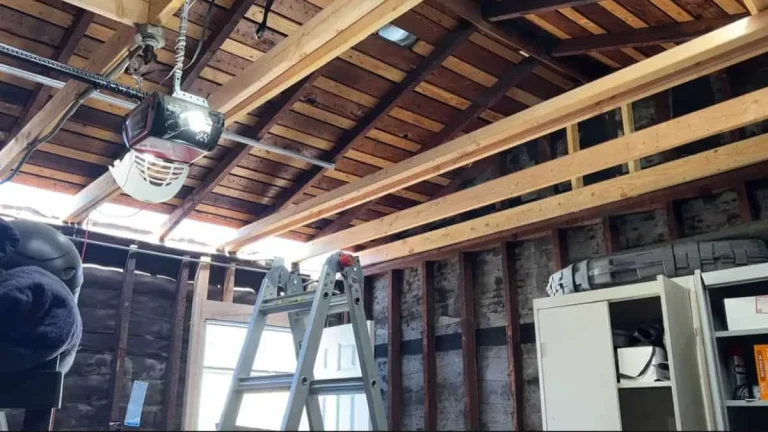
Look up into your garage ceiling. If you see a network of diagonal wood members forming triangles — connecting the top chord (the sloped pieces) to the bottom chord (the horizontal ceiling joist) — those are trusses. If you see simple paired rafters meeting at a ridge board with no triangulating web members, that’s traditional stick-built framing.
Regional construction patterns offer a useful shortcut. Homes built between the 1950s and 1980s overwhelmingly used prefabricated trusses, particularly in suburban tract housing. Older homes, especially pre-1940s construction, are far more likely to have stick-built rafters with open bays you can actually use.
A finished drywall ceiling makes visual inspection harder. In that case, check for an attic access hatch. Open rafter pairs with clear, unobstructed bays between them signal stick-built framing. A tight web of lumber triangles signals trusses.
Why It Matters for Storage Plans
Trusses are engineered as complete structural units. Every member — every web, every chord — carries a calculated load. Cutting, notching, or sistering any truss member disrupts that engineered balance and can void manufacturer specifications while creating dangerous weak points. Sagging trusses are a sign the system is already stressed; adding storage weight accelerates failure.
Stick-built rafters distribute load differently. Each rafter span acts more independently, which means sistering lumber alongside existing members is a legitimate, proven reinforcement method. The load-bearing capacity can be increased without compromising the whole system — provided the work follows span tables and local building codes.
The reinforcement strategy you use depends entirely on which type you have. Confirm your roof framing type before reading further.
Assessing Load Capacity Before Any Work
Skipping this step is how garage ceilings fail. A proper structural assessment tells you exactly how much weight your framing can safely carry before you buy a single board or hang a single hook.
Calculate Current Load Rating
Joist size and wood species determine how much weight a rafter can span without failing. The American Wood Council (AWC) publishes span tables that give precise load ratings for common lumber dimensions. Here’s what those tables typically show for standard construction lumber (Douglas Fir-Larch, #2 grade) at 24-inch on-center spacing:
| Joist Size | Max Clear Span | Approx. Live Load Capacity |
|---|---|---|
| 2×4 | 7–8 ft | 10 lbs/sq ft |
| 2×6 | 10–11 ft | 20 lbs/sq ft |
| 2×8 | 13–14 ft | 30 lbs/sq ft |
Live load is the weight you add — boxes, bins, equipment. Dead load is the weight of the structure itself, including drywall and the rafters. Both count against your total capacity. Regional factors matter too: high snow load zones in states like Minnesota or Colorado reduce safe storage limits because the roof already carries significant seasonal weight.
Spot Structural Stress Signals
Walk the space and look carefully before loading anything. Rafter bowing detection is straightforward — sight down each rafter from end to end. A straight line means healthy lumber. A visible curve or bow signals compromised material that has already begun to fail under existing load.
Watch for these specific warning signs:
- Sagging at the center span — more than 1 inch of deflection across a 10-foot span is outside acceptable limits
- Longitudinal cracks or splits — indicate the wood fibers have separated under stress
- Moisture stains or dark discoloration — signal rot or past water intrusion that weakens the wood internally
- Twisting along the rafter length — means the lumber has dried unevenly and lost structural integrity
Any one of these signals requires a licensed structural engineer before proceeding. This is not optional.
DIY vs. Professional Assessment Decision Tree
Use this framework to decide how to proceed:
- No visible damage + weight target under 20 lbs/sq ft → DIY load calculation using AWC span tables is acceptable
- No visible damage + weight target over 20 lbs/sq ft → consult a structural engineer for a written load assessment
- Any visible sagging, cracking, twisting, or moisture damage → stop all planning; hire a licensed structural engineer before any work
- Truss system with any member showing stress → engineer referral required regardless of load target
A structural engineer assessment typically costs $300–$700 for a residential garage — a fraction of the liability and repair cost of a ceiling collapse.
Sister Joist Reinforcement: Step-by-Step Installation
Sistering lumber is the most reliable DIY method for increasing rafter load-bearing capacity in stick-built garages. It works by running a new joist tight against the existing one, fastened together so both members share the load.
Materials and Sizing
Match the new lumber exactly to the existing joist — same nominal dimensions, same species, same grade. If your garage has 2×6 Douglas Fir #2 rafters, install 2×6 Douglas Fir #2 sisters. Mixing species or dropping to a lower grade undermines the load transfer the method depends on.
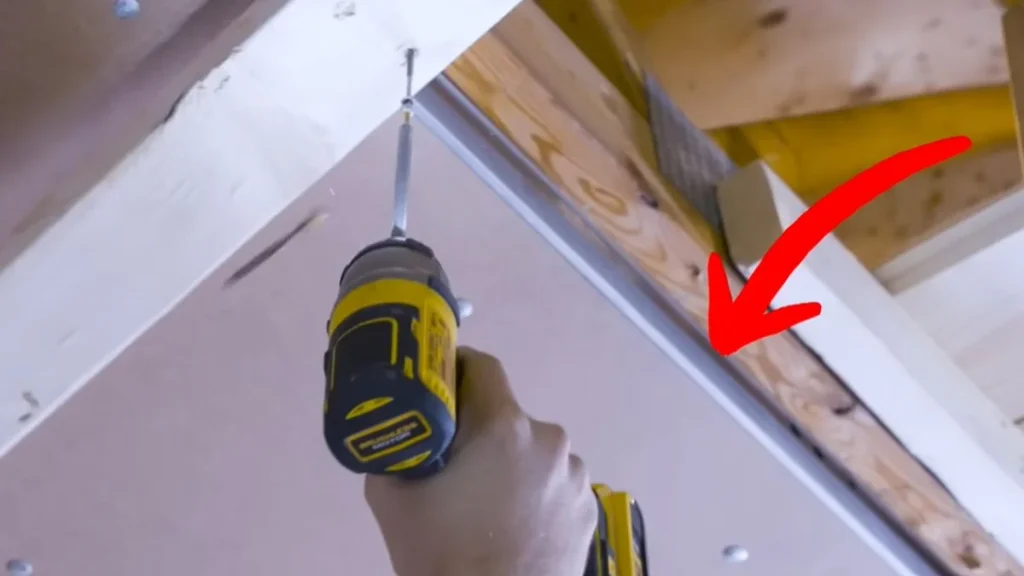
For fasteners, the International Residential Code (IRC) requires 10d common nails (3 inches long) at 12-inch spacing in a staggered two-row pattern — one row near the top edge, one near the bottom. Structural screws rated for joist applications, such as Simpson Strong-Tie’s Strong-Drive SDWC screws, are an acceptable alternative and easier to drive in tight spaces.
Material costs run approximately $1.50–$3.00 per linear foot for dimensional lumber, plus fastener costs. A full sister joist reinforcement on a two-car garage typically costs $150–$400 in materials.
Installation Process
Follow these steps in order:
- Cut the sister joist to the full length of the existing rafter — it must bear on the same wall plates or beams at both ends to transfer load properly.
- Position the sister flush against the existing joist, crown side up. The crown is the slight upward bow visible along the edge; both joists should crown in the same direction.
- Shim any gaps between the two members before fastening. Even a small gap prevents full contact and reduces load transfer efficiency.
- Fasten using the IRC staggered pattern — 10d nails or rated structural screws at 12-inch intervals, alternating top and bottom rows along the full length.
- Secure both ends to bearing points — the sister must sit fully on the wall plate or beam, not just touch it. Use joist hanger hardware from Simpson Strong-Tie or USP Structural Connectors at each end for positive connection.
- Inspect the completed installation — no gaps along the mating face, no missed bearing points, fasteners fully driven with no raised heads.
Repeat for every rafter in the storage zone. Sistering only select rafters while skipping others creates uneven load distribution across the garage attic storage structural support system.
Adding Support Beams for Heavier Loads
When sistering alone won’t reach your target load capacity — typically when you’re planning to store over 40 lbs/sq ft or spanning more than 14 feet — beam installation is the right next step. A properly sized beam transfers load directly to the garage’s foundation rather than relying solely on the rafters above.
Sizing the Beam Correctly
Beam size depends on two variables: the span between supports and the total load it must carry. As a practical starting point, a doubled 2×8 beam handles spans up to 8 feet at moderate storage loads. A doubled 2×10 handles up to 10 feet. For spans beyond 12 feet or loads exceeding 50 lbs/sq ft, engineered lumber — specifically LVL (laminated veneer lumber) beams — is the correct choice. LVL beams carry significantly higher loads in the same depth profile as dimensional lumber.
Use the AWC span tables or the American Institute of Timber Construction (AITC) guidelines to confirm sizing for your specific load and span before purchasing material.
Support Column Placement and Foundation Requirements
Columns transfer the beam load straight down to the floor. Here’s the critical detail most DIYers miss: the garage slab must be able to handle that concentrated point load. A standard 4-inch residential garage slab handles approximately 3,000 lbs per column with a proper base plate spread over at least 12 square inches. If your slab shows cracking or heaving near the planned column location, consult a structural engineer before proceeding.
Place columns at beam ends and at mid-span for beams exceeding 10 feet. Use adjustable steel post bases — Simpson Strong-Tie’s ABA post base series is a proven, code-compliant option — anchored to the slab with epoxy anchor bolts rather than just powder-actuated fasteners.
Ledger Board and Post-to-Beam Connections
Where the beam meets the garage wall framing, attach a ledger board directly to the rim joist or rim band using 1/2-inch structural lag screws at 16-inch spacing. The ledger distributes the beam’s end load across multiple framing members rather than concentrating it at a single point.
At every post-to-beam junction, use rated connector hardware. Simpson Strong-Tie’s BC post cap series and E-Z Base post bases provide positive mechanical connection that nails alone cannot replicate. These connectors are load-rated, code-listed, and designed specifically for garage ceiling reinforcement applications where uplift and lateral forces are real concerns.
Plywood Decking and Weight Distribution
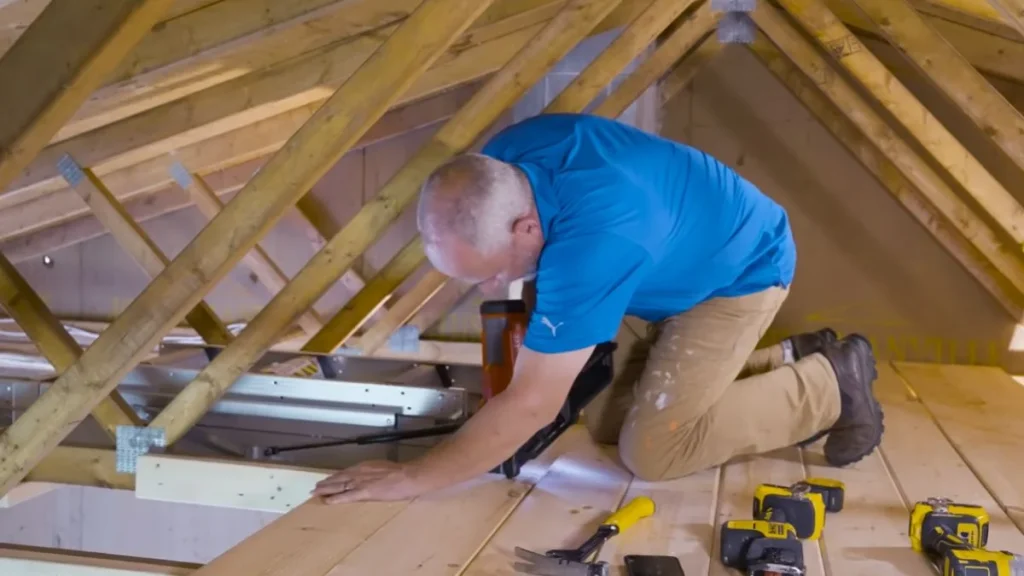
Plywood installation is the final structural layer between your stored weight and the rafters below. The right thickness, orientation, and fastening pattern determine whether the deck spreads load evenly or concentrates it dangerously at single points.
Choosing the Right Thickness
Plywood thickness is a direct function of joist spacing and target load:
| Joist Spacing | Light Storage (under 20 lbs/sq ft) | Heavy Storage (20–40 lbs/sq ft) |
|---|---|---|
| 16″ on center | 1/2″ plywood | 3/4″ plywood |
| 24″ on center | 3/4″ plywood | 3/4″ + blocking required |
Use tongue-and-groove plywood (T&G) wherever possible. The interlocking edges prevent adjacent panels from deflecting independently under load, which eliminates the bouncy, unstable feel of standard butt-jointed panels.
Orientation and Fastening Pattern
Always run plywood panels perpendicular to the joists — never parallel. Parallel installation means panel edges fall between joists with no bearing support, which creates flex points and eventual panel failure.
Stagger panel end joints so no two adjacent rows share a seam above the same joist. This is called a running bond pattern, and it significantly improves the deck’s overall rigidity.
For fastening, the IRC specifies 8d common nails or #8 wood screws at 6-inch spacing along panel edges and 12-inch spacing at intermediate joists. Screws outperform nails for plywood installation in garage attic storage applications because they resist vertical pull-through better under repeated dynamic loading.
Edge Banding and Guardrail Requirements
Any elevated storage platform more than 30 inches above the floor requires fall protection under OSHA residential guidelines and most local building codes. At minimum, install a 2×4 or 2×6 rim board around all open platform edges, flush with the top surface of the decking. This prevents stored bins and boxes from sliding off the edge.
For platforms where a person will climb up to retrieve items, a 42-inch guardrail is required by the IRC. Build the guardrail using 4×4 posts anchored through the decking into the joist below with 1/2-inch carriage bolts — not just toe-nailed, which pulls loose under lateral force.
Common Failure Points and How to Avoid Them
Most garage storage failures don’t happen suddenly — they develop over months as small mistakes compound under load. Knowing where the system breaks down lets you build it right the first time.
Overloading Single Rafter Sections
The most common mistake is concentrating heavy storage over two or three rafters while leaving adjacent members unreinforced. Load doesn’t stay where you put it — heavy bins shift, platforms flex, and point loads migrate. The result is localized overload on individual rafters that were never sized for that demand.
Reinforce every rafter within the entire storage footprint, not just the ones directly beneath your heaviest items. Treat the storage zone as a system, not a collection of individual members.
Fastener Corrosion and Shear Transfer Failure
Standard bright common nails corrode in garages with poor vapor control — and most residential garages have poor vapor control. Corroded fasteners lose shear strength gradually, meaning the sister joist reinforcement or ledger installation that passed inspection on day one may be carrying significantly less load by year three.
Use hot-dipped galvanized or stainless steel fasteners throughout. For Simpson Strong-Tie connector hardware, specify the ZMAX coating (G185 galvanization) rather than standard G90, particularly in coastal or high-humidity regions.
Moisture Infiltration and Hidden Rot
Visible rafter bowing detection catches mechanical failures. Rot is harder to see. Moisture infiltrates through roof penetrations, condensation cycles, and unventilated attic spaces — and it degrades wood fiber internally before the surface shows any discoloration.
Probe suspect areas with a flat-blade screwdriver before sistering lumber alongside existing joists. Sound wood resists the tip firmly. Rotted wood allows the blade to penetrate with hand pressure alone. Any rafter that fails this test requires full replacement, not reinforcement.
Permit Violations and Insurance Liability
Skipping the permit process is a calculated risk with serious consequences. Unpermitted structural work in your garage attic storage system can result in:
- Insurance claim denial if a storage platform collapse causes property damage or injury
- Required demolition of completed work during a home sale inspection
- Personal liability for injuries to anyone using the unpermitted structure
Most jurisdictions require a building permit for any structural modification, including beam installation and sistering projects exceeding a defined scope. Garage ceiling reinforcement cost estimates should always include permit fees — typically $50–$200 for residential structural work — as a non-negotiable line item.
Rafters and ceiling joists usually need to be reinforced together for safe overhead storage.
When to Call a Structural Engineer
A structural engineer is not a last resort — it’s the right first call in specific situations. Knowing exactly when DIY ends and professional assessment begins protects both your structure and your legal standing.
Visible Damage to Existing Framing
Any sagging trusses, cracked truss chords, or rafters showing moisture staining, rot, or bowing require a licensed structural engineer before any reinforcement work begins. Here’s the problem: damaged framing changes the load path in ways that aren’t visible to the untrained eye. A sagging rafter may have already redistributed its load to adjacent members that are now carrying more than their rated capacity. Sistering lumber alongside a compromised rafter without understanding that redistributed load can accelerate — not prevent — failure.
Load Targets Exceeding 30 lbs/sq ft
Standard DIY span table calculations are reliable up to approximately 20–30 lbs/sq ft for undamaged stick-built framing. Beyond that threshold, the margin for calculation error shrinks to a point where professional stamped drawings are the only responsible path. This is especially true for garage attic storage structural support systems designed to hold equipment, vehicle parts, or seasonal inventory that accumulates weight gradually and unpredictably.
Code-Required Stamped Calculations
Many jurisdictions — particularly in California, Florida, and the Pacific Northwest — require engineer-stamped structural calculations before issuing a permit for beam installation or significant joist reinforcement. Check with your local building department before starting. Submitting unstamped drawings to a jurisdiction that requires PE (Professional Engineer) approval results in automatic permit denial and project delays.
Insurance Policy Requirements
Some homeowner insurance policies — particularly those underwritten through Lloyd’s of London syndicates or specialty carriers for high-value homes — explicitly require licensed design approval for structural modifications. Review your policy’s dwelling coverage section before starting any garage ceiling reinforcement work. A $400 engineer consultation fee is a straightforward cost. A denied claim on a $50,000 structural repair is not.
According to the National Society of Professional Engineers, a residential structural consultation typically costs $300–$700, with full stamped drawings running $800–$1,500 depending on project complexity and region.
Quick Decision: DIY Reinforcement or Professional Help?
Reinforcing garage rafters for storage is a safe, cost-effective DIY project only when the framing is undamaged, the load target stays under 20 lbs/sq ft, and a permit confirms local code compliance — any one of those conditions missing means hiring a licensed structural engineer is the correct next step.
Start today by going into your garage, identifying whether you have trusses or stick-built rafters, and pulling up your local building department’s permit requirements online before buying a single board.