Garage Door Chain Broken? Diagnose & Repair

A snapped or derailed garage door chain is one of the most common reasons a 400-pound door suddenly stops mid-travel — and one of the most misdiagnosed.
Most homeowners can’t tell whether the chain is fully broken, simply loose, or just misaligned — and that uncertainty is what turns a $20 fix into a $300 service call.
By the end of this guide, you’ll know exactly what’s wrong with your chain, which repairs are safe to do yourself, and when the job genuinely requires a professional.
Diagnose: Broken Chain vs. Loose Chain vs. Sprocket Problem
A correct diagnosis saves you from buying parts you don’t need. Before touching anything, disconnect the opener using the red emergency release cord — this disengages the chain drive opener from the door and prevents accidental activation while you inspect.
What a Genuinely Snapped Chain Looks Like
A broken garage door opener chain has one unmistakable sign: a visible gap in the chain where two links have separated, or a segment of chain lying on the garage floor. The chain will hang in two distinct sections rather than forming a continuous loop around the sprocket and trolley rail. You may also find a broken master link — a clip-style connector that joins chain ends — near the opener motor head.
How to Spot a Loose or Sagging Chain
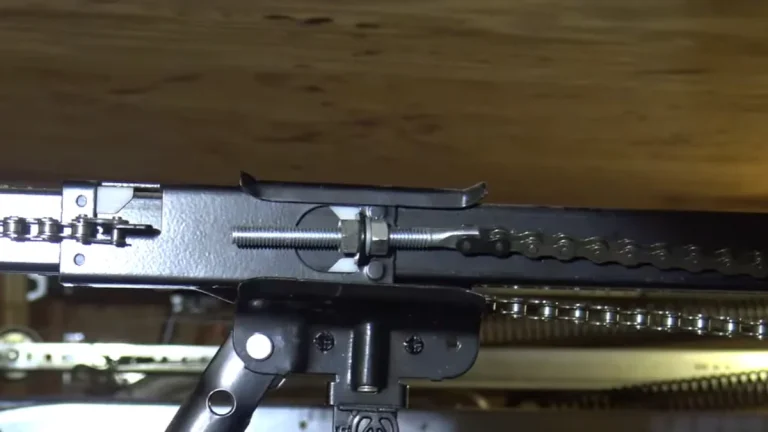
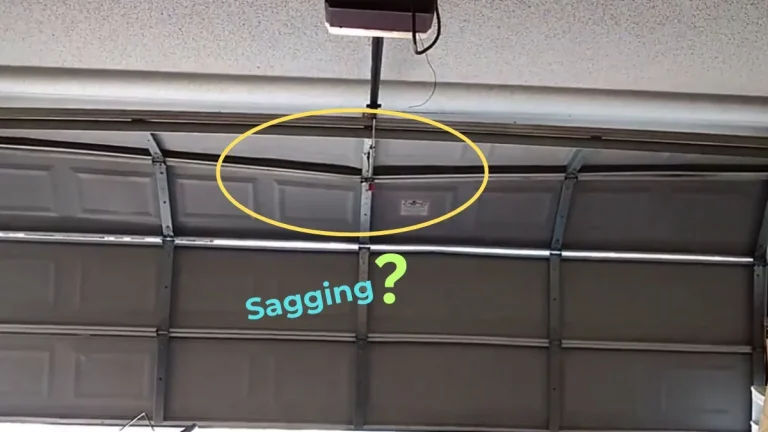
A loose chain sags more than half an inch below the bottom rail of the trolley track. This is a chain tension adjustment problem, not a chain snap. Excessive slack causes the chain to slap against the rail during operation, producing a loud rattling noise that many homeowners mistake for a garage door chain snapped. Check the adjustment bolt on the trolley assembly — most LiftMaster and Chamberlain chain drive openers use a front-mounted nut that tightens chain tension in seconds.
Sprocket Problems That Mimic Chain Failure
Worn or cracked sprocket teeth cause the chain to skip, slip, or jump off the sprocket entirely — a “chain off track” condition. The chain itself remains intact, but it won’t engage properly. Inspect the sprocket by shining a flashlight directly at the gear teeth. Teeth should be sharp and evenly spaced. Rounded, chipped, or asymmetrical teeth confirm sprocket wear, and replacing the chain without addressing the sprocket will repeat the failure within weeks.
Safety First: What to Do Before You Touch Anything
A garage door is the largest moving object in most homes, and the spring system that counterbalances it stores enough tension to cause serious injury. Handle the chain issue only after the door mechanism is fully isolated.
Disconnect the Opener Correctly
Pull the red emergency release cord hanging from the trolley rail — this is the opener safety disconnect. It physically separates the trolley from the chain drive, so the motor cannot pull the door even if someone presses the remote. Once disconnected, manually lower the door to the fully closed position before inspecting anything. Never inspect with the door partially open and unsupported.
How to Inspect Without Activating the Mechanism
Keep the opener unplugged from the wall outlet during inspection — the disconnect cord alone is not enough, because a power surge or faulty circuit board can re-engage the motor. Use a flashlight to examine chain link integrity along the full length of the rail. Look for separated links, bent side plates, rust, or segments that have jumped off the sprocket. Do not pull or tug the chain to test tension while the door is unsupported.
Red Flags That Require a Professional
Stop and call a licensed technician if you see any of these conditions:
- Broken or visibly unwound torsion springs above the door
- Cracks or fractures in the opener motor housing
- The door dropped suddenly during an emergency garage door chain failure
- The cable has slipped off the pulley system on either side
- The chain is jammed between the sprocket and the rail with visible deformation
Torsion spring repair in particular carries a genuine risk of fatal injury and falls outside safe DIY territory under ANSI/UL 325 safety standards for residential garage door openers.
Repair vs. Replace: Which Path Fits Your Situation
Not every garage door chain broken situation requires a new chain. The right call depends on what failed, how old the chain is, and how often problems have appeared.
When Tightening or Realignment Is Enough
A sagging chain with good link integrity only needs a tension adjustment. On most LiftMaster, Chamberlain, and Genie chain drive openers, this means turning the adjustment nut on the trolley assembly clockwise — typically 3 to 5 full turns — until the chain sits roughly a quarter-inch above the bottom rail. A chain that has jumped off the sprocket but shows no broken links can be reseated using needle-nose pliers and a flathead screwdriver, with the opener disconnected and unplugged.
When Full Chain Replacement Is the Right Move
Replace the chain outright when you find any of these conditions:
- One or more links are cracked, stretched, or separated
- The chain has jumped the sprocket 2 or more times in the past year
- Visible rust covers more than 20% of the chain surface
- The chain is older than 10 years with no prior maintenance
Replacement chains for common brands cost $15 to $40 at Home Depot or directly from manufacturers like LiftMaster and Chamberlain. A full garage door chain repair vs replacement job typically takes 45 to 90 minutes for an experienced DIYer.
Decision Factors to Weigh Before Choosing
Chain age matters more than most homeowners realize. A chain showing slack detection issues after repeated tension adjustments has stretched beyond its serviceable limit — tightening it again only delays the next failure. If you have had 3 or more chain-related service calls in 24 months, replacing the entire chain drive opener unit often costs less long-term than repeated repairs.
Why Chains Break: Prevention Beats Emergency Repair
Most emergency garage door chain failures don’t happen without warning — they follow months of gradual wear that homeowners either miss or ignore. Understanding the failure pattern lets you intervene before the chain snaps entirely.
Chain Stretching Is Normal — Ignoring It Is Not
Roller chains on chain drive openers stretch incrementally with every cycle. A standard residential garage door opens and closes 3 to 5 times per day, adding up to roughly 1,500 cycles per year. That repeated loading elongates the chain’s inner link plates and pins over time, increasing overall chain length by up to 3% before failure. The result is visible chain slack detection — that characteristic sag below the rail — which tightens temporarily with adjustment but returns faster each time as the metal continues to yield.
Lubrication Neglect Accelerates Every Failure Mode
A dry chain generates friction between every link and the sprocket teeth, accelerating wear on both components simultaneously. Most garage door manufacturers, including Chamberlain and Genie, recommend lubricating the chain with a lithium-based grease or dedicated chain lubricant every 6 months. WD-40 is not a substitute — it displaces moisture temporarily but leaves no protective film, which worsens chain link integrity within weeks of application.
Metal Fatigue Has a Timeline
A well-maintained chain drive opener chain typically lasts 10 to 15 years under normal residential use. Beyond that threshold, metal fatigue becomes the dominant risk factor regardless of lubrication or tension adjustment history. Fatigue cracks form at the inner link plates first — too small to see without close inspection — and then propagate until a link separates under load. According to Chamberlain’s product maintenance documentation, chains should be inspected annually after the 7-year mark for early signs of wear.
DIY Repair Steps: Disconnect, Inspect, Tension, Test
This process applies to loose or derailed chains with intact links. If your inspection confirmed a broken garage door opener chain with separated links, skip to replacement — these steps won’t restore a snapped chain.
Tools and Supplies You Need
Gather these before starting:
- Adjustable wrench and socket set (3/8-inch drive)
- Needle-nose pliers
- Flathead and Phillips screwdrivers
- Lithium-based chain lubricant (white lithium grease or 3-IN-ONE Garage Door Lube)
- Replacement master link (if reseating a derailed chain)
- Flashlight or headlamp
Step-by-Step Repair Process
- Unplug the opener from the wall outlet and pull the red opener safety disconnect cord.
- Manually lower the door to the fully closed position.
- Inspect every link along the full chain length for cracks, rust, or deformation.
- If the chain is off the sprocket, use needle-nose pliers to reseat it onto the sprocket teeth, starting at the motor end and working toward the trolley.
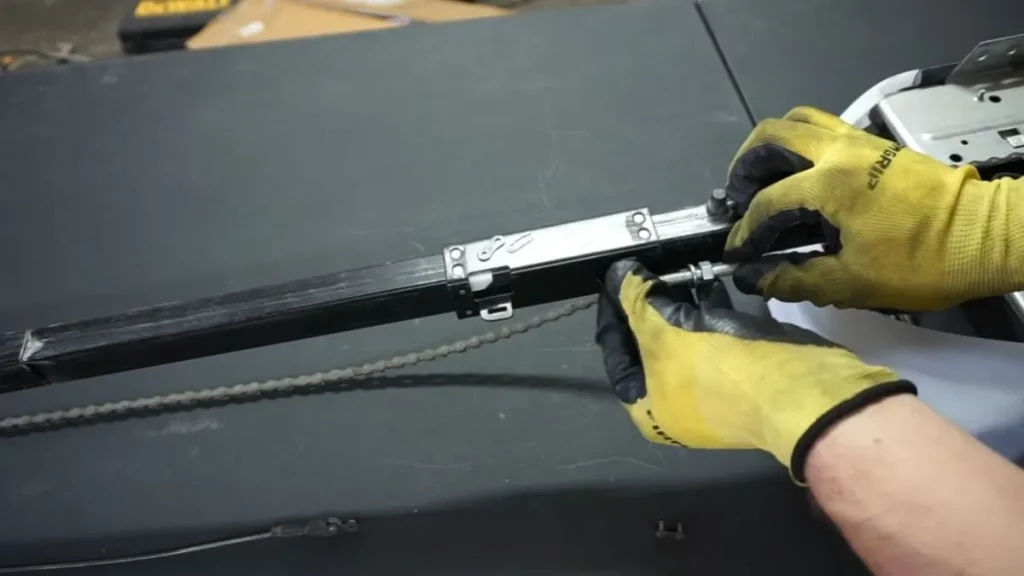
- Locate the adjustment bolt on the trolley assembly — the front-mounted nut controls chain tension on most LiftMaster and Chamberlain models.
- Tighten the nut clockwise until the chain sits between 1/4 inch and 1/2 inch above the bottom rail at its midpoint. This is the manufacturer-specified slack range for most chain drive openers.
- Apply lubricant along the full chain length, wiping off any excess.
Post-Repair Testing
Reconnect the opener safety disconnect by pulling the cord toward the door until it clicks back into the trolley. Plug the unit back in and run 3 full open-close cycles, watching for unusual noise, jerking, or chain slap against the rail. Stop immediately and call a technician if the chain skips on the sprocket, the door reverses unexpectedly, or the chain sags back to its original position after a single cycle.
When Professional Service Becomes the Safer Choice
A loose chain is a reasonable DIY task. A garage door chain snapped under load, combined with unknown repair history or visible damage to other components, is a different situation entirely — one where professional service pays for itself in safety and long-term reliability.
Complexity Signals That Change the Calculation
Call a licensed technician when any of these conditions are present:
- The chain broke while the door was in motion, causing the door to drop or jam
- You cannot identify the opener model or locate adjustment hardware
- The sprocket shows visible wear alongside the chain failure
- A previous repair was done by an unknown party with non-OEM parts
- The door feels heavier than normal when lifted manually — this signals a spring problem, not just a chain issue
Any single one of these factors adds enough complexity to make DIY attempts genuinely risky.
What a Technician Actually Inspects
A professional service call covers the full chain drive opener system, not just the broken component. Technicians check sprocket alignment, cable tension on the pulley system, trolley wear, limit switch calibration, and motor torque output. This full-system view catches secondary failures — like a worn sprocket that caused the original chain failure — that a homeowner replacing only the chain would miss entirely.
Warranty and Liability Implications
Most LiftMaster and Chamberlain opener warranties explicitly require that repairs be performed by authorized dealers to remain valid. A DIY repair on a unit still under warranty can void coverage for every subsequent mechanical failure, not just chain-related ones. According to Chamberlain’s warranty documentation, unauthorized disassembly of the motor head unit voids the manufacturer warranty immediately. Professional repairs also carry their own labor warranty — typically 30 to 90 days — which provides a recourse option that DIY work cannot.
Next Steps: Repair, Replace, or Call
The difference between a $20 tension adjustment and a $300 service call comes down to one thing: an accurate diagnosis before you touch anything. Start right now by unplugging your opener, pulling the red disconnect cord, and inspecting the full chain length with a flashlight — broken links mean replacement, sag means adjustment, and anything involving springs or unknown repair history means calling a licensed technician.