Cinder Block Garage Repair: Complete Guide

Cinder block garage repair done correctly can cost as little as $50 in materials for minor mortar work — but the wrong repair method on a structurally compromised wall can lead to collapse, failed inspections, and costs that multiply into the thousands.
Most homeowners notice crumbling mortar, diagonal cracks, or bowing walls and face the same problem: they don’t know whether their garage is a weekend project or a structural emergency requiring a licensed mason.
This guide gives you a clear framework to assess your damage, match it to the right repair technique, understand real cost and durability trade-offs, and decide with confidence whether to DIY or call a professional.
Types of Cinder Block Damage and Assessment Framework
Identifying your damage type before touching a single tool is the most important step in any cinder block repair project. The wrong diagnosis leads to repairs that mask the problem instead of solving it.
Crumbling and Deteriorating Blocks
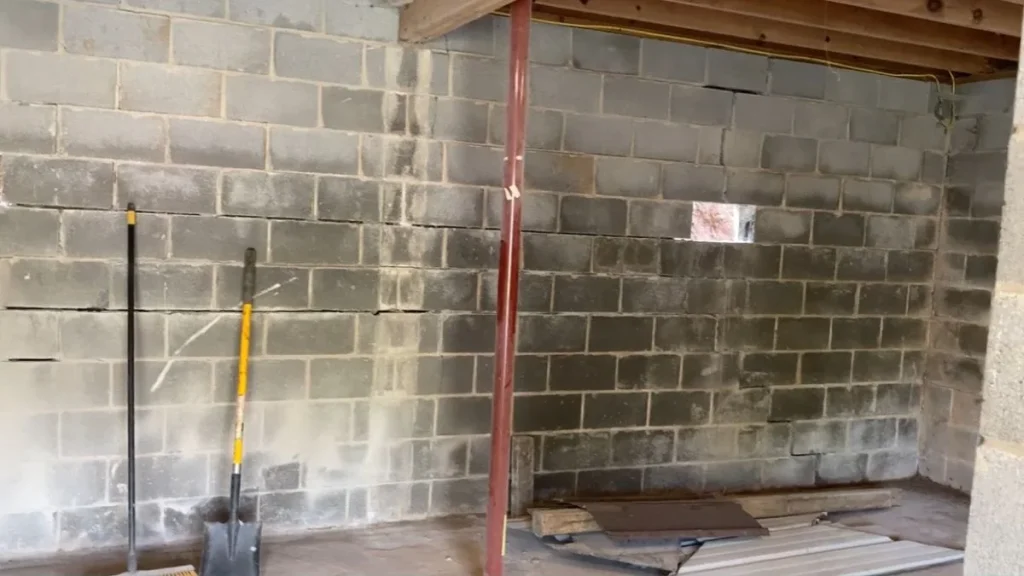
Mortar joint erosion almost always appears before the concrete blocks themselves begin to fail. When mortar crumbles, water enters the wall cavity, accelerating deterioration. White, chalky deposits on the surface — called efflorescence — signal that water is already moving through the block and depositing mineral salts as it evaporates. This is a warning, not just a cosmetic issue.
Surface spalling (shallow flaking of the block face) is repairable with a parge coating or concrete block repair mortar. Deep crumbling that extends into the block core signals structural compromise and requires block replacement, not surface patching.
Leaning or Bowing Walls
Outward deflection in a cinder block foundation wall indicates either soil pressure, foundation settlement, or both. A wall bowing more than 1 inch out of plumb warrants a structural engineer evaluation before any DIY repair begins. Garage block wall reinforcement with rebar or carbon fiber straps may stabilize the wall, but load-bearing wall repair of this kind typically requires a permit in most jurisdictions.
Cracks: Mortar Joints vs. Block Face
Stair-step cracks running diagonally through mortar joints point to settlement or rebar corrosion expanding inside the block. Horizontal cracks across multiple courses suggest lateral soil pressure — one of the more serious patterns in masonry repair. Cracks through the block face itself require concrete block epoxy stabilization or full block replacement, not simple repointing.
Water Damage and Structural Red Flags
Active weeping — water visibly seeping through the wall — means a cinder block parge coating alone will not fix the problem. Parge addresses surface moisture, not hydrostatic pressure. Interior water pooling, visible foundation movement, or damage on a confirmed load-bearing wall all require professional assessment before any garage foundation stabilization work proceeds.
DIY Repair Methods: Techniques and Trade-Offs
Most cinder block wall deterioration is repairable without professional help — but each method has a specific application range, and using the wrong one wastes money or creates a false sense of security.
Mortar Repointing and Joint Repair
Repointing is the most common DIY masonry repair. Remove deteriorated mortar to a minimum depth of 3/4 inch using an angle grinder with a tuckpointing wheel or a cold chisel — going shallower produces a bond that fails within a season. Avoid undercutting the block face.
Here’s the problem: many older garages were built with soft lime mortar, and replacing it with modern Portland cement mortar creates a mismatch. Portland is harder and less flexible, which can crack the blocks themselves over time. Match mortar hardness to your block type — Type S mortar works for most garage foundation walls exposed to moisture.
Joint profile matters too. A concave or V-shaped finish sheds water better than a flush or raked joint. Cure new mortar slowly — keep it damp for 72 hours and avoid application below 40°F or above 90°F.
Parge Coating for External Protection
A cinder block parge coating is a thin layer of mortar (typically 3/8 to 1/2 inch) applied over the exterior block face to seal surface voids and slow moisture infiltration. Apply in two passes — a scratch coat followed by a finish coat — to prevent shrinkage cracking.
Parge is breathable, which allows trapped moisture to escape rather than building up behind the wall. It is not a waterproofing system. Expect 10 to 15 years of service with proper application; inspect annually for hairline cracks and recoat as needed.
Epoxy and Concrete Patching Compounds
Concrete block epoxy stabilization is appropriate for non-moving structural cracks and spalled block faces where the underlying block is still sound. Products like Simpson Strong-Tie SET-XP or Sika AnchorFix anchor epoxies bond at tensile strengths exceeding 2,000 psi — far stronger than the block itself.
Surface preparation is critical: the substrate must be dry, dust-free, and above 40°F for proper cure. Epoxy is not a surface cosmetic — it is a structural adhesive. Do not use it over active cracks that are still moving seasonally, as it will debond.
Rebar Reinforcement and Structural Stabilization
Garage block wall reinforcement with rebar is necessary when horizontal cracks appear or when a wall shows measurable outward deflection. Vertical rebar can be inserted into existing block cores and epoxy-anchored at the footing to restore tensile resistance. Horizontal steel straps or carbon fiber straps bonded to the interior face are a less invasive alternative.
This is not a DIY task for any confirmed load-bearing wall. Rebar placement depth, spacing, and epoxy anchoring specs must meet local building code requirements — most jurisdictions require a permit and inspection for structural garage foundation stabilization of this kind.
Cinder block repairs often turn up related concrete ledge issues — here’s how to handle those too.
Cost and Feasibility: DIY vs. Professional
Repair costs vary dramatically based on damage type — a $40 bag of Type S mortar handles basic repointing, while professional garage foundation stabilization on a compromised load-bearing wall can reach $10,000 or more. Knowing where your project falls on that spectrum prevents both overspending and dangerous shortcuts.
Material Cost Breakdown by Repair Method
| Repair Method | DIY Material Cost | Tool Requirement |
|---|---|---|
| Mortar repointing | $40–$80 | Angle grinder ($50 rental) |
| Parge coating | $60–$120 | Margin trowel (purchase ~$25) |
| Epoxy crack repair | $80–$200 | Caulk gun (own or buy ~$15) |
| Rebar reinforcement | $150–$400+ | Hammer drill ($40–$60 rental) |
Tool rental makes sense for one-time jobs. If you’re repointing more than 200 linear feet of mortar joint, buying an angle grinder at $80–$120 is cheaper than multiple rental days.
Professional Repair Pricing and Scope
A licensed masonry contractor typically charges $5 to $15 per square foot for crumbling concrete block repair and repointing, depending on region and access difficulty. Full structural assessments from a structural engineer run $300 to $700 for a residential garage. Permits for load-bearing wall repair or rebar reinforcement add $100 to $500 depending on municipality — some jurisdictions waive fees for repairs under a set dollar threshold, so check locally before assuming.
Decision Factors: Skill, Damage Severity, and Structural Risk
Use this framework to make the call:
- DIY-appropriate: Surface spalling, mortar joint erosion, efflorescence, minor cracking in non-load-bearing walls with no measurable deflection
- Professional required: Any outward bowing exceeding 1 inch, horizontal cracks spanning multiple courses, confirmed load-bearing wall involvement, active water infiltration with interior pooling
- Permit likely required: Rebar insertion, carbon fiber strap installation, block replacement exceeding a single course
The result? Most cosmetic and moisture-related cinder block wall deterioration falls squarely in DIY territory. Structural stabilization — anything touching the foundation wall’s load path — does not.
Frequently Asked Questions
Can Crumbling Cinder Blocks Be Repaired, or Must They Be Replaced?
Surface crumbling and spalling can be repaired with a parge coating or concrete block epoxy stabilization as long as the block core remains structurally sound. Blocks that are cracked through, hollow from moisture damage, or actively disintegrating must be replaced — patching over compromised material will fail within one to two seasons.
What Is the Cheapest Way to Repair a Cinder Block Garage Wall?
Mortar repointing is the lowest-cost repair, with materials running $40 to $80 for most garage walls and no specialized tools beyond an angle grinder rental. It addresses the most common cause of cinder block wall deterioration — eroded joints — before damage progresses to the blocks themselves.
How Long Will a Repaired Cinder Block Wall Last?
A properly repointed wall using Type S mortar lasts 20 to 30 years before needing attention again. Parge coatings typically hold 10 to 15 years with annual inspection. Epoxy crack repairs are effectively permanent on non-moving cracks, while rebar or carbon fiber reinforcement, when installed to code, provides structural stabilization for the remaining life of the structure.
Next Steps: Inspection and Action Timeline
The single factor that separates a $100 DIY fix from a $10,000 professional repair is catching cinder block wall deterioration before it reaches the load-bearing structure. This weekend, walk your garage perimeter and probe every mortar joint with a screwdriver — any joint where the tool penetrates more than 3/4 inch without resistance needs repointing now, before winter freeze-thaw cycles widen the damage.
If you find bowing, horizontal cracks, or interior water pooling, stop and schedule a structural engineer assessment before starting any repair work.