Garage Ceiling Leak: Roof vs Plumbing Diagnosis Guide
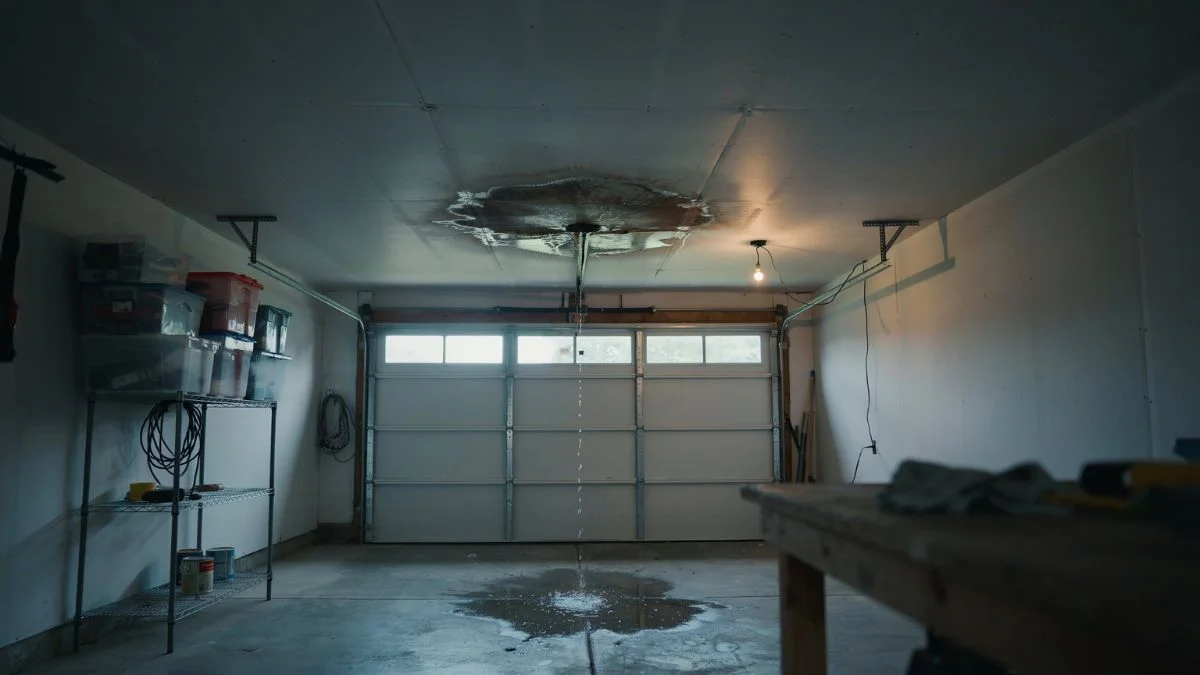
A leak in garage ceiling drywall is one of the most misdiagnosed home problems — licensed contractors report that roughly half of homeowners who call for a roof inspection end up with a plumbing or condensation problem instead.
The real pain point is not the water itself but the uncertainty: you are staring at a stain, you do not know if it is safe to park your car there, and you are not sure whether to call a roofer, a plumber, or no one at all — while the damage quietly grows.
This guide gives you a clear, step-by-step diagnostic framework to identify the exact source of your garage ceiling leak, judge the urgency level, and know with confidence whether to fix it yourself or call a professional.
How to Identify the Leak Source
The fastest way to narrow down a garage ceiling leak is to combine three pieces of evidence: what sits directly above the stain, what the stain looks like, and when the water appears. Each clue rules out entire categories of causes.

What Is Directly Above the Leak?
Start your moisture assessment by mapping the space above the water stain on your garage ceiling.
- Attic or roof deck directly above — roof leak or condensation are the most likely culprits
- Bathroom, kitchen, or laundry room above — plumbing leak above the garage moves to the top of the list
- HVAC equipment, ducts, or a water heater above — condensation or a mechanical leak is probable
- Exterior wall or chimney nearby — flashing failure or wall infiltration is possible
This single step eliminates guesswork before you touch anything.
Read the Stain Pattern
The shape of a water stain on the garage ceiling tells you a lot about the source.
| Stain Pattern | Most Likely Cause |
|---|---|
| Concentrated dark ring, single spot | Active drip from a pipe or roof penetration |
| Wide, spreading discoloration | Wet insulation in garage ceiling spreading moisture laterally |
| Stain along drywall seams or edges | Water infiltration tracking along framing before dropping |
| Tide marks with dry center | Intermittent source — often roof or condensation |
Run the Water Meter Test
This test separates a plumbing leak above the garage from every other source in under five minutes.
- Turn off every water fixture in the house — faucets, dishwasher, ice maker, irrigation.
- Find your water meter and note the current reading, including the small leak indicator dial if your meter has one.
- Wait 15 minutes without using any water.
- Check the meter again.
If the dial moved or the reading changed, water is actively flowing somewhere — almost certainly a plumbing leak. If the meter is completely still, you can shift your focus to the roof or condensation.
Match the Leak to Its Timing
Timing is the most reliable single indicator during a garage ceiling leak inspection.
A roof leak appears during rain or within a few hours after a storm, then stops completely once the weather clears. A plumbing leak runs continuously or spikes whenever someone uses a specific fixture — flush the toilet above the garage and watch the ceiling. Condensation builds gradually over days or weeks, peaks in humid seasons, and has no connection to rainfall at all.
Keep a simple log: date, weather conditions, and whether the leak was active. Two or three entries will usually confirm the pattern.
Look for Roof Damage from the Outside and Inside
A garage ceiling leak from the roof almost always leaves evidence you can see without going on the roof.
From the ground, check for:
- Missing, curled, or cracked shingles directly above the stain
- Damaged or pulled-back flashing around chimneys, vents, or skylights
- Gutter debris causing water to back up under the drip edge
- Moss or algae growth, which signals trapped moisture and shingle deterioration
From inside the attic, look for daylight showing through the roof deck, dark staining on rafters, or wet insulation clumped against the sheathing. During active rain, a flashlight inspection of the attic will often reveal exactly where water infiltration is entering — though the entry point can be several feet away from where the drip lands on the garage ceiling below.
Common Causes by Location and Season
Knowing when a leak appears is just as important as knowing where it appears. Most garage ceiling leaks fall into predictable seasonal and location-based patterns that make source identification significantly faster.
Roof-Related Sources
A garage ceiling leak from the roof typically traces back to one of three failure points: damaged shingles, failed flashing, or ice dam backup.
Shingle damage exposes the roof deck to direct water infiltration. Missing or cracked shingles are common after high winds, hail, or years of UV degradation. Flashing failures are the most frequently missed cause — the thin metal strips sealing transitions around chimneys, pipe vents, and skylights develop gaps as caulk dries and metal contracts over time. Ice dams form in winter when heat escaping through the roof melts snow, which refreezes at the cold eaves and forces water backward under shingles.
Seasonal pattern to know:
- Winter — ice dam backup, especially in northern climates with repeated freeze-thaw cycles
- Spring — heavy sustained rain saturates aging shingles and overwhelms marginal flashing seals
- Summer — UV heat accelerates shingle brittleness and caulk failure
Plumbing Above the Garage
A plumbing leak above the garage behaves differently from every other source — it is indifferent to weather and tied directly to fixture use.
Common plumbing sources include:
- Supply lines — copper or PEX pipes feeding a bathroom or kitchen directly above the garage ceiling
- Drain lines — PVC or cast iron drain pipes that develop cracks, loose joints, or root intrusion
- Water heaters — tank corrosion or pressure relief valve discharge, often installed in a utility room above the garage
- HVAC condensate lines — a clogged condensate drain on an air handler sends water overflowing into the ceiling cavity
Wet insulation in the garage ceiling is a reliable indicator here. Insulation acts like a sponge, absorbing a slow plumbing drip for weeks before the drywall stains or sags — meaning the actual water volume is often much larger than the visible stain suggests.
Gutter and Drainage Failures
Gutters cause garage ceiling leaks in a way most homeowners do not anticipate. When gutters overflow or pull away from the fascia, water runs directly down the exterior wall and finds its way into the wall cavity or roof edge above the garage.
Key failure points by season:
- Spring — high rainfall volume overwhelms undersized or clogged gutters, pushing water over the front edge and behind the drip edge
- Summer — heat causes vinyl gutter sections to expand and separate at joints, creating gaps that direct water toward the structure
- Fall — leaf accumulation blocks downspouts, causing standing water that overflows and saturates the fascia
Downspout discharge is a separate but related problem. If a downspout terminates within 4 feet of the garage foundation, pooling water can migrate through the slab or foundation wall and appear as moisture on the garage ceiling — making this one of the trickier source identification challenges in any garage ceiling leak inspection.
Who to Call: Professional Routing
Calling the wrong trade first is one of the most common — and most expensive — mistakes homeowners make with a garage ceiling leak. A roofer cannot fix a burst supply line, and a plumber cannot reseal chimney flashing. Routing the right professional from the start saves both time and diagnostic fees.
Call a Roofer When
The evidence points to a garage ceiling leak from the roof when:
- The stain appears during or within hours of rainfall and dries completely between storms
- Your attic inspection reveals wet sheathing, daylight through the deck, or stained rafters
- You can see missing shingles, lifted flashing, or moss growth from the ground
- The leak location corresponds directly to a roof penetration — chimney, vent pipe, or skylight
A licensed roofing contractor will perform a full roof inspection, probe the flashing seals, and check the attic for water infiltration paths. Request a written inspection report, not just a verbal quote.
Call a Plumber When
A plumbing leak above the garage is confirmed or strongly suspected when:
- The water meter moves with all fixtures off
- The leak activates or worsens when someone uses a specific fixture
- The stain grows steadily regardless of weather conditions
- Wet insulation in the garage ceiling has a faint odor, which can indicate a drain line leak rather than a clean supply line
A licensed plumber will use leak detection tools — including acoustic sensors and moisture meters — to pinpoint the source without unnecessary drywall removal. Ask specifically whether they offer camera inspection for drain lines, which eliminates guesswork entirely.
Call a General Contractor When
Some garage ceiling leaks do not fit a clean single-source profile. Call a general contractor when:
- Multiple stains appear in different locations with no clear pattern
- You cannot determine what is overhead without opening the ceiling
- The drywall is sagging, soft, or showing signs of structural compromise
- Previous repairs by a roofer or plumber did not stop the leak
A general contractor coordinates multi-trade inspections and can assess both the source and the full scope of garage drywall water damage repair needed — including whether wet insulation must be replaced before new drywall goes up.
Know the Hard Limits of DIY
Surface-level moisture assessment is a reasonable DIY task. Everything beyond that carries real risk.
You can safely do on your own:
- Document stain size, shape, and location with photos
- Run the water meter test
- Check gutters and downspouts for obvious blockage
- Inspect the attic with a flashlight during dry weather
Do not attempt to diagnose structural integrity damage, probe wet drywall for hidden rot, or access the roof without proper safety equipment and training. A professional inspection costs $150–$500 depending on trade and scope — far less than misdiagnosing the source and completing the wrong repair.
Immediate Damage Control
The first 24 hours after discovering a garage ceiling leak determine how much damage you will ultimately repair. Water infiltration that sits untreated compounds quickly — saturating insulation, weakening drywall, and creating conditions for mold within a narrow window.
Stop Moisture from Spreading
According to IICRC (Institute of Inspection, Cleaning and Restoration Certification) standards, mold can begin colonizing wet building materials in as little as 24 to 48 hours. That window is your action deadline.
Steps to take immediately:
- Place buckets or plastic bins under active drips to protect the floor and any stored items.
- Set up box fans aimed at the wet area and run a dehumidifier if you have one — moving air slows secondary moisture spread into adjacent drywall and framing.
- If wet insulation in the garage ceiling is accessible and sagging, carefully remove it and spread it flat in a dry area. Wet insulation loses all thermal value and becomes a direct mold substrate if left in place.
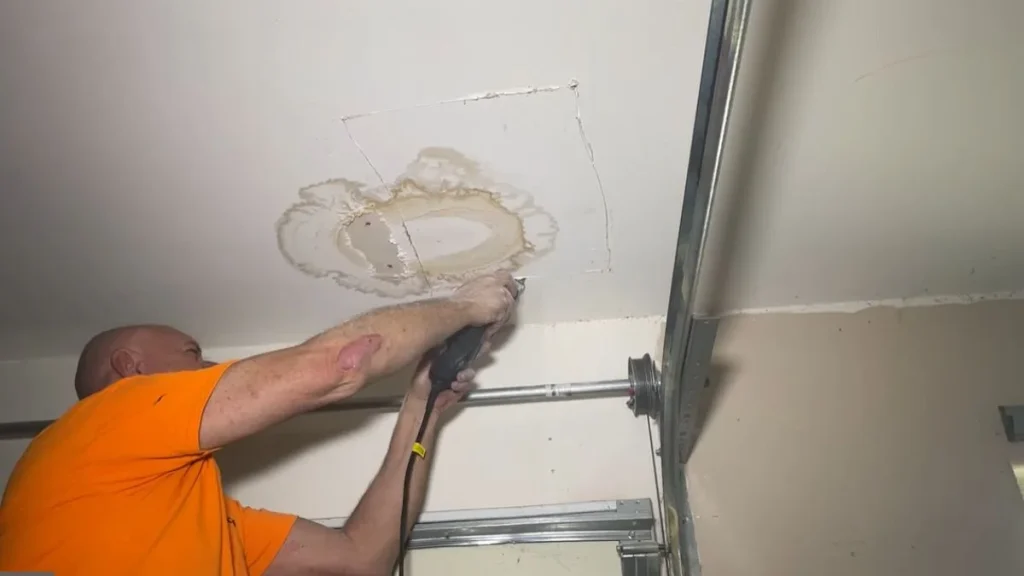
- Cut small ventilation holes (4–6 inches) in the drywall on either side of the stain to allow the cavity to dry from the inside. This is a controlled step — not demolition — and prevents hidden mold from developing behind intact drywall.
Address Electrical and Structural Hazards First
Water and electricity in the same ceiling cavity is an immediate life-safety issue — not a wait-and-see situation.
If the leak is active and the ceiling contains recessed lights, junction boxes, or exposed wiring, go to your breaker panel and cut power to that circuit before doing anything else. Water contacting a live wire can energize wet drywall and framing, creating an electrocution hazard that is invisible from the outside.
Structural integrity is the second urgent check. Press gently on the drywall surface around the stain with the back of your hand. Soft, spongy, or visibly sagging drywall means the panel has absorbed enough water to lose its load-bearing capacity. A saturated 4×8 sheet of 5/8-inch drywall can hold several gallons of water — enough added weight to cause a sudden ceiling collapse. Rope off or vacate the area beneath any sagging section immediately.
Document Everything Before You Clean Up
Insurance adjusters require photographic evidence of the original damage state, and cleaning up before documenting is one of the most common reasons claims are delayed or reduced.
Before moving anything or cutting drywall:
- Photograph the full ceiling area showing the stain size and location
- Take close-up shots of any sagging, discoloration, or visible mold
- Photograph wet insulation, damaged drywall, and any personal property affected
- Note the date, time, and current weather conditions in a written log
This documentation supports both your insurance claim and any professional inspection that follows. Keep all photos timestamped and backed up to a cloud folder before repairs begin.
Repair Costs and Timeline Reality Check
Repair costs for a garage ceiling leak vary enormously depending on source, severity, and how long the water infiltration went undetected. Here is what realistic numbers look like across each repair category.
Roof Repair Costs
| Repair Type | Typical Cost Range | Timeline |
|---|---|---|
| Missing shingle replacement (1–3 shingles) | $150–$400 | 1–2 hours |
| Flashing reseal (chimney or vent) | $200–$500 | 2–4 hours |
| Full flashing replacement | $500–$1,500 | Half to full day |
| Partial roof section replacement | $1,500–$5,000 | 1–3 days |
Flashing failures are frequently underpriced in initial quotes because the full extent of water infiltration under the roof deck is not visible until the flashing is pulled back. Get a written scope of work before any roof inspection converts to a repair order.
Plumbing Repair Costs
A plumbing leak above the garage that is caught early — a loose supply line fitting or a cracked P-trap — typically costs $150–$400 to fix, including labor. The cost escalates sharply when the source is a corroded pipe segment buried in the ceiling cavity, requiring drywall access, pipe rerouting, and restoration. Full pipe rerouting jobs run $800–$3,000 depending on pipe material, length, and accessibility.
HVAC condensate line clearing is the least expensive fix in this category — typically $75–$200 — but only if caught before the overflow saturates the surrounding insulation and framing.
Drywall and Insulation Restoration
Garage drywall water damage repair is almost always a separate cost from fixing the source, and homeowners frequently underestimate it.
Typical restoration costs:
- Drywall replacement — $2–$4 per square foot for materials; $50–$80 per hour for labor
- Wet insulation in garage ceiling removal and replacement — $1–$2.50 per square foot for batt insulation; spray foam replacement runs significantly higher
- Paint matching and finishing — $200–$600 depending on ceiling size and texture complexity
A 100-square-foot ceiling repair with full drywall replacement, new insulation, and finished paint typically runs $800–$2,000 total for labor and materials.
What Insurance Actually Covers
Homeowners insurance coverage for a garage ceiling leak depends entirely on the cause — not the damage.
| Cause | Typically Covered? | Notes |
|---|---|---|
| Sudden roof damage (storm, hail, wind) | Yes | Subject to deductible; documentation required |
| Gradual roof deterioration | No | Maintenance exclusion applies |
| Sudden plumbing failure (burst pipe) | Yes | Must be sudden and accidental |
| Slow plumbing leak (ongoing drip) | No | Negligence exclusion commonly applied |
| Condensation damage | Rarely | Almost universally excluded |
The critical distinction insurers apply is “sudden and accidental” versus “gradual deterioration.” A burst pipe that floods a ceiling in one event is covered. A supply line that dripped for three months and slowly rotted the framing is not. Document the discovery date precisely — it matters when the adjuster reviews the claim timeline.
When a Garage Ceiling Leak Becomes Urgent
Not every garage ceiling leak is an emergency — but several specific conditions turn a manageable repair into a serious safety event. Knowing the difference determines whether you have days to act or minutes.
Structural Warning Signs That Demand Immediate Action
The following signs indicate that structural integrity is already compromised. Treat each one as a stop-everything signal.
Sagging drywall is the most visible danger sign. A standard 4×8 sheet of 5/8-inch drywall weighs approximately 74 pounds dry. When saturated, that same panel can hold an additional 20–40 pounds of water weight before the fasteners pull through the framing — and the failure is sudden, not gradual. Never stand directly beneath a visibly bowed ceiling section.
Soft spots or spongy texture when you press the ceiling surface with a broom handle indicate that the drywall core has dissolved. At this stage, the panel has zero remaining structural contribution and collapse is unpredictable.
Visible mold patches — any discoloration that is fuzzy, dark green, or black rather than the typical brown water stain — mean colonization has already progressed beyond surface level. The EPA classifies mold remediation for areas larger than 10 square feet as a job requiring professional containment protocols, not DIY cleanup.
Ceiling compound cracking along seams in a pattern radiating outward from the stain signals that framing members have absorbed moisture and begun to swell or shift — a structural concern that goes beyond drywall replacement alone.
The 48-Hour and One-Week Thresholds
Timeline is everything once a garage ceiling leak is discovered.
A professional inspection within 48 hours of discovery keeps all options open. The source can still be confirmed accurately, wet insulation in the garage ceiling can be dried rather than replaced, and mold has not yet established. Most licensed roofers, plumbers, and water damage restoration companies — including national firms like ServiceMaster and SERVPRO — offer emergency inspection scheduling within this window.
Here’s what changes after one week without action:
- Wet insulation transitions from salvageable to a confirmed replacement item, adding $300–$800 to restoration costs
- Mold colonization in the ceiling cavity becomes likely, triggering professional remediation requirements and costs that typically start at $500 and climb past $3,000 for contained garage spaces
- Framing lumber that stays wet for 7 or more days begins to soften and lose load capacity, shifting the repair from a drywall replacement job to a structural repair requiring a contractor and potentially a permit
The water stain on your garage ceiling that looks stable today is actively wicking moisture into every porous material it contacts. Stable appearance does not mean stable damage.
Next Steps: Inspection and Claim Prep
A $300 professional inspection is the single highest-ROI action you can take after discovering a leak in your garage ceiling — it prevents misdiagnosed repairs that routinely cost $3,000–$8,000 and gives insurance adjusters the documented source confirmation they require before approving any claim.
Today, photograph the stain with your phone’s timestamp visible, run the water meter test, and contact one licensed roofer and one licensed plumber for inspection quotes before committing to any repair. Notify your insurance carrier within 30 days of discovery — most homeowners policies include a reporting window, and missing it can void an otherwise valid claim.