How to Replace a Garage Door Spring: DIY vs Professional
A garage door spring snaps under 150 to 300 pounds of tension — enough force to cause serious injury — and knowing how to replace a broken garage door spring safely is the difference between a $30 fix and an emergency room visit.
The real problem is not finding instructions online. It is not knowing whether your specific situation — your spring type, your tools, your experience level — makes DIY genuinely safe or genuinely reckless.
This guide gives you a clear decision framework: the safety criteria, cost comparisons, and skill requirements to confidently choose the right path for your situation.
Why Garage Door Springs Are Dangerous
A garage door spring is not a passive component. It stores enormous mechanical energy — a single torsion spring holds enough tension to snap a wrist or fracture a skull if it releases suddenly and without control.
The Physics Behind the Risk
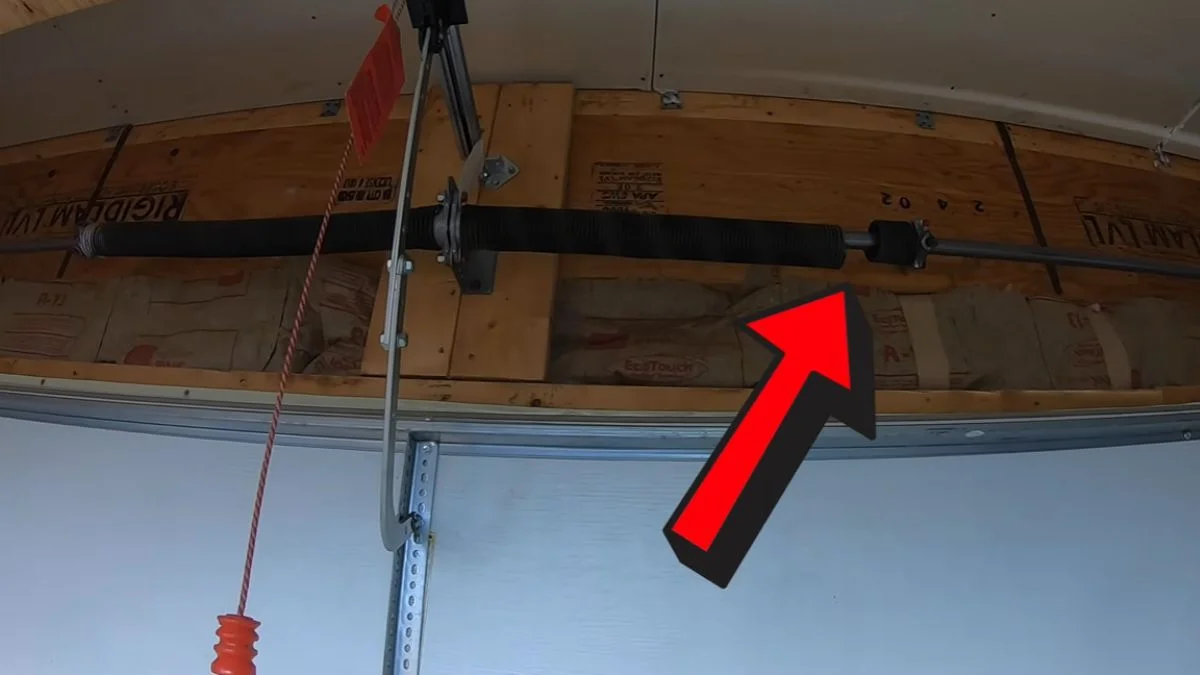
Torsion springs — the horizontal springs mounted above the door on a steel shaft — are wound to a precise tension measured in inch-pounds of torque. A standard residential torsion spring stores between 150 and 300 foot-pounds of energy when fully wound. That energy releases instantly if the spring breaks or slips during winding. Extension springs, which run along the horizontal tracks on either side of the door, present a different hazard: they can launch off the cable system at high velocity if a safety cable is not threaded through them.
What Injuries Actually Look Like
The Consumer Product Safety Commission estimates over 13,000 garage door-related injuries occur annually in the United States. The most common DIY injuries during torsion spring replacement involve winding bars — the steel rods inserted into the winding cone to apply torque. A slipping winding bar becomes a projectile. Reported injuries include broken fingers, facial lacerations, jaw fractures, and eye damage.
When You Should Not DIY — Full Stop
Some situations remove the choice entirely:
- The spring is a torsion spring on a high-cycle or commercial-grade door above 10 feet tall
- You do not own proper winding bars (substituting a screwdriver is a documented cause of serious injury)
- The garage door cable system shows fraying alongside the broken spring
- You have never handled spring tension or torque-based mechanical work before
In these cases, professional deferral is not caution — it is the correct technical decision.
Identifying Your Spring Type and Measuring Specifications
Before ordering a replacement part or touching anything, you need to identify exactly which spring system your door uses. Installing the wrong spring type causes immediate mechanical failure and creates the same injury risk as the original break.

Torsion Springs vs Extension Springs
Torsion springs mount horizontally above the closed door on a steel shaft running through the center of the spring. They work by twisting — storing torque in the coil as the door closes, releasing it as the door opens. Most doors built after 1990 use torsion springs.
Extension springs mount on the horizontal tracks on each side of the door and work by stretching. They are more common on older homes and lighter, single-car doors. The counterbalance mechanism works differently: extension springs use a pulley and cable system rather than a central shaft, making spring tension easier to release but the cables equally dangerous if neglected.
How to Measure a Broken Spring Safely
Measure the broken spring while it is still in place — never remove it first. You need four measurements:
- Wire diameter: Use calipers. Measure 10 coils, then divide by 10 for accuracy.
- Inside diameter: Measure the interior opening of the coil — typically 1.75 or 2 inches for residential torsion springs.
- Overall length: Measure both broken sections and add them together, then add 0.2 inches for the gap at the break point.
- Wind direction: Left-wound or right-wound — determined by which way the coil faces at the stationary cone end.
Reading Specs From the Broken Spring
Most torsion springs have manufacturer specs stamped or painted on the winding cone. Look for a color code — the International Door Association standardizes wire gauge by color, so an unpainted or red-coded spring tells you the wire size without calipers. Cross-reference these markings with the door’s weight, typically found on the manufacturer label inside the top panel, to confirm the replacement spring matches the load requirements.
Tools and Materials Required for DIY Replacement
Using the wrong tools during torsion spring replacement is not just inefficient — it is the primary cause of DIY injuries. Every substitution introduces a failure point under load.

Winding Bars: The Most Critical Tool
Winding bars are the steel rods you insert into the winding cone holes to apply and control spring tension. They must be:
- Exactly 18 inches long — shorter bars reduce leverage and increase slip risk
- Solid steel, not hollow — hollow bars bend under torsion spring load
- The correct diameter for your winding cone holes, typically 0.432 inches for residential springs
Never substitute a screwdriver, a drill bit, or a ratchet extension. These are documented causes of winding bar ejection injuries. Winding bars cost $15 to $25 as a pair from suppliers like Clopay or Ideal Security — this is non-negotiable safety equipment.
Additional Required Tools
- Safety glasses: Rated ANSI Z87.1 minimum — standard glasses do not stop a snapped spring fragment
- Work gloves: Heavy leather, not rubber — you need grip and cut resistance simultaneously
- Adjustable wrench and socket set: For loosening set screws on the winding cone and securing the shaft installation
- C-clamps or locking pliers: Two required, to secure the door in the closed position before any spring tension work begins
- Sturdy ladder: Rated for your weight plus 50 pounds of working load
Spring Replacement Kits and Quality Variance
Pre-packaged DIY garage door spring replacement kits from brands like Ideal Security cost $30 to $80 and include the spring, end cones, and hardware. The quality difference matters: residential-grade springs are rated at 10,000 cycles, while high-cycle springs are rated at 25,000 to 50,000 cycles. Spending an extra $20 to $40 on a high-cycle spring reduces replacement frequency significantly on a door used 8 to 10 times daily.
Step-by-Step DIY Replacement Process
Complete every step in this exact order. Skipping or reordering steps — particularly the door-securing step — is how controlled work becomes an emergency.

Step 1: Secure the Door and Disconnect Power
Clamp two locking pliers or C-clamps onto the vertical tracks just below the bottom rollers. This prevents the door from moving under any circumstance. Disconnect the automatic opener from the power outlet — not just the wall switch. A door that moves during spring tension work can cause catastrophic injury.
Step 2: Release Remaining Tension and Remove the Old Spring
Insert both winding bars into the winding cone holes alternately — never hold one bar while inserting the other. Loosen the set screws on the winding cone with your socket wrench, then use the bars to release any remaining spring tension in quarter-turn increments. Once tension is fully released, slide the spring off the shaft.
Step 3: Install the New Spring
Slide the new torsion spring onto the shaft with the stationary cone facing the center bracket. Thread the spring onto the shaft alignment carefully — the coil direction must match your wind measurement from Section 3. Secure the stationary cone to the center bracket and tighten all set screws firmly.
Step 4: Wind the Spring to Correct Tension
Insert a winding bar into the winding cone and apply turns in quarter-turn increments. Most residential doors require 30 quarter-turns — roughly 7.5 full rotations — but confirm this against your door’s weight and spring specifications. Keep both hands on the active winding bar at all times. Never let go between quarter-turns.
Step 5: Test Door Balance
Remove the clamps, disconnect the opener arm, and manually lift the door to waist height — approximately 3 to 4 feet. Release it. A correctly tensioned door holds position without drifting up or falling down. If it rises, the spring is overwound. If it falls, add 2 quarter-turns and retest.
When Professional Service Makes More Sense
DIY torsion spring replacement is a viable option for mechanically confident homeowners with the right tools — but it is not the right choice for every situation. Recognizing the boundary before you start is more valuable than stopping halfway through.
Physical and Access Limitations
Torsion spring work requires sustained overhead effort at ladder height, firm two-handed grip on steel winding bars, and the ability to apply controlled force in precise quarter-turn increments. If you have reduced grip strength, shoulder or wrist injuries, or limited mobility, the margin for error disappears. A slipped winding bar at the wrong moment causes the same injury regardless of how carefully you were trying.
The Real Cost of an Inexperienced Mistake
Here’s the problem: a DIY error during spring tension winding does not just mean starting over. An overwound spring can crack the torsion shaft or damage the cable drum. An incorrectly installed stationary cone can fail within days, requiring full professional correction. At that point, you pay both the parts cost of the first attempt and the full broken garage door spring repair cost of professional service — typically $150 to $350 for a standard torsion spring replacement — without any of the savings DIY promised.
Warranty and Liability Protection
Licensed garage door technicians carry liability insurance and typically warranty their labor for 90 days to one year. If the spring or cable system fails after professional installation, the repair cost falls on them. A DIY installation carries no such protection — and if a faulty installation damages a vehicle or injures someone, homeowner insurance claims can become complicated.
Situations That Require a Professional
- Double torsion spring systems on doors heavier than 200 pounds
- Any door taller than 10 feet with commercial-grade hardware
- Visible cable fraying, drum damage, or bent shaft alongside the broken spring
- No access to proper winding bars before the repair needs to happen
Common Mistakes and Troubleshooting After Installation
Most post-installation problems trace back to one of three errors: wrong tension, misaligned components, or incomplete verification. Each has a specific symptom and a specific fix.
Tension Problems: Too Little or Too Much
An under-tensioned spring makes the door feel heavy during manual operation and causes the automatic opener motor to strain audibly — you will hear it working harder than normal. Add 2 quarter-turns to the winding cone and retest door balance.
An over-tensioned spring pulls the door upward when released at waist height and can bow the top panel under stress. Remove 2 quarter-turns and retest. Repeated over-tensioning fatigues the spring metal and shortens its rated cycle life significantly.
Uneven Door Movement
If the door rises or lowers at an angle — one side faster than the other — the problem is almost always cable misalignment on the cable drum rather than the spring itself. Check that both cables sit evenly in their drum grooves before assuming the spring tension is wrong. A misaligned cable left uncorrected will fray against the drum edge within weeks.
Immediate Spring Failure After Installation
A spring that breaks within days of installation points to one of three causes:
- Wrong spring size for the door weight — the spring is working beyond its rated load
- Incorrect wind direction installed, creating metal fatigue from the first cycle
- Set screws on the winding cone left undertightened, allowing the cone to slip on the shaft
Post-Replacement Verification Checklist
Run through this checklist before reconnecting the automatic opener:
- Balance test: Door holds position at 3 to 4 feet without drifting
- Cable inspection: Both cables sit flush in drum grooves with no fraying or slack
- Set screw confirmation: All winding cone and stationary cone set screws are tight
- Noise assessment: No grinding, popping, or scraping during a full manual open-and-close cycle
- Gap check: Spring coils are evenly spaced with no compressed or separated sections
Frequently Asked Questions
Can I replace a garage door spring myself safely?
Yes, but only under specific conditions: you have proper 18-inch solid steel winding bars, mechanical experience with torque-based work, and a torsion spring on a standard residential door under 200 pounds. Without the correct tools or experience, the injury risk from uncontrolled spring tension makes professional service the safer financial and physical choice.
How do I know if my spring is torsion or extension?
Look above the closed door — a torsion spring runs horizontally through a steel shaft mounted at the center of the door frame. Extension springs run along the horizontal tracks on each side of the door and are visibly stretched when the door is closed.
What happens if I tension the new spring incorrectly?
Under-tensioning makes the door too heavy for the opener motor and fails the balance test — the door drops when released at waist height. Over-tensioning pulls the door upward uncontrolled and stresses the top panel. Both conditions are correctable by adding or removing quarter-turns at the winding cone, but repeated incorrect winding shortens the spring’s rated cycle life and can crack the torsion shaft.
Making Your DIY vs Professional Decision
The deciding factor is not cost — it is whether you have the specific tools and mechanical experience to control spring tension safely, because an error mid-process costs more in parts, professional correction, and potential injury than hiring a technician from the start.
If you have proper winding bars, mechanical confidence, and a standard residential torsion spring, measure your broken spring today using the steps in Section 3 and order the matched replacement. If any part of that condition is missing, contact a licensed garage door technician and request an itemized quote before committing to either path.