How to Replace Garage Door Opener Motor Without Replacing Opener
Can You Replace Just the Motor?
Knowing how to replace garage door opener motor without replacing opener sounds like an obvious money-saver — but for most Chamberlain, LiftMaster, and Genie units, the motor is not sold as a standalone part.
The real problem is that a failed motor often means a full opener replacement cost of $150–$500, and most homeowners don’t know whether a cheaper motor-only fix is actually possible for their specific unit before calling a technician.
This guide gives you a clear, model-specific answer on whether your opener qualifies for a motor-only swap — and walks you through exactly how to do it safely if it does.
Compatibility Reality Check
Before buying any parts, you need to know whether your opener can actually support a motor-only swap. Most can’t — but some can, and the difference comes down to three factors: parts availability, drive system compatibility, and control board integration.
When Motor-Only Replacement Is Actually Possible
A garage door opener motor replacement is feasible when all of these conditions are true:
- The opener model is still in production and the manufacturer sells a replacement motor unit separately
- The replacement motor’s voltage and horsepower ratings match the existing drive system exactly
- The sprocket size and chain pitch on the new motor align with the existing sprocket and chain assembly
- The control board and safety sensors use the same electrical connectors as the replacement motor generation
Chamberlain and LiftMaster are the most repair-friendly brands here. Several of their belt-drive and chain-drive models use a modular motor design — meaning the motor unit can be unbolted and swapped without touching the rail, trolley, or drive system.
Why Most Motor-Only Replacements Fail
Here’s the problem. Garage door opener manufacturers frequently use proprietary mounting hardware that only fits one specific model series. If your opener is discontinued — which is common for units older than 10–12 years — replacement motors simply don’t exist for it.
Even when a motor looks similar, incompatible chain pitch or sprocket teeth counts will cause the drive system to slip or bind immediately after installation. Control board electrical connections also differ between motor generations, so a newer motor often won’t communicate with an older board even if it physically mounts.
Manufacturers including Genie and Ryobi also void any remaining warranty coverage when you perform a partial component replacement rather than replacing the full opener mechanism.
How to Verify Your Opener Supports Motor Replacement
Follow these steps before purchasing anything:
- Open the cover on your opener housing and locate the model number label — it’s typically on a white sticker inside the front panel or on the back of the unit.
- Enter that model number into the manufacturer’s parts diagram on their official website (Chamberlain’s is at chamberlain.com, LiftMaster’s at liftmaster.com).
- Search the parts list specifically for “motor unit” — if no motor unit is listed, a standalone replacement does not exist for your model.
- Confirm the replacement motor’s voltage (typically 120V AC) and horsepower rating (commonly 1/2 HP or 3/4 HP) match your existing opener’s spec plate exactly.
- Call manufacturer support with your model number and confirm motor unit compatibility before purchasing — this single step prevents the most common and costly installation mistakes.
Motor Replacement Instructions (When Feasible)
If your compatibility check confirmed that a motor-only swap is possible, this process takes 1–3 hours with basic hand tools. Work methodically — rushing any step risks damaging the control board or misaligning the drive system.

Pre-Removal: Preparation and Safety
Safety comes first, and this step is non-negotiable. Disconnect power at your home’s circuit breaker for the garage circuit, then unplug the opener unit directly from the ceiling outlet. Never rely on just unplugging — a wiring fault could still energize components.
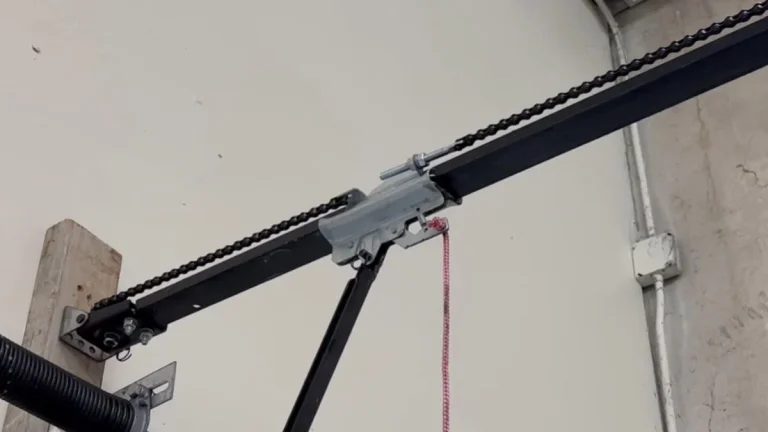
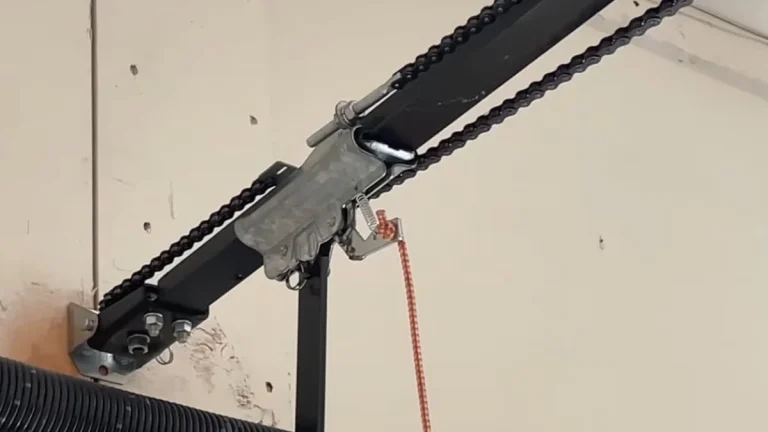
Prop the garage door fully open using a sturdy ladder or a 2×4 wooden brace wedged into the track. This prevents the door from dropping during the repair. Pull the emergency release cord (the red handle hanging from the trolley) and confirm the door moves freely by hand before touching any hardware.
Gather these tools before starting:
- Socket set (3/8-inch drive, metric and SAE)
- Torque wrench
- Phillips and flathead screwdrivers
- Needle-nose pliers for wire connectors
- Marker or masking tape for labeling wires
Disconnecting and Removing Old Motor
Start by relieving tension on the chain or belt. Loosen the tension adjustment bolt on the trolley until the chain has enough slack to lift off the motor sprocket cleanly. Forcing a taut chain off the sprocket bends the links and damages the sprocket and chain assembly on the new motor unit.
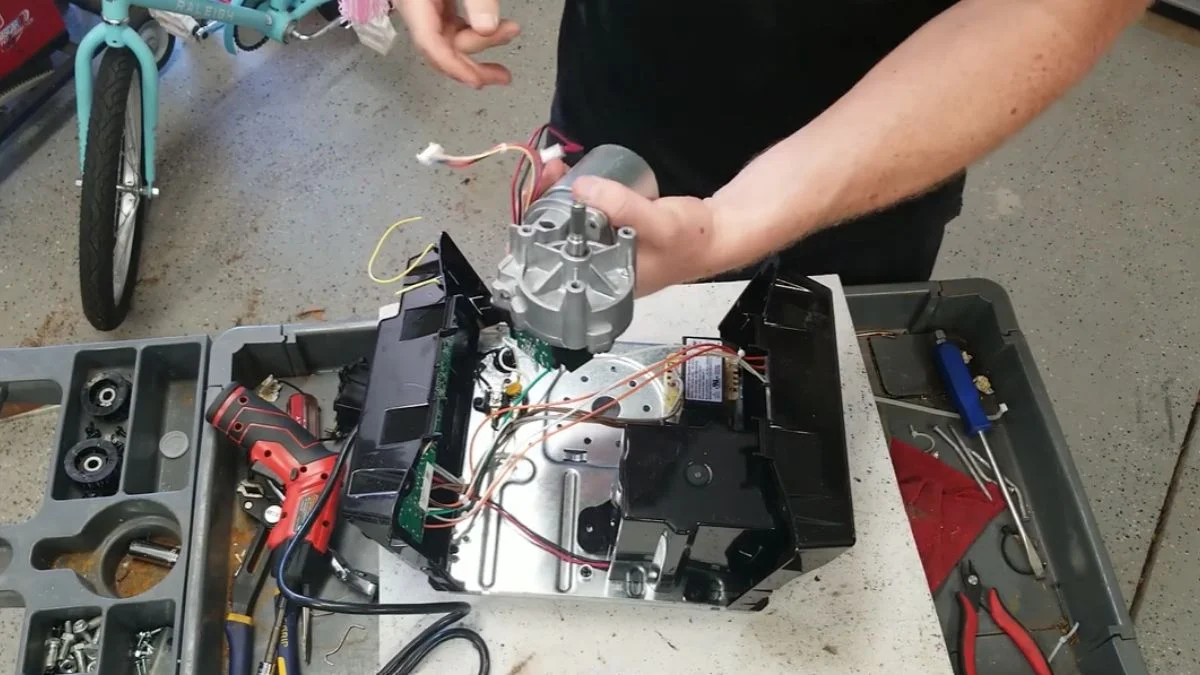
Use masking tape and a marker to label every electrical connector before disconnecting anything. Photograph the wire positions on both the motor terminals and the control board. Then disconnect each connector firmly but gently — twisting while pulling prevents broken tabs.
Unbolt the motor from its mounting bracket using your socket wrench. Most LiftMaster and Chamberlain motors use four bolts in a square pattern. Support the motor with your free hand as the last bolt comes out — these units typically weigh 8–15 pounds and will drop if unsupported.
Installing Replacement Motor Unit
Align the new motor unit with the existing mounting bracket holes before inserting any bolts. If the holes don’t align perfectly, stop — this signals a mounting hardware mismatch between the replacement motor and your opener mechanism, and forcing it will crack the housing.
Insert all bolts by hand first, then torque them to the manufacturer’s specification. For most Chamberlain and LiftMaster replacement motors, that spec is 20–30 ft-lbs. Under-torqued bolts vibrate loose within weeks; over-torqued bolts strip the bracket threads permanently.
Reconnect electrical terminals in the exact positions you photographed and labeled during removal. Garage door motor compatibility with the existing control board depends entirely on correct polarity and connector seating — a reversed wire here will blow the board’s logic fuse on first power-up.
Reintegration: Chain, Sensors, and Control Board
Thread the chain back onto the new motor sprocket and check that it sits fully in each sprocket tooth with no skipping. Adjust chain tension so there is roughly 1/2 inch of sag at the midpoint of the rail — too tight causes premature sprocket wear, too loose causes skipping under load.
Reconnect the safety sensor wiring to its two-wire connector on the motor’s control board integration port. The sending sensor (yellow LED) and receiving sensor (green LED) must both show solid indicator lights after reconnecting. Blinking LEDs mean a wiring or alignment problem that must be resolved before operating the door.
Reprogram your remote controls following the replacement motor’s manual — most Chamberlain and LiftMaster units use a “Learn” button sequence that takes under two minutes. Run the door through 3 full open-close cycles, watching for chain alignment drift, unusual noise, or hesitation at the midpoint of travel.
Cost Comparison: Motor vs. Full System Replacement
The decision to replace just the motor unit or the entire opener mechanism comes down to a straightforward numbers calculation — but only when you factor in long-term reliability, not just upfront cost.
Motor-Only Replacement Investment
A replacement motor unit for a compatible Chamberlain or LiftMaster model typically costs $45–$120 for the part alone. If your opener passes the compatibility check and you complete the swap yourself, total out-of-pocket cost stays under $150 in most cases.
Professional labor for a motor-only swap runs $75–$150, significantly less than a full replacement installation. The reason is simple: a technician reuses your existing rail, trolley, mounting hardware, and safety sensors, cutting job time to 1–2 hours. Additional parts — a new cotter pin, replacement wire connectors, or a chain master link — rarely add more than $10–$20 to the total.
Full Opener Replacement Alternative
A complete new opener system costs $150–$500 for the unit, plus $100–$200 in professional installation labor, putting the total between $250 and $700 depending on brand and drive type. That price includes a new rail assembly, mounting brackets, control board, safety sensors, and wall console — everything the motor-only swap leaves in place.
The result? A full replacement comes with a manufacturer warranty of 1–5 years covering all components, while a partial motor swap typically carries no warranty protection on the existing opener mechanism. For openers older than 8–10 years, full replacement also eliminates the parts availability problem — compatible replacement motors for aging units become harder to source every year.
The honest calculation: if your opener is under 8 years old and passes the compatibility check, motor-only replacement saves real money. If it’s older than 10 years, the cost difference between repair and full replacement narrows enough that a new system is usually the smarter long-term investment.
When Professional Installation Makes Sense
A DIY motor swap is a reasonable project when compatibility is confirmed and the existing opener mechanism is in good condition. When either of those conditions is uncertain, professional installation is the smarter call — and in some cases, the legally safer one.
Red Flags for DIY Avoidance
Stop and call a licensed garage door technician if you encounter any of these situations during your repair:
- Uncertain compatibility: If the replacement motor unit’s mounting holes, sprocket size, or electrical connectors don’t match your existing opener exactly, forcing the installation risks destroying both the new motor and the old control board.
- Safety sensor failure after reconnection: If either the sending or receiving sensor shows a blinking LED after you’ve reconnected the wiring, the door will not close safely. Troubleshooting sensor alignment and control board integration faults requires diagnostic tools most homeowners don’t have.
- Grinding or stalling during test cycles: These sounds indicate a drive system compatibility problem — typically a sprocket and chain assembly mismatch — that a visual inspection alone won’t resolve.
- Damaged electrical connectors on the control board: Cracked, burned, or corroded connector pins mean the control board itself needs replacement, which changes the entire scope of the repair.
Liability and Warranty Considerations
Here’s what most people miss. Performing a DIY garage door opener motor replacement voids the manufacturer’s warranty on the existing opener in most cases — Chamberlain, LiftMaster, and Genie all include this clause in their warranty documentation.
Beyond warranty loss, homeowner liability is a real concern. A garage door weighs 130–400 pounds. If a door malfunction after a DIY motor swap causes injury or property damage, your homeowner’s insurance carrier may deny the claim on the grounds of improper repair. A professional installation certificate from a licensed technician creates a documented paper trail that provides legal protection in exactly this scenario.
Garage door openers also fall under UL 325, the Underwriters Laboratories safety standard governing automatic door operators. Professional installers are trained to verify UL 325 compliance after any motor or component replacement — a verification step the standard DIY process does not include.
FAQ
Can I replace a garage door opener motor only?
Yes, but only for specific models. Chamberlain and LiftMaster offer replacement motor units for select chain-drive and belt-drive openers, but most manufacturers don’t sell the motor as a standalone part. Confirm your model number against the manufacturer’s parts diagram before purchasing anything.
Will replacing the motor void my garage door opener warranty?
In most cases, yes. Chamberlain, LiftMaster, and Genie all include clauses in their warranty documentation that void coverage when components are partially replaced rather than the full opener mechanism. Check your specific warranty terms before starting any repair.
How do I know if my motor is actually failing vs. opener malfunction?
A failing motor typically produces a humming sound with no door movement, runs hot to the touch, or trips the thermal overload reset button repeatedly. If the motor runs but the door doesn’t move, the problem is more likely the drive system — a broken chain, worn sprocket, or disconnected trolley — not the motor unit itself.
Next Steps: Repair or Replace Decision
Your opener’s model number is the single deciding factor — without confirming motor unit availability in the manufacturer’s parts diagram, every other step in this process is premature. Pull that model number from inside your opener housing right now, enter it at chamberlain.com or liftmaster.com, and search the parts list for a replacement motor unit before spending a dollar or touching a single bolt.