How to Change Your Chamberlain Keypad Battery in 5 Minutes
A dead battery is the number one reason a Chamberlain wireless keypad stops responding — and most homeowners never suspect it.
When your keypad goes silent, it’s easy to assume the worst: a failed motor, a lost code, or a costly service call. It’s none of those things.
This guide walks you through exactly how to change the battery in a Chamberlain garage door opener keypad in under 5 minutes, with no programming required afterward in most cases.
What You’ll Need Before Starting
Gathering the right items before you start keeps the job under 5 minutes. You need three things at most.
The Right Screwdriver
Most Chamberlain wireless keypad models use a small flat-head screwdriver to open the battery cover. A precision flat-head — the kind sold in eyeglass repair kits — works better than a standard one because the battery compartment slot is narrow. Using a screwdriver that’s too wide risks cracking the plastic cover. If you don’t own a precision set, any flat-head with a blade under 4mm wide will do the job.
The Correct Replacement Battery
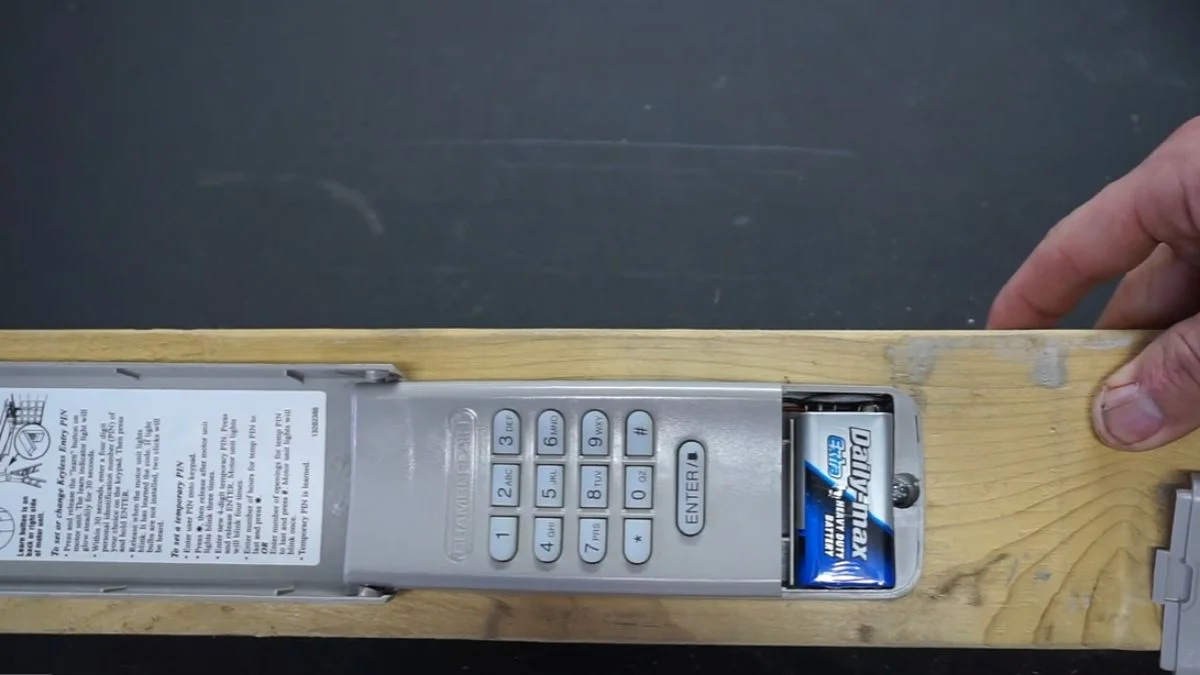
Most Chamberlain wireless keyless entry keypads take a CR2032 lithium coin battery. This is a flat, round, 3-volt battery roughly the size of a nickel. You’ll find it at any hardware store, pharmacy, or online retailer for under $5. Before buying, flip open your existing battery compartment and confirm the battery type printed inside — some older Chamberlain models use a 9-volt instead. Buying the wrong battery is the most common reason this repair stalls.
Optional but Smart: Gloves and Contact Cleaner
Latex or nitrile gloves protect the new battery from skin oils, which can accelerate corrosion on the battery contacts over time. If you notice any white or greenish residue on the contacts inside the compartment, that’s corrosion — a known cause of keypad malfunction even with a fresh battery. A quick spray of electrical contact cleaner, available at any hardware store, removes it completely before you install the new CR2032.
Step-by-Step Battery Replacement
This process takes the same amount of effort as changing a watch battery. Follow each step in order and you won’t run into problems.
Locating and Opening the Battery Cover
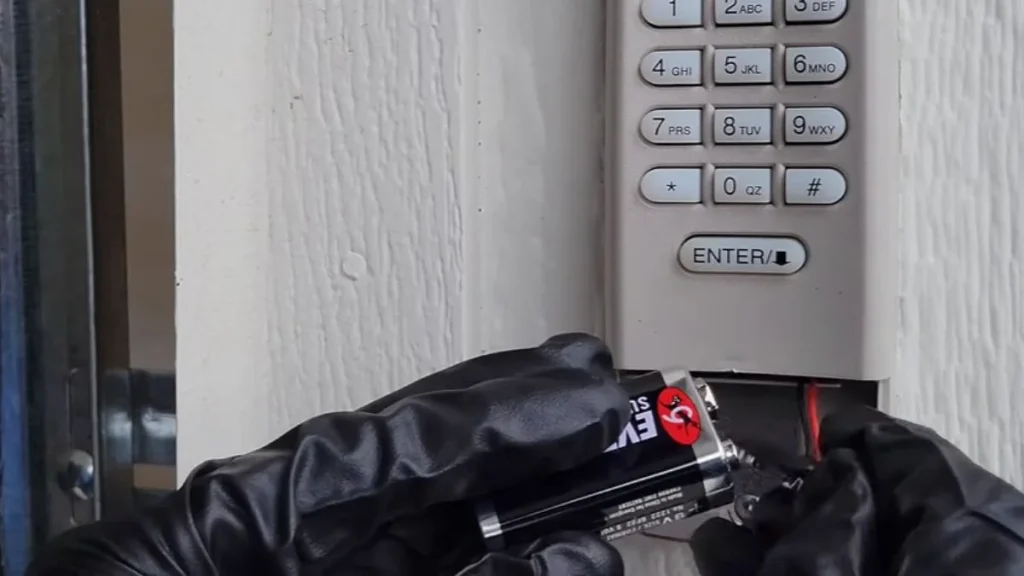
Flip the keypad over or look at its underside. On most Chamberlain wireless keyless entry models, the battery cover is a small oval or rectangular panel with a narrow slot cut into it. Slide the tip of your flat-head screwdriver into that slot and apply light upward pressure — think prying, not forcing. The cover pops off with minimal resistance. If it feels stuck, reposition the screwdriver closer to the center of the slot. Cracked covers almost always result from using too wide a blade or pushing too hard at the edge.
Removing and Installing the Battery
Before pulling the old CR2032 out, note which side faces up. On most Chamberlain keypads, the flat side marked with a “+” faces upward toward you. Remove the dead battery and set it aside for proper disposal. Check the battery contacts for any white or greenish corrosion — clean them with a dry cloth or contact cleaner before inserting the new battery. Seat the fresh CR2032 firmly with the positive side facing the same direction as the original. A loose battery is a common cause of continued keypad malfunction even after replacement.
Reassembling the Keypad
Align the battery cover with the oval cutout on the back of the keypad. Press it down evenly until you feel or hear a click. No screwdriver pressure should be needed at this stage — if the cover isn’t snapping into place, it’s slightly misaligned. Reposition and press again. Forced reassembly cracks the housing.
Reprogramming: Do You Need To?
For most Chamberlain and LiftMaster keypads, the answer is no — your access code stays stored in the keypad’s memory even when the battery is completely dead.
Why Most Models Retain Their Code
Chamberlain wireless keyless entry keypads store your PIN in non-volatile memory, which means the code persists without power. Swapping the CR2032 battery does not erase this memory. Once the new battery is seated and the cover is back on, your existing PIN should work immediately. This is true for the majority of current Chamberlain and LiftMaster models, including the popular KLIK2U and 940EV series keypads.
When Reprogramming May Be Required
Here’s the exception worth knowing. Some older Chamberlain models — particularly those manufactured before 2010 — do not retain memory after a full battery drain. According to official Chamberlain support documentation at support.chamberlaingroup.com, if your keypad fails to operate after a fresh battery install, a full reprogram is the recommended next step. The same applies if the battery was left dead for an extended period in certain legacy models. Check your model number against the Chamberlain support site to confirm which category your keypad falls into.
Testing the Keypad After Replacement
Walk to your keypad and enter your usual PIN. A working keypad will trigger the garage door immediately, and many models emit a green LED flash or an audible beep to confirm the signal sent successfully. If nothing happens, press each key firmly — keypad malfunction after battery replacement is sometimes just a matter of incomplete key contact. If the keypad still won’t respond, the battery contacts may need cleaning or the battery may be seated incorrectly.
When Battery Replacement Isn’t the Answer
A fresh CR2032 fixes most non-responsive keypads — but not all of them. If your keypad still isn’t working after a battery swap, one of three issues is usually responsible.
Battery Contacts Corrosion
Open the battery compartment again and look closely at the small metal contact strips. White, green, or powdery residue on those contacts prevents the new battery from completing the circuit, even when seated correctly. This is battery contacts corrosion, and it’s more common in keypads exposed to humidity or temperature swings. Clean the contacts with a dry cotton swab first. For heavier buildup, a short spray of electrical contact cleaner — brands like WD-40 Specialist or CRC Contact Cleaner work well — dissolves the residue without damaging the plastic housing.
Weak Signal vs. Dead Battery
A keypad that works sporadically isn’t necessarily battery dead — it may have a signal range problem. Test this by standing directly in front of the garage door and entering your PIN from close range. If the door responds at 2 feet but not at 10 feet, the issue is signal strength, not the battery. Interference from nearby Wi-Fi routers, LED lighting, or other radio-frequency devices can disrupt the wireless keyless entry signal.
Persistent Failure: What to Check Next
Work through these steps in order before calling for help:
- Test the new CR2032 in another device to confirm it’s not a faulty battery.
- Inspect and clean the battery contacts a second time.
- Perform a full keypad reset and reprogram your PIN from scratch.
- Contact Chamberlain customer support directly at 1-800-528-9131 if the keypad malfunction continues.
When to Call for Help
A CR2032 battery swap resolves the vast majority of Chamberlain keypad failures, and the entire fix costs under $5 and takes less time than finding your car keys. If you’ve replaced the battery, cleaned the contacts, and attempted a full reprogram with no result, call Chamberlain’s support line at 1-800-528-9131 — their technicians can run a remote diagnostic and tell you whether you need a replacement keypad unit.