Garage Door Light Flashes 5 Times? Complete Diagnostic Guide

When your garage door light flashes 5 times, that blinking pattern is not a malfunction — it is a built-in diagnostic code your opener uses to tell you exactly what is wrong.
Most homeowners stare at the flashing light, assume the worst, and call a technician before checking what the code actually means — a step that often costs $75–$150 for a problem they could fix in minutes.
Read this guide and you will know the exact cause behind the 5-flash signal on the most common opener brands, whether a DIY reset will solve it, and when a professional repair is genuinely necessary.
What Does a 5-Flash Code Actually Mean?
Five flashes on your garage door opener’s diagnostic light indicator points to one of three root causes, and the brand you own determines which explanation applies first.
RPM Sensor Failure — The Most Common Cause
The RPM sensor monitors how fast the motor shaft spins during each open or close cycle. When the sensor detects an irregular speed — or no signal at all — the opener’s logic board logs the fault and triggers the LED flash code. In practice, this shows up as a door that starts moving, then stops and reverses, followed by 5 rapid blinks on the learn button LED.
This is the leading cause of a 5-flash code across LiftMaster, Chamberlain, and Craftsman openers, all three of which share similar internal architecture because Chamberlain Group manufactures all three brands.
Logic Board Malfunction — The Secondary Possibility
A failing garage door logic board can mimic an RPM sensor fault because the board itself is what interprets the sensor signal. Logic board failure symptoms include erratic behavior — the door reversing for no reason, the opener running briefly then shutting off, or the control board refusing to respond to the wall button or remote.
Unlike an RPM sensor, a logic board is not a simple swap for most homeowners. Garage door opener control board replacement typically costs $80–$200 in parts alone.
Motor Overheating — The Third Cause
Repeated open/close cycles in a short window — common during moves or home deliveries — can trigger thermal overload protection. The motor overheating garage door scenario usually resolves itself after a 30-minute cooldown, after which the 5-flash code clears on its own.
If the code returns under normal use, overheating is not the actual problem.
How to Diagnose Which Problem You Actually Have
Before replacing any part, run through this three-step diagnostic sequence. It takes less than 10 minutes and narrows the cause to a single likely culprit.

Step 1: Visual Inspection
Start at the photoelectric sensors mounted at the base of your door tracks — one on each side, roughly 4–6 inches off the ground. Check for:
- Misaligned sensor lenses (one LED should be solid, not blinking)
- Dirt, cobwebs, or grease on the sensor face
- A visible gap where the door track has bent and shifted the sensor bracket
- Any burning smell near the motor head unit or visible scorch marks on the housing
A misaligned safety sensor is the single most misdiagnosed cause of a garage door won’t close flashing light situation. Fix the alignment before assuming anything deeper is broken.
Step 2: Listen-and-Time Test
Press the wall button and pay close attention to what the motor does:
- Motor clicks but door never moves — classic RPM sensor failure; the board is sending power but getting no shaft rotation signal back
- Motor runs, door moves partway then stalls — points to force adjustment being off, or thermal shutdown mid-cycle
- No motor sound at all — the garage door logic board is likely not passing the signal through; this is a control board problem, not a sensor problem
Step 3: Check Your Usage Pattern
How the fault appeared tells you almost as much as what the motor does.
- Happened after 8–10 consecutive cycles? Motor thermal shutdown — wait 30 minutes and retry.
- Occurred the first time you programmed a new remote during setup timeout? The 5-flash code in that context means a learn mode fault, not an RPM issue.
- Appeared randomly on a normal day with no unusual use? RPM sensor degradation is the most probable explanation, especially on openers more than 7 years old.
Safe Reset and Troubleshooting Steps
A proper opener reset clears stored fault codes from the logic board and gives you a clean baseline to test from. Run these steps in order — skipping ahead wastes time and can introduce new faults.
Step 1: Power Cycle the Opener
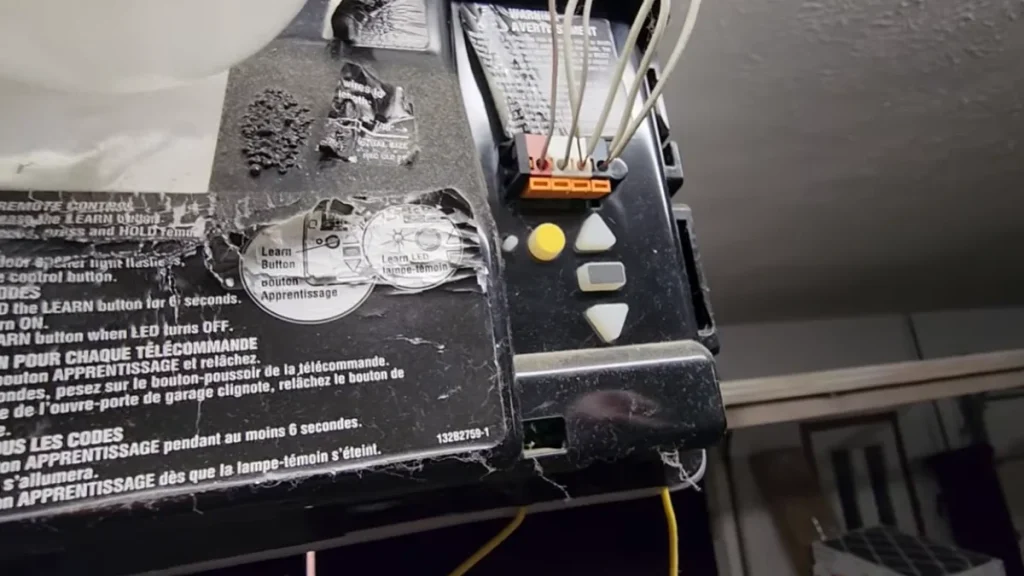
Unplug the opener from the ceiling outlet. Wait a full 30 seconds — not 5, not 10. This allows capacitors on the garage door logic board to fully discharge and clears any temporary fault state. Plug it back in and watch the diagnostic light indicator on the motor head unit. If it returns immediately to 5 flashes without you pressing anything, the fault is stored in hardware, not a temporary glitch.
Step 2: Clear the Fault Code via the Learn Button
Locate the learn button on your opener — it is typically on the back or side panel of the motor unit, color-coded by model. Press and hold it for 6 seconds until the learn button LED flashes once and goes out. This wipes all stored remote codes and resets the opener’s diagnostic registers. Note that you will need to reprogram all remotes and keypads afterward.
Step 3: Relearn the Door’s Travel Limits
With the door fully closed, press the wall button once to initiate a fresh setup sequence. The opener will run the door through a full open-and-close cycle to relearn the up and down limit positions. During this cycle, do not interrupt the door’s movement — stopping it mid-travel triggers the safety reversal system and forces another fault code.
Step 4: Run the Verification Test
After the travel limit cycle completes, run 3 consecutive open-and-close cycles using the wall button. Watch for smooth, uninterrupted movement and confirm the diagnostic light indicator stays off between cycles. If the 5-flash code returns during any of these 3 cycles, the reset did not resolve the underlying fault.
Here’s what that result means: a recurring flash code after a full reset points to a hardware failure — either RPM sensor replacement or garage door opener control board replacement — and that is the point to call a qualified technician.
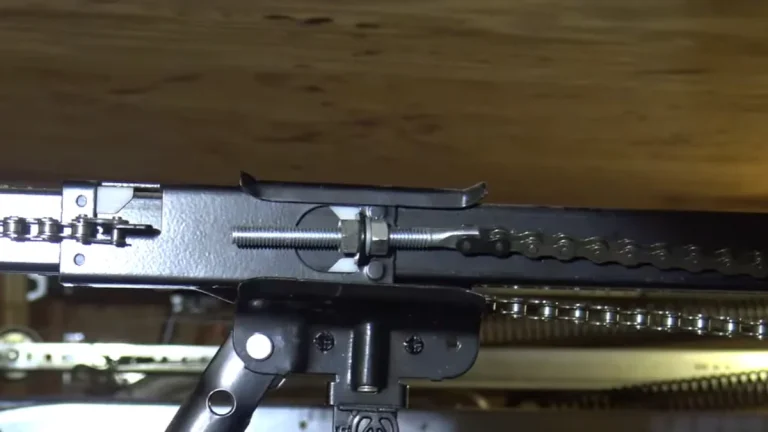
If the error code points to a travel or force issue, check whether the belt has slipped off track first.
Repair vs. Replace Decision Framework
Knowing the repair cost before calling a technician puts you in a stronger position to make a financially sound decision. Here are the real numbers by fault type.
Typical Repair Costs by Cause
| Fault | Parts Cost | Labor Cost | Total Estimate |
|---|---|---|---|
| RPM sensor replacement | $15–$40 | $75–$120 | $90–$160 |
| Logic board replacement | $80–$200 | $75–$150 | $155–$350 |
| Motor replacement | $100–$250 | $100–$200 | $200–$450 |
| Safety sensor realignment | $0 (DIY) | $50–$75 | $0–$75 |
RPM sensor replacement is the most cost-effective repair on this list — the part is inexpensive, and on LiftMaster and Chamberlain units, it connects via a simple plug-in harness that most homeowners can swap without tools beyond a flathead screwdriver.
When Full Replacement Makes More Financial Sense
Three conditions make replacement smarter than repair:
- Opener is 10+ years old — parts availability drops sharply after a decade, and labor costs approach the price of a new unit
- Out of warranty — Chamberlain and LiftMaster standard warranties run 1–5 years depending on model; an out-of-warranty logic board repair on an aging unit is rarely worth the investment
- Repair cost exceeds 50% of replacement cost — a new mid-range LiftMaster belt-drive opener retails for $200–$350, making a $300 motor repair a poor value
DIY vs. Professional Service — Where the Line Is
Homeowners with basic mechanical confidence can safely handle:
- Sensor realignment and cleaning
- Power cycling and opener reset procedures
- RPM sensor replacement on plug-harness models
- Force adjustment via the limit dial on the motor unit
Leave these to a licensed technician:
- Garage door opener control board replacement involving wired terminal connections
- Any repair requiring work on the torsion spring system
- Fault diagnosis on openers with no visible diagnostic light indicator or no documentation available
Know Your Next Move
A 5-flash code is not a death sentence for your opener — it is a specific diagnostic signal that points to an RPM sensor, logic board, or thermal fault, and most cases resolve with a power cycle or a sub-$40 part. Start with the listen-and-time test from Section 3 right now, before calling anyone.
If the reset procedure in Section 4 does not clear the code after two full attempts, pull the model number from your motor unit’s label and contact a Chamberlain-certified technician with that number in hand — it cuts diagnosis time and prevents unnecessary parts charges.