How to Adjust Garage Door Springs: Step-by-Step Safety Guide
A garage door service call costs $150–$350 on average, yet adjusting garage door springs is a task many homeowners with basic mechanical experience can handle safely themselves.
The real problem is knowing exactly when to turn a winding bar and when to stop — especially after adding heavier insulated panels or weatherproofing that shifts the door’s balance and puts new strain on the springs.
This guide walks you through the complete adjustment process for both torsion and extension springs, shows you the clear safety boundaries that separate a manageable DIY job from one that requires a certified technician, and gives you the confidence to make the right call before touching anything.
Why Spring Adjustment Is Dangerous
Torsion springs store enough mechanical energy to cause life-altering injuries in a fraction of a second. A standard residential torsion spring operates under 150–300 foot-pounds of torque. If a winding cone cracks or a set screw slips while you’re holding a winding bar, that energy releases instantly — into your hands, face, or chest.
What Can Go Wrong
The injuries are not minor. Crushed fingers, broken wrists, shattered eye sockets, and in documented cases, death. The Consumer Product Safety Commission has recorded fatalities linked to garage door spring failures during DIY service attempts. This is not a tool that forgives mistakes.
The core hazard is the winding bar itself. It’s a steel rod inserted into the winding cone to add or release tension in precise increments. One slip, one moment of inattention, and the bar becomes a projectile. Standard homeowner tool sets don’t include winding bars for good reason — this is specialized equipment that demands trained hands.
When to Stop and Call a Professional
Stop immediately and call a certified technician if any of the following apply:
- You have no prior experience with torsion spring adjustment or cable drum systems
- The spring is visibly cracked, corroded, or has a gap in the coils
- The winding cone looks damaged or the set screws won’t seat properly
- You feel uncertain at any step of the process
Uncertainty is a signal, not a weakness. A professional garage door technician charges far less than an emergency room visit.
Tools You Actually Need
Walk into this job with the wrong tools and you create the exact hazard you’re trying to avoid. Every item on this list serves a specific safety or mechanical function — none of it is optional.
Essential Winding Bars and Safety Gear
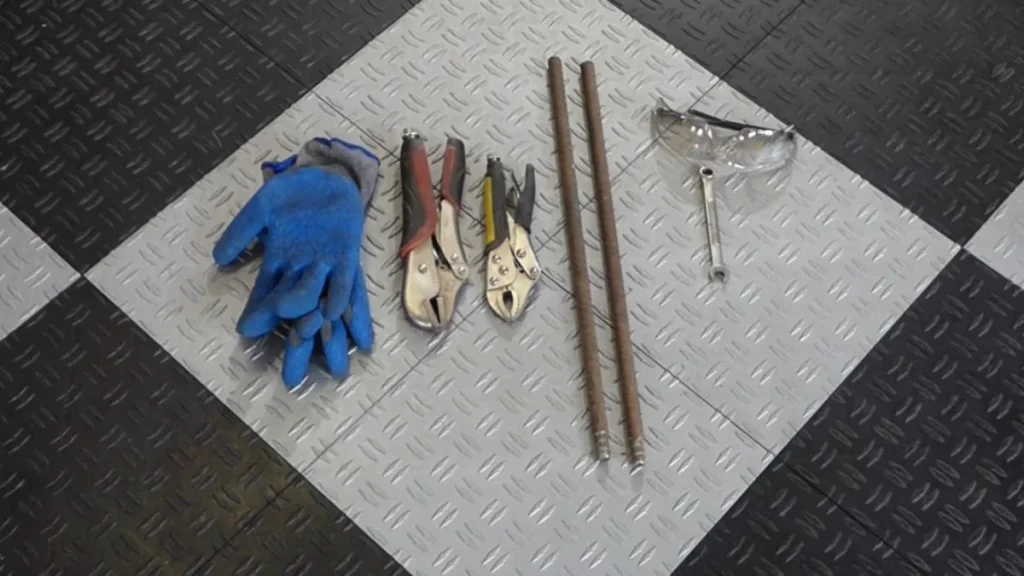
The most critical tools are 2 steel winding bars, each at least 18 inches long and 1/2 inch in diameter. Thinner bars bend under load and can snap out of the winding cone mid-adjustment. Never substitute screwdrivers, bolts, or rebar — these are the wrong diameter and will slip. Winding bars are available at most hardware stores, through retailers like Amazon, or from garage door supply companies like Clopay or Wayne Dalton.
Beyond winding bars, gather:
- Adjustable wrench and vice grips for set screws and cable drum hardware
- A sturdy step ladder that puts your eyes level with the spring assembly
- Safety glasses rated for impact protection
- Heavy work gloves and closed-toe shoes — non-negotiable
Setup and Preparation Steps
Before touching any spring hardware, disconnect the garage door opener by unplugging it directly from the electrical outlet. Do not rely on the wall button lock — openers can receive remote signals unexpectedly and trigger movement mid-adjustment.
Next, operate the door manually to confirm it moves freely on its tracks. This tells you whether you’re dealing with a tension problem or a separate hardware issue.
Finally, document the current state. Take photos of the spring, winding cone, cable drum, and set screw positions. Write a note describing exactly how the door behaves — whether it springs open, slams closed, or continues to open past the fully raised position. This baseline protects you if something changes during adjustment.
Step-by-Step Adjustment Process
This process applies to standard single torsion spring systems found on most residential garage doors. If your door has two springs mounted on either side of a center bracket, adjust both springs equally — never one alone.
Locating and Inspecting Components
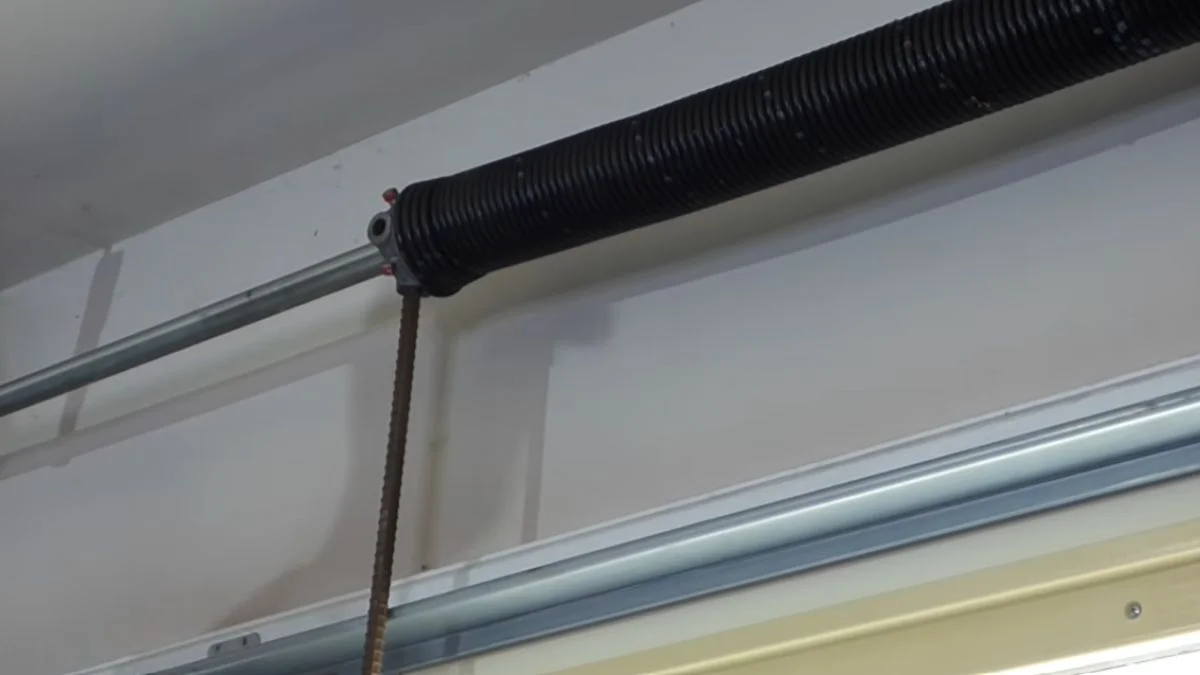
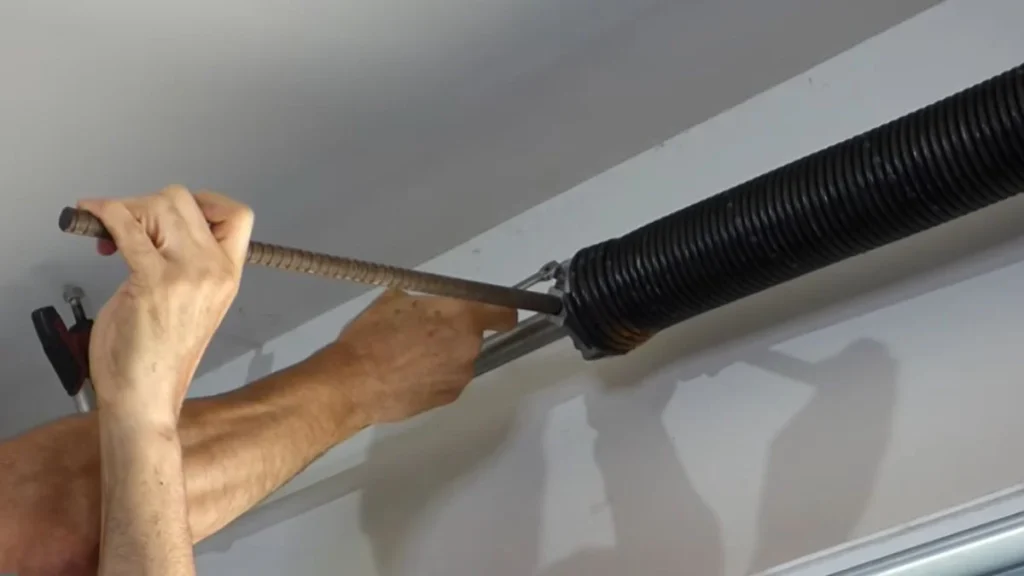
The torsion spring runs horizontally above the door, mounted on a steel shaft that spans the full door width. At each end of the spring sits a winding cone — a cylindrical fitting with 4 holes drilled around its circumference to accept winding bars. Two set screws on each winding cone clamp the cone to the shaft and hold the stored tension in place.
Before touching anything, inspect the spring closely. Look for:
- Rust or corrosion along the coils
- A visible gap between coils, which signals a broken spring
- Uneven wear or coil spacing on one side
- Cable drum misalignment or frayed cables
A broken or visibly damaged spring cannot be adjusted — it must be replaced by a professional.
Quarter-Turn Adjustment Technique
One quarter-turn of the winding cone equals one tension increment. This is the standard unit of torsion spring adjustment, and it’s smaller than it sounds — do not rush it.
The sequence for each increment:
- Insert both winding bars into the cone holes to maintain control
- Loosen the set screws slightly — just enough to allow movement
- Turn the cone one quarter-turn in the correct direction
- Retighten the set screws firmly before removing either winding bar
- Test the door manually before proceeding to the next increment
To tighten tension when the door feels too heavy or slams closed, wind the spring upward. To loosen tension when the door springs open too fast or continues to open past the fully raised position, wind downward. Never remove both winding bars simultaneously with tension on the spring.
Testing and Verifying New Tension
Disconnect the opener and lift the door manually to waist height — approximately 3 to 4 feet. Release it. A properly tensioned door holds that position without drifting up or dropping down. If it climbs toward the ceiling, the spring is overwound. If it falls, add another quarter-turn.
Listen during the test. A door that slams closed suddenly has too little tension. A door that creeps upward on its own has too much. Both indicate another adjustment increment is needed.
Once the door holds steady at mid-height and operates smoothly through its full range, document the final tension state with photos before reconnecting the opener.
Diagnosing What Went Wrong
Door behavior tells you exactly what the spring system is doing. Match the symptom to the cause before reaching for a winding bar — adjusting in the wrong direction makes the problem worse, not better.
Door Slams Closed or Falls Hard
When a door slams closed from any height, the torsion spring has too much tension. The spring is overpowering the door’s weight and driving it downward. The fix is to reduce tension by loosening the winding cone in quarter-turn increments, testing after each one. Do not attempt more than 2 increments before retesting.
Door Won’t Stay Open or Creeps Down
A door that slowly creeps down or won’t hold at the half-open test position has too little spring tension. The spring isn’t generating enough counterforce to support the door’s weight. This is the most common symptom after adding insulated panels or new weatherstripping — the door got heavier and the existing tension is no longer sufficient. Increase tension one quarter-turn at a time until the door holds steady.
Door Opens Unevenly or Tilts to One Side
Uneven movement usually points to a dual-spring imbalance or a cable drum that has slipped on its shaft. If one side of the door rises faster than the other, do not adjust spring tension alone — this requires inspecting both winding cones, both cable drums, and the cables themselves for uneven wear or slack.
Slow Opening With Grinding Noise
Grinding during operation combined with slow movement signals spring fatigue or significant cable wear — not a tension adjustment problem. A worn torsion spring loses its ability to store energy evenly across the coils. This symptom requires a professional assessment. Continuing to wind a fatigued spring risks sudden fracture under load.
When to Hire a Professional
Knowing when to stop is the most important skill in this entire process. The situations below are not edge cases — they come up regularly, and each one shifts the risk calculation firmly toward calling a certified technician.
Visible Spring Damage or Prior Repair Attempts
Any torsion spring showing rust penetrating the coils, a visible gap, or uneven coil spacing is a replacement job, not an adjustment job. The same applies if you can see evidence of a previous repair — mismatched coil color, hardware that looks newer than the rest of the assembly, or winding cone set screws that are already stripped. A compromised spring can fracture under the added stress of a fresh tension adjustment.
Double Springs or Side-Mounted Extension Systems
If your garage door uses 2 torsion springs mounted on a single shaft, or extension springs running parallel to the horizontal tracks on each side, and you have never performed a torsion spring adjustment before, hire a professional for the first service. These configurations require balanced tension adjustment across multiple components simultaneously. Getting one side wrong stresses the cable drum, the cables, and the tracks.
Any Moment of Uncertainty
Here’s the clearest rule: if you pause and think “I’m not sure about this step,” stop. Set the winding bars down, retighten the set screws, and call a technician. No amount of money saved justifies a fractured wrist or worse.
The Actual Cost Comparison
A professional garage door spring adjustment runs $75–$150 for a service call in most U.S. markets. Full spring replacement with labor typically costs $200–$350. Weigh that against the time investment, the tool purchase cost if you don’t own winding bars, and the genuine physical risk. For a first-time adjustment on an unfamiliar system, the professional option is often the rational one.
Frequently Asked Questions
What Is the Proper Tension for a Garage Door Spring?
A properly tensioned garage door spring holds the door stationary at the half-open position — approximately 3 to 4 feet off the ground — without drifting up or dropping down. There is no universal torque number; correct tension is specific to the door’s exact weight, height, and spring specifications.
How Many Quarter-Turns Should I Adjust My Garage Door Spring?
Most tension corrections require between 1 and 4 quarter-turns total, adjusted one increment at a time with a manual door test after each turn. The exact number depends on how far off the current tension is — never wind more than 2 quarter-turns without testing, as over-winding is as problematic as under-winding.
Can You Put Too Heavy of a Torsion Spring on a Garage Door?
Yes. A torsion spring that is too strong for the door’s weight generates excess tension that forces the door open unexpectedly, puts strain on the opener motor, and can snap cables at the cable drum. Springs are rated by door weight and height — always match the replacement spring to the manufacturer’s specifications for your specific door model.
Know When to Walk Away
The single most valuable skill in adjusting garage door springs is recognizing the moment the job exceeds your experience level — and stopping before that moment becomes an injury. If your door has recently gained weight from new panels or insulation, start with the half-open balance test right now: disconnect the opener, lift the door to waist height, and release it.
What the door does next tells you whether you need one quarter-turn of adjustment or a phone call to a certified technician.