How to Fix a Garage Wall Hole: DIY Patch Guide
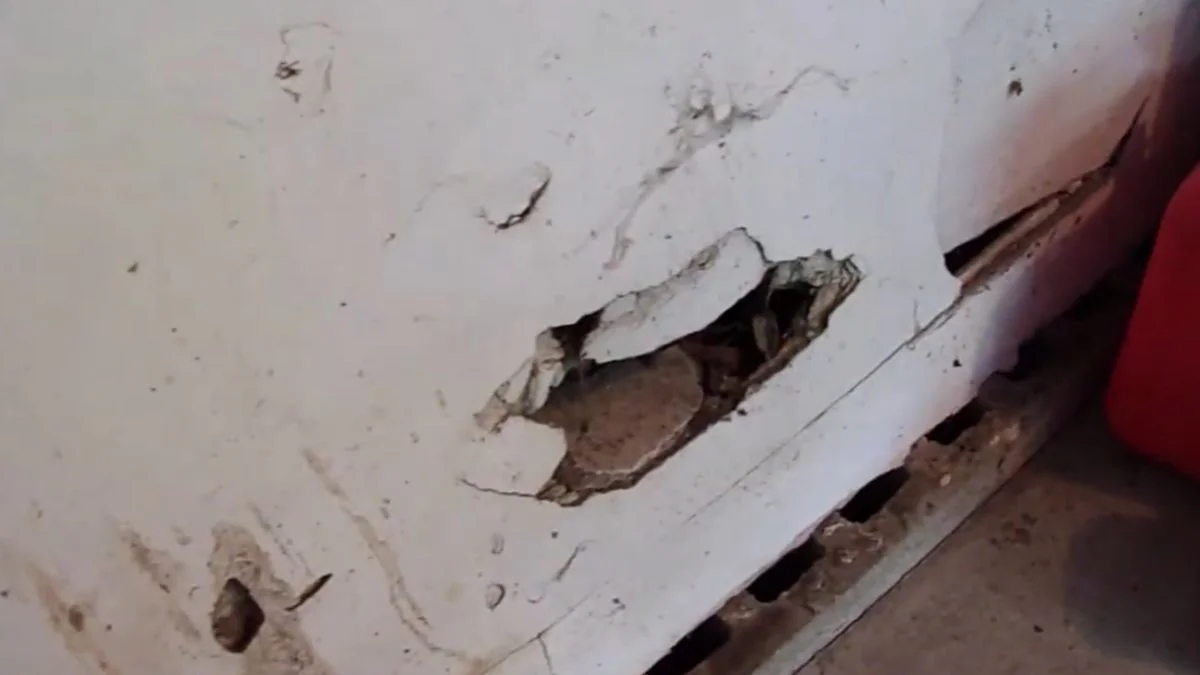
A garage wall hole that looks like a major problem can cost less than $15 to fix yourself — no contractor needed.
Most homeowners discover the damage right before a home sale or move and have no idea whether they need spackle, joint compound, or a full drywall patch kit. The wrong choice wastes money and leaves a visible repair.
This guide gives you the exact method, materials, and steps for every hole size, so you finish with a wall that looks professionally repaired.
Drywall vs. Concrete: Know Your Wall Type First
The repair method that works perfectly on drywall will completely fail on concrete — so identifying your wall material is the first real step.
How to Tell Drywall from Concrete in 30 Seconds
Knock on the wall with your knuckle. Drywall (also called Sheetrock, the USG brand name) produces a hollow sound and feels slightly flexible under firm pressure. Concrete or concrete block produces a dense thud and feels completely rigid.
Look at the wall’s surface. Drywall has a paper facing, visible seams at 4-foot intervals, and screws or nail dimples beneath the paint. Concrete block shows a textured, grainy surface with mortar lines. Poured concrete walls are smooth but visibly dense.
Location matters too. In attached garages, the wall shared with the house interior is almost always drywall — often fire-rated Type X drywall, which is 5/8 inch thick. Perimeter walls facing outside are frequently concrete block, especially in older homes.
Why the Wrong Product Causes Real Problems
Spackle and lightweight joint compound are designed for drywall only. Applied to concrete, they won’t bond properly and will crack or pop off within weeks. Conversely, concrete patching compounds like hydraulic cement or masonry filler are too rigid and porous for drywall — they won’t accept paint the same way and leave an obvious patch.
Getting this identification right takes 30 seconds and saves you from buying the wrong drywall patch kit, self-adhesive mesh patch, or concrete repair product entirely.
Repair Method by Hole Size
Hole size determines everything — the tools, the number of coats, and whether DIY is even realistic.

Small Holes: Under 1 Inch
Nail holes, screw pops, and small punctures need nothing more than lightweight joint compound or spackle and a putty knife. Apply a small amount directly into the hole, drag the putty knife flat across the surface to remove excess, and let it dry completely — typically 2 to 4 hours. Sand lightly with 120-grit sandpaper, prime, and paint. One coat usually suffices for holes this size.
Medium Holes: 1 to 6 Inches
This is where a self-adhesive mesh patch earns its place. Press the mesh patch firmly over the hole, then apply lightweight joint compound over it with a 6-inch putty knife in thin, even coats. Thin coats matter — thick applications crack as they dry. Apply 3 coats minimum, sanding with 120-grit between each after the coat dries fully (at least 4 hours per coat). Prime before painting or the repaired area will look visibly different from surrounding drywall.
Large Holes: Over 6 Inches
Holes larger than 6 inches — common with garage wall damage from car impact — require a backing board for structural support. Cut a piece of 2×4 lumber, insert it behind the drywall opening, and screw it in place. Cut a drywall patch to fit, screw it to the backing board, then tape the seams with paper drywall tape and finish with joint compound coats.
If the studs themselves are cracked or the wall feels soft around the damage, stop and call a licensed contractor. That signals moisture damage or structural compromise beyond a patch repair.
Materials, Tools, and Cost Breakdown
Buying the right materials before you start saves a second trip to the hardware store and keeps garage drywall repair cost as low as possible.
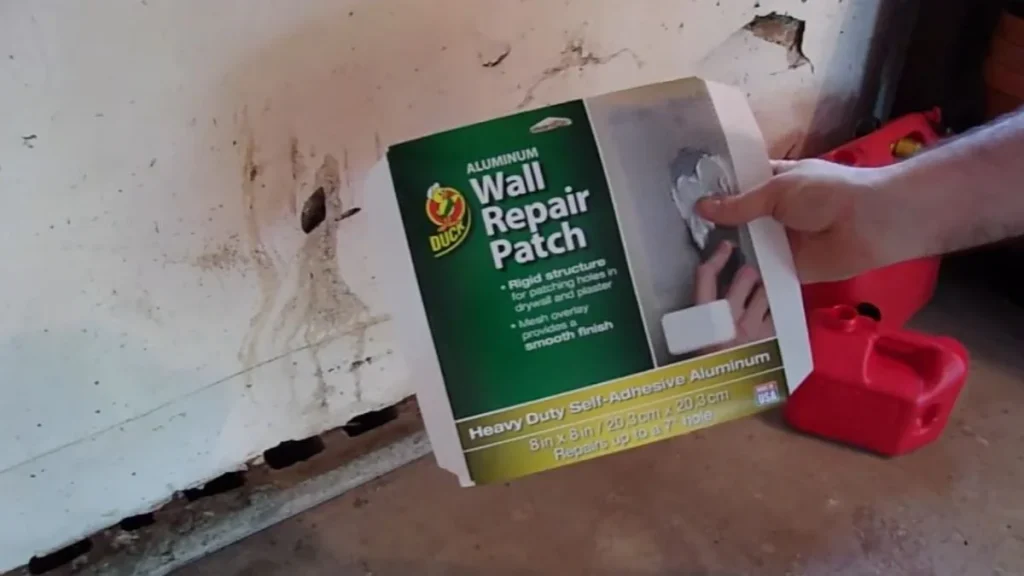
Patch Types: Self-Adhesive vs. Traditional Mesh
A self-adhesive mesh patch — like the 3M High Strength Large Hole Repair Kit — sticks directly over the hole with no additional backing required. It works well for holes up to 5 inches and is the fastest option for most medium repairs. Traditional fiberglass mesh tape requires you to cut it to size and embed it in joint compound, which gives a stronger bond but demands more technique. For holes over 6 inches, traditional mesh with a backing board outperforms any self-adhesive option.
Spackle vs. Joint Compound: Which to Use
Spackle dries faster (30 to 60 minutes) and shrinks less, making it ideal for small holes under 1 inch. Lightweight joint compound — brands like Sheetrock Plus 3 or DAP Wallboard Joint Compound — spreads more smoothly over mesh patches, feathers out to blend with surrounding drywall, and is the correct choice for medium and large repairs.
Tools You Need
- 3-inch putty knife for small holes
- 6- to 8-inch putty knife for medium patches and feathering compound
- 120-grit sandpaper or sanding sponge
- Dust mask (N95 rated) — drywall dust is a respiratory irritant
- Primer and matching paint
Cost Comparison by Repair Size
| Hole Size | DIY Material Cost | Pro Repair Estimate |
|---|---|---|
| Under 1 inch | $5–$10 | $75–$150 |
| 1–6 inches | $15–$30 | $150–$300 |
| Over 6 inches | $30–$60 | $300–$600+ |
Common Garage Wall Damage: Prevention Angles
Fixing the hole is only half the job — understanding what caused it prevents you from repeating the same repair in six months.
Vehicle Impact: The Most Common Cause
Garage wall damage from car impact usually happens at bumper height, roughly 18 to 24 inches from the floor. A single misjudged pull-in can punch straight through standard 1/2-inch drywall. The fix is a parking stop — a rubber or concrete curb stop bolted to the garage floor — which costs $20 to $40 at Home Depot and physically prevents the vehicle from reaching the wall. Wall-mounted parking guides are a second option, using a hanging tennis ball or laser parking sensor to cue the driver to stop.
Settling Cracks and Moisture Damage
Hairline cracks along seams often signal normal house settling and respond well to joint compound alone. Wider cracks — anything over 1/4 inch — or cracks accompanied by soft, crumbling drywall indicate moisture intrusion. Before patching, identify the water source. A patch over active moisture will fail within weeks. Check the garage roof, foundation line, and any plumbing running through adjacent walls.
Upgrading for Long-Term Protection
Standard 1/2-inch drywall is the most vulnerable option for a garage interior. Replacing damaged sections with 5/8-inch Type X drywall adds both impact resistance and fire rating. For corners and edges — the most collision-prone areas — install metal or rubber corner guards, available at Lowe’s for $8 to $15 per piece. Heavy shelving units should anchor directly into studs, not just drywall, to prevent pull-out damage over time.
Troubleshooting Failed Repairs
Most patch failures trace back to one of four mistakes — and every one of them is fixable without starting over from scratch.
Spackle or Joint Compound Cracking Mid-Cure
Cracking almost always means the coat was applied too thick. Lightweight joint compound shrinks as water evaporates during drying, and anything over 1/8 inch per coat will crack before it cures fully. Scrape out the cracked material with a putty knife, let the area dry completely, and restart with thinner coats. Cold garage temperatures below 55°F also slow curing and cause uneven shrinkage — keep the space above 60°F during application and drying.
Patch Lifting or Bubbling Under Paint
A self-adhesive mesh patch lifts when the wall surface wasn’t clean before application. Dust, grease, and paint flakes all break the adhesive bond. If bubbling appears after painting, the patch wasn’t fully embedded in joint compound — the mesh needs full coverage, not just a skim coat over the top. Sand the area down, re-embed with a proper compound layer, and re-feather the edges.
Paint Color Matching and Primer Selection
Skipping primer is the single most common reason a patched area looks visibly different from the surrounding wall. Joint compound is highly porous and absorbs paint unevenly, creating a dull, flat spot called flashing. Apply one coat of PVA drywall primer — Zinsser or Kilz both work well — before any topcoat.
For color matching, take a 2-inch paint chip cut from an inconspicuous area to a Home Depot paint desk. Their spectrophotometer color-matching system identifies the formula within seconds and produces a near-exact match even on older painted walls.
If the wall is cinder block specifically, here’s a more targeted repair guide.
Ready to Patch Your Garage Wall
Hole size determines your entire repair path — get that assessment right first and the rest of the process follows a straight line. Measure your hole right now, then pick up a self-adhesive mesh patch kit and a quart of lightweight joint compound at your nearest Home Depot or Lowe’s for under $30. That single supply run covers the majority of garage wall repairs most homeowners will ever face.