Running a Subpanel to Your Garage: The Complete Guide

A single 15-amp circuit — standard in most garages — gets eaten alive the moment you run a table saw and shop vac at the same time, and running a subpanel to your garage is the permanent fix.
Most homeowners stall at this project because the questions stack up fast: What size panel do you actually need? What does the National Electrical Code require? How much will this cost, and is any of it legal to DIY?
This guide gives you a code-compliant roadmap covering load calculations, wire sizing, grounding requirements, permit realities, and an honest breakdown of what you can do yourself versus what a licensed electrician should handle.
Do You Need a Garage Subpanel?
Not every garage needs a subpanel. The right answer depends on how much power you actually use and plan to use.
Signs Your Garage Needs a Power Upgrade
A subpanel makes sense when your existing circuits can’t keep up. Common indicators include:
- You’re running 2 or more high-draw tools simultaneously — a table saw draws 12–15 amps alone, and adding a dust collector or air compressor immediately overloads a standard 20-amp circuit
- Your circuit breaker trips regularly under normal workshop use
- Your planned equipment — a welder, paint booth, or EV charger — exceeds what a single 20-amp circuit can support
- You want room to grow without rewiring again in two years
When a Single Circuit Is Enough
If your garage use is light — occasional hand tools, a drill, basic LED lighting — a dedicated 20-amp circuit added to your main panel is simpler and cheaper than a full garage workshop electrical upgrade. A subpanel only pays off when your total load consistently pushes past 30–40 amps.
Attached vs. Detached Garage: Key Differences
This distinction changes your entire installation plan.
An attached garage shares the same structure as your home, so conduit runs are shorter, grounding is simpler, and material costs stay lower.
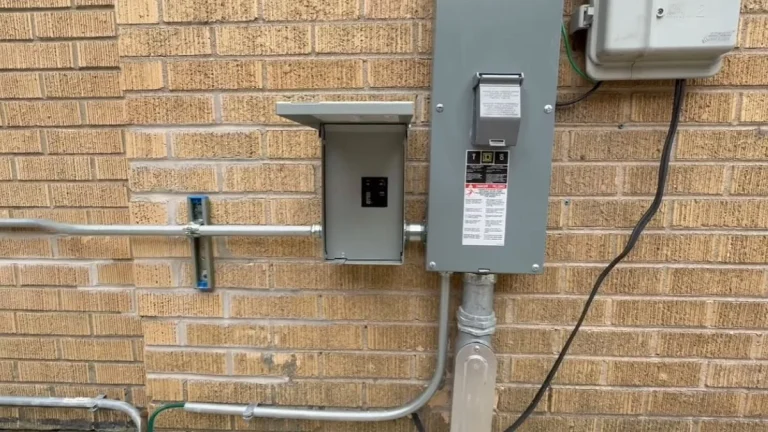
A detached garage is treated as a separate structure under NEC Article 225, which governs outside branch circuits and feeders. This means you need a 4-wire feeder installation (two hots, one neutral, one ground), a ground rod at the detached structure, and outdoor-rated materials or underground conduit rated for direct burial. Skipping the ground rod is one of the most common code violations inspectors catch.
Not sure which panel size or amperage you need first? Start with this guide.
Electrical Code & Sizing Requirements
Getting the sizing and code compliance right before you buy a single piece of wire saves you from failed inspections and genuine safety hazards.
NEC Rules That Apply to Garage Subpanels
Two NEC articles govern most garage subpanel installations. Article 225 covers detached garage electrical service — any structure fed by a feeder from another building. Article 230 applies when an attached garage receives its own service entrance directly from the utility. For most DIY installs, Article 225 is the relevant one.
The 80% rule is non-negotiable: the continuous load on any circuit breaker cannot exceed 80% of its amperage rating. A 60-amp subpanel breaker can carry no more than 48 continuous amps.
Neutral and ground separation in the subpanel is mandatory — and one of the most common DIY mistakes. In your main panel, neutral and ground share a bus. In the subpanel, they must connect to separate bars. Bonding them together in the subpanel creates a shock hazard and guarantees a failed inspection.
Calculating the Right Amperage for Your Garage
Start by listing every tool and appliance you plan to run, with wattage ratings from the nameplate. Divide watts by 240 to get amps for 240V equipment. Apply a demand factor — not everything runs at full load simultaneously — then add 25% for future capacity.
- 60-amp subpanel: sufficient for a moderate workshop with a table saw, dust collector, and basic lighting
- 100-amp subpanel: recommended for welders, large air compressors, EV chargers, or any combination of heavy 240V tools
When in doubt, size up. The cost difference between a 60-amp and 100-amp subpanel is modest compared to upgrading later.
4-Wire Feeder Specifications
A code-compliant 4-wire feeder installation requires two hot conductors, one neutral, and one separate ground. Wire gauge depends on distance and amperage rating:
| Amperage | Max Distance | Minimum Wire Gauge |
|---|---|---|
| 60 amp | Up to 100 ft | 6 AWG copper |
| 60 amp | 100–200 ft | 4 AWG copper |
| 100 amp | Up to 100 ft | 4 AWG copper |
| 100 amp | 100–200 ft | 2 AWG copper |
For above-ground runs, 1-inch outdoor-rated EMT conduit handles most residential feeder cables comfortably. Underground conduit specifications require a minimum burial depth of 18 inches in rigid PVC or Schedule 40 conduit — deeper in areas with heavy frost. Use standard color coding throughout: black and red for hot conductors, white for neutral, bare copper for ground, and label all wire ends at both panels.
Step-by-Step Installation & Grounding
Installation order matters here. Rushing the sequence — especially grounding — is how code violations and shock hazards happen.
Connecting the Feeder at the Main Panel
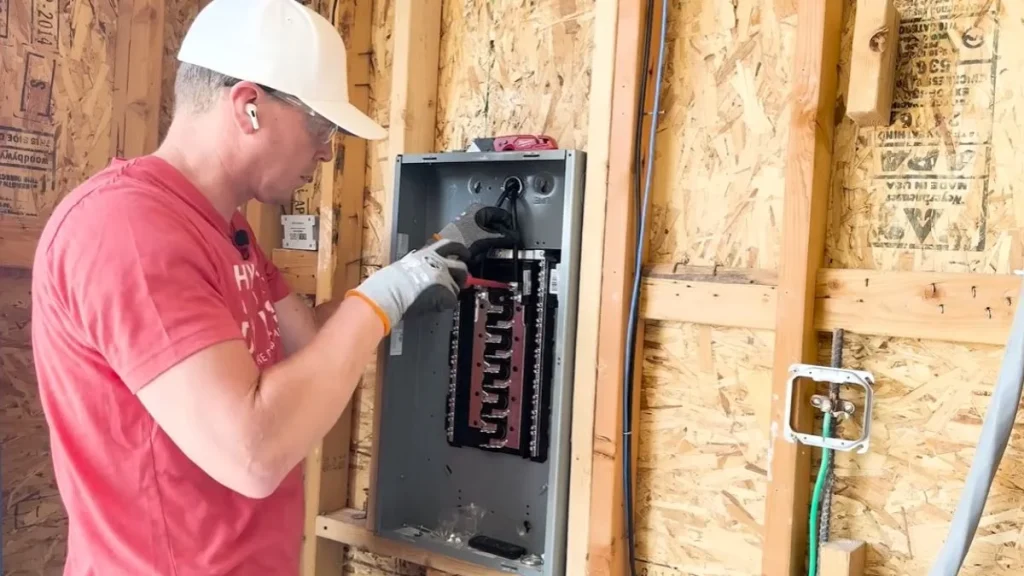
Start by installing a double-pole breaker in your main panel sized to match your feeder wire gauge — a 60-amp breaker for 6 AWG copper, a 100-amp breaker for 4 AWG copper. Pull the feeder cable through conduit continuously, with no splices mid-run. Splicing inside conduit is a code violation under NEC Article 300.
At the main panel connection, use the correct lug size for your wire gauge and torque all terminals to the manufacturer’s specification — typically 35 in-lb for 6 AWG and 50 in-lb for larger conductors. Under-torqued connections arc and generate heat over time.
Wiring the Subpanel Interior
Mount the subpanel enclosure first, then pull your feeder through. Connect the two hot conductors to the main lugs, white neutral to the neutral bus, and bare copper ground to the ground bus. The ground bus must bond directly to the subpanel enclosure.
Here’s the critical difference from your main panel: the neutral bus and ground bus must remain completely isolated from each other. Most subpanels ship with a bonding screw or strap connecting the two — remove it before energizing.
Size each individual circuit breaker to match its load: a 15-amp breaker for lighting circuits, a 20-amp breaker for receptacle circuits, and a dedicated 30- or 50-amp double-pole breaker for 240V tools.
Grounding by Garage Type
Grounding requirements differ significantly between attached and detached structures.
For an attached garage, bond the subpanel ground wire back to the main panel ground bus. No ground rod is required.
For a detached garage, NEC Section 250.32 requires dual grounding: an 8-foot ground rod driven at the structure AND a ground conductor running back to the main panel through the feeder. Both connections are mandatory — the ground rod alone is not sufficient.
After driving the ground rod, verify resistance with a ground resistance tester. NEC recommends 25 ohms or less. If resistance exceeds that threshold, drive a second rod at least 6 feet away and bond both together.
4 Installation Mistakes That Fail Inspections
- Bonding neutral to ground in the subpanel — creates a return path on the ground wire and a shock hazard on metal enclosures
- Undersized feeder wire for the run distance — voltage drop increases with distance; recalculate for any run over 100 feet
- Unprotected conduit above ground — EMT conduit must be secured every 10 feet and protected from physical damage at vulnerable points
- Missing ground rod at detached structures — inspectors check for this first; it is the single most common detached garage electrical service violation
Cost Breakdown & Professional vs. DIY
A garage subpanel installation typically costs $500–$1,500 in materials alone, and $1,200–$4,000 total when hiring a licensed electrician — depending on distance, amperage, and whether conduit goes underground.
Typical Material Costs
| Item | Estimated Cost |
|---|---|
| Subpanel enclosure (60–100 amp, 12–24 space) | $80–$200 |
| Double-pole feeder breaker (main panel) | $25–$60 |
| 6 AWG or 4 AWG feeder cable (per 100 ft) | $80–$200 |
| 1″ EMT conduit + fittings (per 100 ft) | $60–$150 |
| Schedule 40 PVC underground conduit (per 100 ft) | $50–$120 |
| Ground rod + clamp | $20–$40 |
| Miscellaneous breakers, wire, connectors | $50–$150 |
Prices vary by region and supplier. Big-box retailers like Home Depot and Lowe’s stock most of these materials, but electrical supply houses like Graybar or Rexel often offer better pricing on bulk wire and conduit.
Labor Costs When Hiring an Electrician
Most licensed electricians charge $75–$150 per hour for residential work, with a typical garage subpanel installation taking 4–8 hours. Underground conduit routing adds $500–$1,000 to the job due to trenching labor. Expect to pay a service call fee of $50–$100 on top of hourly rates in most markets.
A complete professional installation — materials plus labor, including permits — typically lands between $1,500 and $4,000 for a detached garage with underground conduit, and $1,000–$2,500 for an attached garage with above-ground EMT conduit runs.
What You Can Realistically DIY
The honest breakdown looks like this:
- Conduit installation and wire pulling: moderate difficulty, well within reach for a careful DIYer comfortable with basic tools
- Subpanel interior wiring: moderate, provided you understand neutral and ground separation and breaker sizing
- Main panel to subpanel connection: high risk — the main panel lugs remain live even with the main breaker off, and contact with them is potentially fatal; most jurisdictions require a licensed electrician for this step
In practice, a hybrid approach works well: pull your own conduit, run the feeder wire, and wire the subpanel interior, then hire an electrician for the main panel connection only. This cuts labor costs significantly while keeping the most dangerous step in professional hands.
Permits and Inspection Timeline
Pull a permit before starting — not after. Most jurisdictions require one for any new feeder installation, and unpermitted electrical work creates liability issues when you sell the home.
Permit fees typically run $50–$200 depending on the municipality. Inspections usually happen at 2 points: rough-in (conduit in place, before wire is pulled) and final (all wiring complete, panel labeled). Approval turnaround runs 1–2 weeks in most areas, though busy municipalities can take longer. Call your local building department first to confirm their specific process.
Ready to Power Your Workshop Safely
The single decision that determines whether this project is safe and legal is keeping the main panel connection in the hands of a licensed electrician — every other step is manageable for a prepared DIYer. Start today by listing every tool and appliance you plan to run in the garage, calculating your total amperage load using the method in Section 3, and calling your local building department to confirm permit requirements before buying a single piece of conduit.