How to Seal a Garage Door from Mice
A mouse can squeeze through a gap as small as a quarter-inch — meaning standard rubber weatherstripping, which shrinks and cracks over time, leaves most garage doors effectively open to rodents year-round.
The real frustration for homeowners is discovering that basic door sweeps and foam seals fail within a single season, forcing repeated replacements while mice keep finding the same entry points along the bottom and sides of the door.
This guide covers exactly how to seal a garage door from mice using proven materials, specific product recommendations, and step-by-step methods that hold up long-term — so you can stop patching the same gaps and start keeping rodents out for good.
Why Standard Garage Door Seals Fail Against Mice
Most garage door weatherstripping is engineered for one job: blocking wind and rain. Rodent exclusion is an entirely different engineering problem.
How Mice Exploit Weatherstripping
Standard rubber and foam weatherstripping compresses permanently after months of door cycling. Once compressed, the seal no longer makes full contact with the floor or door frame — and that partial gap is all a mouse needs.
Here’s what makes it worse. Mice actively test entry points. They return to the same location repeatedly, gnawing at rubber and foam until the gap widens enough to pass through. Neither material offers meaningful chew resistance. Steel wool and metal reinforcement — the materials that actually stop gnawing — are absent from every standard weatherstripping product sold at big-box hardware stores.
Adhesive weatherstripping faces the same vulnerability. Even a weatherproof adhesive garage door seal degrades under UV exposure and temperature swings, pulling away from the door frame and reopening gaps at the sides and corners.
Why Rodents Target Garage Doors
Garage doors are the largest unmonitored gap in most homes. The bottom seal and side seals move constantly, wearing faster than any other exterior seal on the structure. According to the National Pest Management Association, rodents most commonly enter structures at ground level through gaps smaller than a dime.
Garages also offer immediate rewards: stored birdseed, pet food, cardboard boxes for nesting, and direct access to the home interior. That combination makes the garage door the first gap mice test — and standard weatherstripping the weakest line of defense you have.
Complete Garage Door Inspection & Sealing Process
Effective mouse exclusion starts with a methodical inspection — not guesswork. Sealing one gap while missing three others wastes both time and materials.
Identifying All Mouse Entry Points
Inspect the garage door in four zones, working top to bottom:
- Bottom seal: Crouch at floor level and look for daylight under the closed door. Any visible light means a gap large enough for mice. Pay attention to the corners, where bottom seals rarely make full contact with uneven concrete.
- Side seals: Press the garage door side seal along its full length. Compressed or cracked sections no longer create a continuous rodent barrier. Gaps wider than a quarter-inch are active entry points.
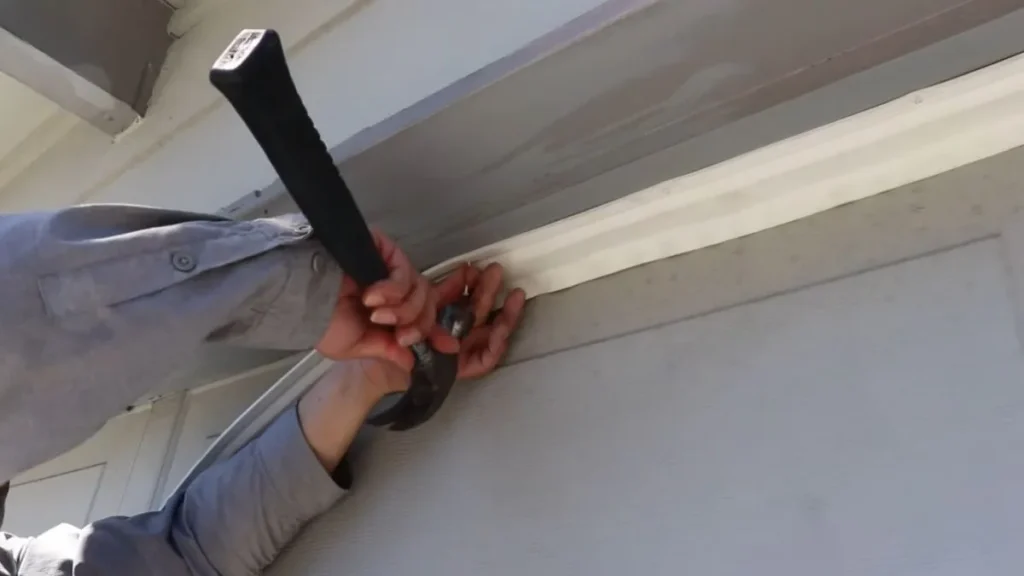
- Top seal: Check where the door panel meets the frame header at the top. This area is frequently overlooked in DIY garage door mouse prevention.
- Utility penetrations: Electrical conduit, water lines, and cable pass-throughs cut into garage walls or the door frame itself are common mice entry points that no weatherstripping product addresses on its own. Use garage door caulk or steel wool packed tightly into these gaps before applying a permanent sealant over the top.
Step-by-Step Sealing Walkthrough
Tools needed: caulk gun, utility knife, tin snips, tape measure, wire brush, and your chosen chew-resistant materials.
- Clean all surfaces with a wire brush to remove dirt, old adhesive, and deteriorated foam.
- Measure each gap precisely before cutting replacement weatherstripping or metal reinforcement strips.
- Install the bottom seal first — it carries the heaviest wear load and sets the baseline for side seal alignment.
- Apply side seals from bottom to top, pressing firmly for full adhesion along the door frame.
- Close the door and run a flashlight along every seam in a darkened garage. Any light bleed indicates an incomplete seal.
- Apply pressure by hand to each seal section. A properly installed rodent-proof garage door bottom seal should resist compression without creating new gaps at adjoining sections.
Rodent-Proof Seals: Materials & Product Solutions
Material choice is the single biggest factor in whether a garage door seal holds up against mice. The wrong material fails regardless of how well it’s installed.
Stainless Steel Reinforced Barriers vs. Standard Rubber
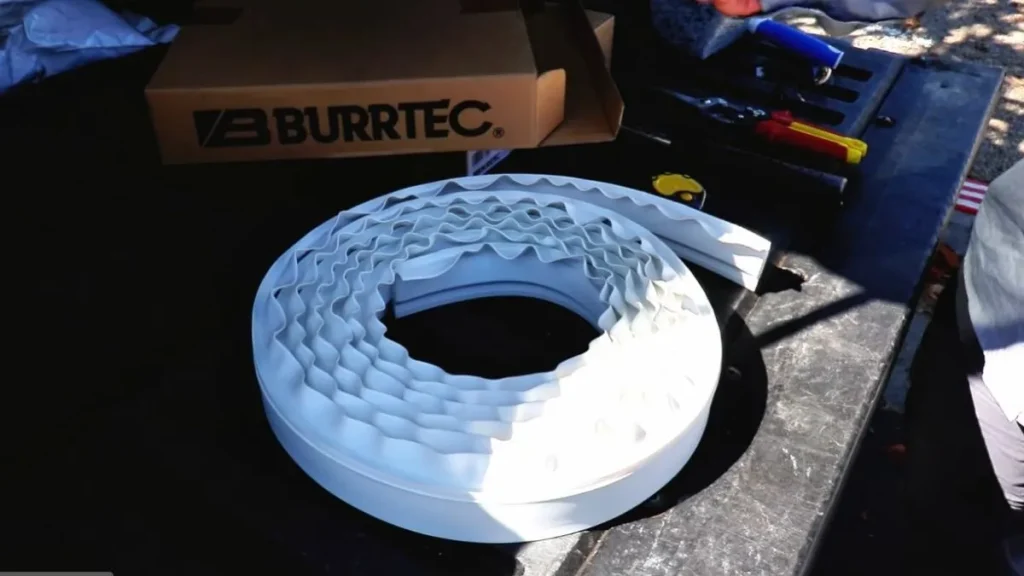
Mice cannot chew through stainless steel mesh or metal-backed seals. Their incisors, while strong enough to gnaw through rubber, foam, and even soft wood, cannot penetrate interlocked stainless steel fill material. Standard rubber bottom seals, by contrast, typically show gnaw damage within 60 to 90 days in active rodent pressure areas.
The Xcluder Garage Door Rodent Shield is the most widely recognized metal-reinforced option on the market. It combines a poly-fiber and stainless steel mesh fill inside a flexible carrier strip, making it both weatherproof and chew-resistant without requiring structural modifications. The cost premium — roughly 3 to 4 times the price of a standard rubber bottom seal — is justified when you factor in replacement frequency. A standard rubber seal in a high-traffic garage may need annual replacement; a stainless steel reinforced barrier typically lasts 5 or more years.
Best Garage Door Seals Comparison
| Product Type | Chew Resistance | Avg. Lifespan | Price Range | Best For |
|---|---|---|---|---|
| Xcluder Rodent Shield | Excellent | 5+ years | $40–$70 | Active rodent pressure |
| Stainless steel threshold seal | Excellent | 7–10 years | $50–$90 | Uneven concrete floors |
| Rubber bottom seal (standard) | Poor | 1–2 years | $15–$30 | Weather only |
| Foam adhesive weatherstripping | Poor | 6–12 months | $8–$20 | Temporary gap filling |
| Steel wool + caulk (DIY) | Good | 2–3 years | $5–$15 | Side gaps and penetrations |
For side gaps specifically, a weatherproof adhesive garage door seal combined with steel wool packed behind it outperforms foam alone at a fraction of the cost of full replacement side seals. Home Depot’s Frost King brand offers adhesive vinyl side seal options, but none include metal reinforcement — making them a weather solution, not a pest exclusion solution.
Budget vs. Premium: Cost-Benefit Analysis
Spending $15 on a rubber seal that fails in one season costs more over five years than spending $60 on a stainless steel solution once. The math on mouse exclusion almost always favors the premium option.
DIY Interim Fixes
Steel wool packed into garage door gaps and secured with garage door caulk is the most cost-effective immediate rodent barrier available — total material cost runs $5 to $15. It works because mice cannot chew through tightly packed steel wool without shredding their gum tissue. The limitation is longevity: steel wool oxidizes and compresses over 2 to 3 years, requiring inspection and replacement. Deterrent sprays add no structural exclusion value and should not substitute for physical gap sealing.
Mid-Range Adhesive Kits
Weatherproof adhesive garage door seal kits from brands like Frost King or M-D Building Products run $20 to $35 and install without tools. They handle weather competently but offer no meaningful chew resistance. In moderate rodent pressure areas, these are a functional 2-year solution — acceptable if you’re renting or treating a secondary structure.
Premium Stainless Steel Solutions
The Xcluder Rodent Shield and comparable stainless steel garage door seal products carry a higher upfront cost but eliminate the replacement cycle that makes cheaper options expensive over time.
Climate is a real variable here. In freeze-thaw regions — the upper Midwest, New England, mountain states — rubber and foam seals degrade significantly faster as repeated expansion and contraction breaks down adhesive bonds and seal compression. In those climates, the case for metal reinforcement is even stronger: a stainless steel threshold seal maintains its rodent barrier integrity through temperature extremes that destroy standard weatherstripping within a single winter.
When Sealing Alone Isn’t Enough
Sealing a garage door stops new mice from entering. It does nothing to address mice already living inside your garage or home. These are two separate problems requiring two separate strategies.
Troubleshooting Failed Sealing Attempts
If mice are still appearing after a full garage door gap sealing effort, run through this diagnostic checklist before assuming the seal failed:
- Check for interior infestation first. Droppings near walls, chewed food packaging, or nesting material in stored boxes all indicate an established population inside — not an exclusion failure. A sealed door cannot solve an interior infestation.
- Re-inspect the full door perimeter. Use the flashlight test again at night. Mice entering through a side seal gap or a missed utility penetration will appear to be “getting past” the bottom seal when the real entry point is elsewhere.
- Examine the door frame itself. Wood frames with rot or soft spots allow mice to chew new entry points adjacent to even a properly installed rodent-proof garage door bottom seal. Metal reinforcement at the seal contact zone doesn’t help if the surrounding frame is compromised.
- Look beyond the garage door entirely. Foundation cracks, vents without screens, and gaps around exterior pipes are common alternative entry points that redirect rodent traffic once the garage door is properly sealed.
Integration with Broader Pest Control
Physical exclusion through chew-resistant materials is the foundation of effective mouse prevention — but it works as part of a system. Pair sealed garage doors with snap traps placed along interior walls to eliminate any mice already inside. Remove food attractants: store birdseed, pet food, and grass seed in sealed metal containers. According to the National Pest Management Association, eliminating food sources and entry points together reduces rodent activity more effectively than either method alone. If activity persists after 2 to 3 weeks of combined exclusion and trapping, contact a licensed pest management professional for a full structure assessment.
Move Forward with Confidence
The gap between a standard rubber seal and a stainless steel reinforced barrier is the difference between a fix that lasts one season and one that lasts a decade. Start today by closing your garage door, running a flashlight along the full perimeter in a darkened garage, and ordering an Xcluder Rodent Shield to replace whatever bottom seal is currently failing.
Pair that with steel wool and caulk at any utility penetrations, set snap traps along interior walls, and remove every food source — that combination stops mice where a seal alone cannot.