Why Ceiling Joists Change Direction in Garages: A Framing Guide
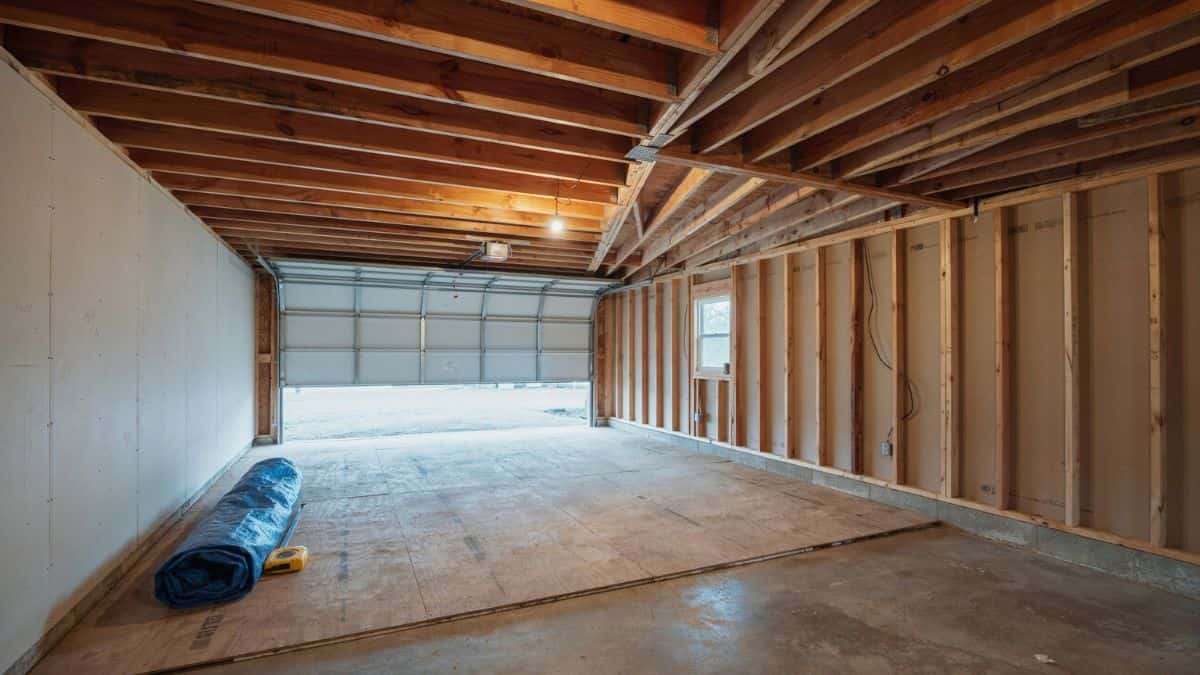
Ceiling joists change direction at the back of the garage door opening because the framing must transfer roof loads around the largest structural gap in the entire garage — and missing this detail causes failed storage installations, cracked drywall, and improperly mounted garage door openers.
Most homeowners drilling into a garage ceiling have no idea which direction their joists run, how far they span, or why the layout shifts near the door header.
This guide gives you a clear, code-aware explanation of joist directionality so you can plan storage, repairs, or opener mounts safely.
Structural Reason for Direction Changes
The direction your ceiling joists run is not a random contractor choice — it follows the load path, meaning the route structural forces travel from the roof down to the foundation.
Load Paths at Garage Door Openings
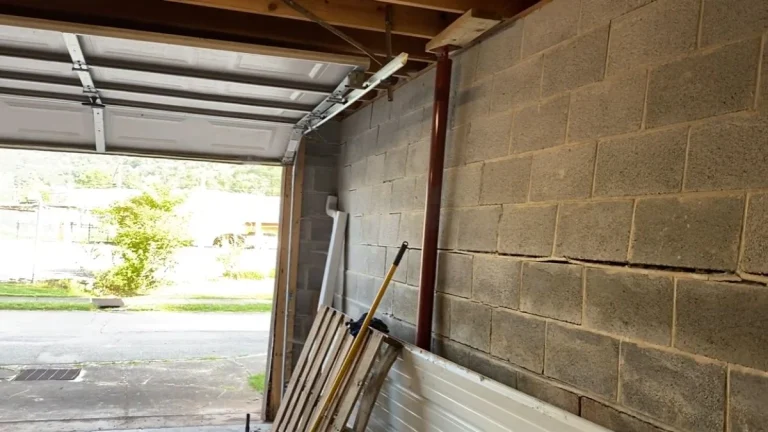
A garage door opening can span 8, 9, 16, or even 18 feet. No single joist can bridge that gap unsupported. So builders install a header beam — a doubled or engineered lumber beam that spans the full width of the opening and carries the roof load above it.
Joists then run perpendicular to that header, bearing down on it at one end and on the opposite wall’s top plate at the other. This perpendicular orientation is the most efficient way to distribute weight across the header without concentrating stress at a single point. The result is a classic garage ceiling framing pattern where joist orientation shifts at the door wall relative to the rest of the structure.
Header Beams vs. Continuous Joist Runs
In rooms without large openings, joists often run continuously from one bearing wall to the other in a single uninterrupted direction. Garages break that pattern because the door opening eliminates the bearing line — the structural edge where joist ends rest and transfer load downward.
The International Residential Code (IRC), specifically Table R802.4, sets maximum joist spans based on lumber size, species, and spacing. A 2×6 joist at 16 inches on center, for example, can span roughly 9 to 11 feet depending on wood species — which is why wider garages require a mid-span bearing beam or a direction change that shortens individual joist runs.
When the framing layout accounts for these span limits, the ceiling joists change direction at the back of the garage door to stay within code-compliant lengths while keeping the header from becoming overloaded.
Identifying Joist Direction in Your Garage Ceiling
Knowing how to locate ceiling joists before drilling or mounting anything is the single most practical skill in garage ceiling work. The good news is you can confirm joist direction in most garages without opening up the ceiling.
Visual Inspection Without Tools
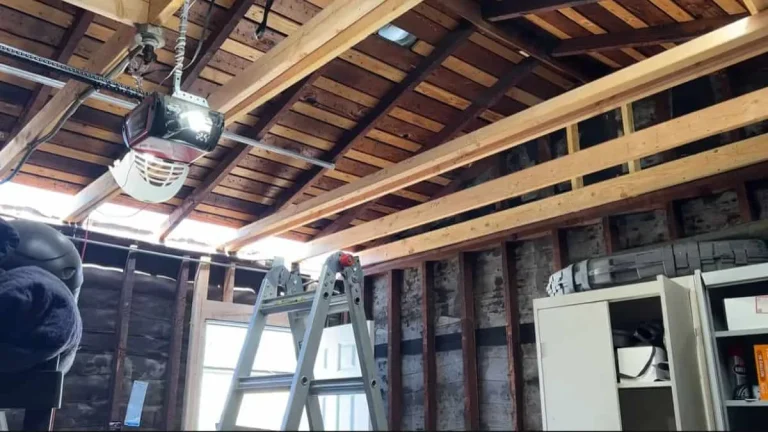
Start at the walls. In an unfinished or partially finished garage, joist ends are often visible where the framing meets the top plate of each wall. The wall where joist ends land is the bearing line — that tells you immediately which direction the framing runs.
If the ceiling is drywalled, look for two other clues. First, rows of drywall screws or nails form straight lines running parallel to the joists beneath them — these lines are spaced 16 or 24 inches apart in a consistent garage ceiling framing pattern. Second, check the attic above the garage if accessible. The framing layout is fully exposed there, making joist orientation unmistakable.
Practical Detection Methods
A stud finder set to “joist” or “deep scan” mode is the fastest electronic method. Run it across the ceiling in a slow, steady line perpendicular to the direction you suspect the joists run. Mark each hit with painter’s tape, then confirm the spacing — 16 inches on center is standard for load-bearing garage ceilings, though 24 inches appears in some older or lightly loaded framing.
Tools like the Franklin Sensors ProSensor 710 detect multiple joists simultaneously, which removes guesswork about whether a single reading is accurate. Once you identify two confirmed joist locations at consistent spacing, you can measure forward across the entire ceiling and predict every remaining joist position without re-scanning. This method also reveals exactly where ceiling joists change direction at the back of the garage door, because the spacing pattern will shift or the scan will return no hits in the transition zone near the header beam.
Load-Bearing Reality and Safety Implications
Not every garage ceiling joist carries structural weight, and confusing a non-load-bearing joist with a load-bearing one is how storage rack installations fail — sometimes dangerously.
Determining If Joists Carry Structural Weight
In many single-story garages, the ceiling joists function primarily as collar ties — they resist outward wall spread rather than supporting floor loads above. This is especially common in detached garages with simple gable roofs. However, in garages below a living space or bonus room, the joists are true floor joists and carry significant live and dead loads.
The distinction matters enormously for storage planning. A non-load-bearing 2×6 joist at a 10-foot span may safely support only 10 to 15 pounds per linear foot before deflection becomes a structural concern. A load-bearing joist of the same size is engineered to handle 40 to 50 pounds per linear foot. Misidentifying joist type leads to overloading, and the direction change zone near the header beam is already a higher-stress area in the framing layout.
Storage Installation Around Directional Shifts
The zone where ceiling joists change direction at the back of the garage door is not the place to anchor your heaviest storage rack. Joist ends near the header bear concentrated load from the roof above, leaving less reserve capacity for added weight below.
Fastener selection must match joist orientation and load type. Lag bolts — typically 5/16-inch or 3/8-inch diameter — are appropriate for overhead storage systems where shear force is the primary concern. Carriage bolts work better when you’re bolting through a joist with a nut on the opposite side for a permanent fixture.
When a storage rack spans the directional shift zone, cross-bracing between joists is required to distribute weight evenly across the framing. Products like the Fleximounts GR48 overhead storage system include lateral stabilizer bars specifically because rack designers understand that joist spacing installation in garages isn’t always consistent near openings.
Working Around Direction Changes
The direction change zone in a garage ceiling framing pattern is not a dead zone — it just requires deliberate reinforcement before you add load to it.
Retrofitting and Reinforcement Options
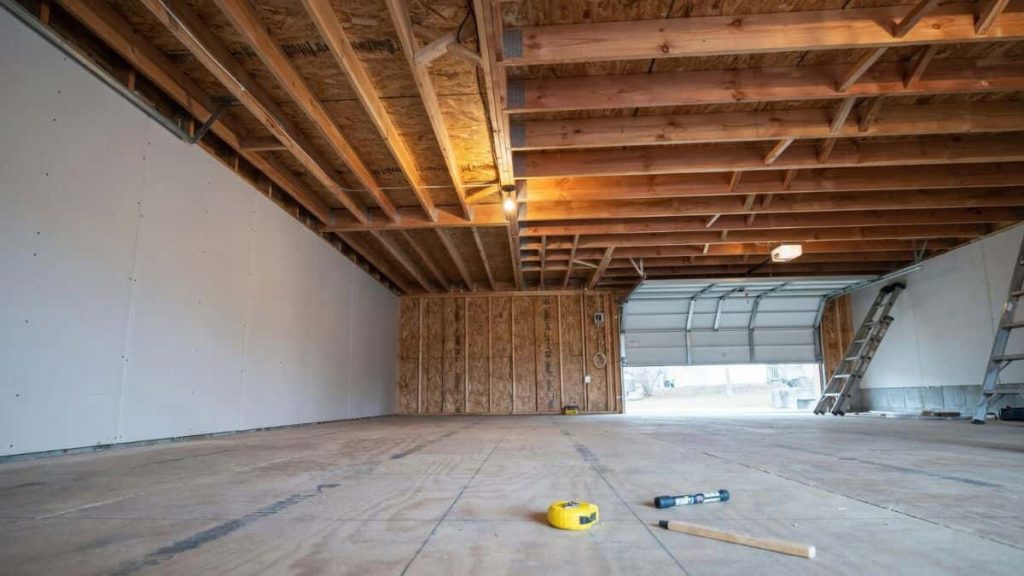
Sister joists are the most common fix for a weak or undersized joist span. The process involves cutting a new joist to the same length as the existing one, sliding it tight against the original, and fastening the two together with structural screws or nails every 12 inches along the full length. Sistering effectively doubles the load capacity of that joist run without touching the rest of the framing layout. This is particularly useful when ceiling joists change direction at the back of the garage door and the existing members are 2x4s — undersized by modern standards for any real storage load.
Blocking solves a different problem. When storage or mounting hardware must span across joists running in two different directions, solid wood blocking installed perpendicular between joist ends creates a continuous bearing line across the transition zone. Use 2x lumber matching the joist depth, face-nail it with 16d nails or structural screws, and you’ve created a stable attachment surface regardless of the underlying joist orientation load bearing differences.
Structural engineer consultation is not optional for major modifications — it’s the right call any time you’re adding more than 200 pounds of concentrated load to a ceiling, removing a section of framing near the header beam, or working in a garage beneath a living space. Engineers like those credentialed through the Structural Engineering Institute can assess your specific joist span, wood species, and load path conditions in a single site visit, producing a written load calculation that protects you legally and structurally.
Mounting Garage Door Openers With Joist Changes
A garage door opener needs a solid, straight anchor point running from the header wall back toward the rear of the garage — and that path runs directly through the zone where ceiling joists change direction at the back of the garage door.
Low-Headroom Kits as an Alternative to Ceiling Attachment
Standard opener installation assumes a continuous joist running parallel to the opener rail from front to back. When the framing layout includes a directional shift, that continuous joist often doesn’t exist in the right position. Rather than forcing a mount into a weak or perpendicular joist, low-headroom kits reposition the entire drive mechanism. Chamberlain, LiftMaster, and Genie all manufacture low-headroom conversion kits that shift the opener’s attachment point to the side wall or header frame instead of the ceiling joists. This completely sidesteps the joist orientation problem and is code-compliant in most jurisdictions.
Bracket Angle Adjustment at Directional Transition Points
When ceiling mounting is the only option, the bracket angle becomes critical. Standard mounting straps assume a joist running parallel to the rail — typically perpendicular to the garage door opening. At a directional transition point, the nearest joist may run at 90 degrees to that assumption.
Here’s the problem. Lag-bolting into the face of a joist instead of its top edge dramatically reduces pull-out strength. The correct fix is to install a 2×6 or 2×8 cross-member spanning between two solid joists on either side of the transition zone, creating a new bearing line perpendicular to the opener rail. Fasten that cross-member with structural joist hangers, then mount the opener bracket to it using 5/16-inch lag bolts with a minimum 1.5-inch embedment into the lumber. This approach maintains full load path integrity regardless of the underlying garage ceiling framing pattern.
Next Steps for Your Garage Project
Every safe garage ceiling project starts with confirming joist direction and load designation before a single fastener goes in. Take a stud finder across your ceiling today, mark every joist with painter’s tape, and note exactly where the spacing pattern shifts near the door header.
If that zone is where you plan to hang storage or mount an opener, add blocking or sister joists before proceeding — or call a structural engineer for a load calculation.