Adding a Bay to Your Garage: Costs, Steps & Contractor vs DIY

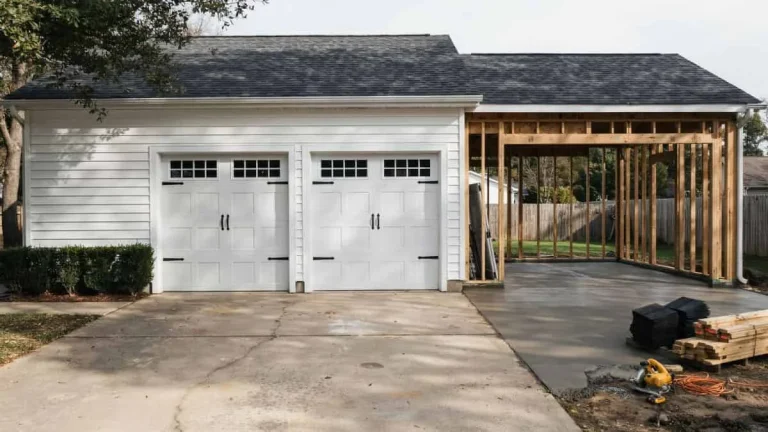
Adding a bay to an existing garage typically costs between $15,000 and $35,000 — a significant investment that catches most homeowners off guard.
The real challenge isn’t just the money: it’s not knowing whether your lot, foundation, and local zoning even allow expansion before you spend a dollar on plans or permits.
This guide gives you a complete roadmap — real cost breakdowns, permit requirements, structural considerations, and an honest contractor-vs-DIY comparison — so you can make a confident, informed decision before your first contractor call.
Cost Breakdown for Adding a Bay
A single-bay garage expansion typically runs $15,000–$35,000 for an attached addition, with the garage expansion cost per square foot landing between $60 and $120 across most U.S. markets. A standard garage stall measures 10–12 feet wide by 20–24 feet deep, so you’re adding roughly 200–288 square feet to your existing garage footprint.
Detached additions cost 10–20% more than attached ones due to independent foundation work, separate roofing, and the need to run new utility connections from scratch.
Average Costs by Region
Labor and material rates vary sharply by geography. In high-cost markets like California and New York, the same bay expansion that costs $25,000 in the Midwest can run $40,000–$55,000. Permit fees follow a similar pattern — suburban jurisdictions in Texas or Ohio typically charge $500–$1,500, while cities like San Francisco or Seattle can charge $3,000–$8,000 for the same structural extension.
Material costs are more stable nationally, but local lumber prices and concrete rates still add 15–25% in supply-constrained regions.
Hidden Costs Homeowners Miss
This is where budgets break down.
- Site prep and foundation work: If your existing slab needs reinforcement or the ground requires grading, expect $2,000–$6,000 in overages before framing starts.
- Electrical upgrades: Adding a vehicle storage addition almost always requires a panel upgrade or new dedicated circuits — typically $800–$2,500.
- Roof pitch matching: Blending the new roofline with your existing structure is labor-intensive. Mismatched pitch corrections add $1,500–$4,000 to framing costs.
- Utility relocation: If a gas line, water line, or HVAC duct runs through the expansion zone, relocation adds $1,000–$3,500.
Budget a 15–20% contingency on top of your baseline estimate for any structural extension project.
If you’re specifically going from a two-car to a three-car garage, here’s what that project tends to cost.
Planning and Design Before You Start
Before any framing or permits, you need to confirm that your property can physically and legally accommodate a bay expansion. Two factors kill more garage addition projects than any other: setback violations and incompatible foundations.
Standard bay dimensions run 10–12 feet wide by 20–24 feet deep. A side-by-side addition extends your garage laterally, while a tandem garage addition extends it front-to-back, adding depth rather than width.
Structural Compatibility Assessment
Start with your foundation. A poured concrete slab in good condition can typically support a structural extension with minimal reinforcement. A cracked or settling slab needs professional evaluation before any addition proceeds — skipping this step leads to expensive corrections mid-project.
Check your roof pitch next. A mismatched pitch between the existing structure and the new bay forces custom framing work that adds cost and complexity. Matching a 6/12 pitch to an existing 4/12, for example, requires a structural engineer’s input in most jurisdictions under International Code Council (ICC) residential building standards.
Finally, assess your electrical panel. Most single-car garages run a 15- or 20-amp circuit. A vehicle storage addition with lighting, outlets, and an EV charger needs 100-amp subpanel capacity at minimum.
Tandem vs. Side-by-Side Configuration
Side-by-side layouts require 10–12 additional feet of lot width and are the more common choice for adding a third bay to an existing garage. They keep all vehicles independently accessible.
Tandem configurations need only 20–24 additional feet of depth, making them ideal for narrow lots. The trade-off is real: the rear vehicle is always blocked by the front one, which frustrates daily drivers but works well for seasonal or project vehicle storage.
| Configuration | Added Footprint | Independent Access | Best For |
|---|---|---|---|
| Side-by-side | 200–288 sq ft wide | Yes | Daily-use vehicles |
| Tandem | 200–288 sq ft deep | No | Seasonal/storage use |
Permits and Legal Requirements
No permit, no protection. Unpermitted garage additions can trigger fines, forced demolition, and serious complications when you sell the home. Every bay expansion that involves structural work requires a building permit — no exceptions.
Building Permits and the Application Process
Most municipalities require a complete permit application that includes a site plan, construction drawings, and a structural engineer’s stamp for any load-bearing modification. The ICC residential building code sets the national baseline, but your local jurisdiction may impose stricter standards.
Typical permit timelines run 2–6 weeks in suburban areas and 8–16 weeks in dense urban jurisdictions. Submit early — permit delays are the single most common cause of project timeline overruns on garage addition projects.
Zoning Setbacks, Easements, and Property Line Rules
Your local zoning ordinance defines the minimum distance your structure must sit from property lines — typically 3–10 feet for side setbacks and 5–20 feet for rear setbacks. Utility easements can further restrict your buildable garage footprint, even on lots that appear to have ample space.
Before finalizing any design, pull your property’s plat map from your county assessor’s office and confirm easement locations. A surveyor can verify exact boundary lines for $300–$800 if there’s any ambiguity.
HOA Approval and the 10-Year Conversion Rule
If your home falls under an HOA, architectural approval is required before permits — not after. Most HOAs mandate matching exterior materials, consistent rooflines, and pre-approved door styles.
The 10-year conversion rule applies in select jurisdictions: if an unpermitted structure stands for 10 years without code enforcement action, some municipalities limit their ability to order removal. This varies widely by state and offers no reliable protection — permitted work is always the correct path.
DIY vs. Contractor: Making the Right Call
The garage addition DIY vs. contractor decision comes down to one honest question: which phases of this project are you legally allowed to do yourself, and which ones do you have the verified skills to execute safely?
What DIY Realistically Covers
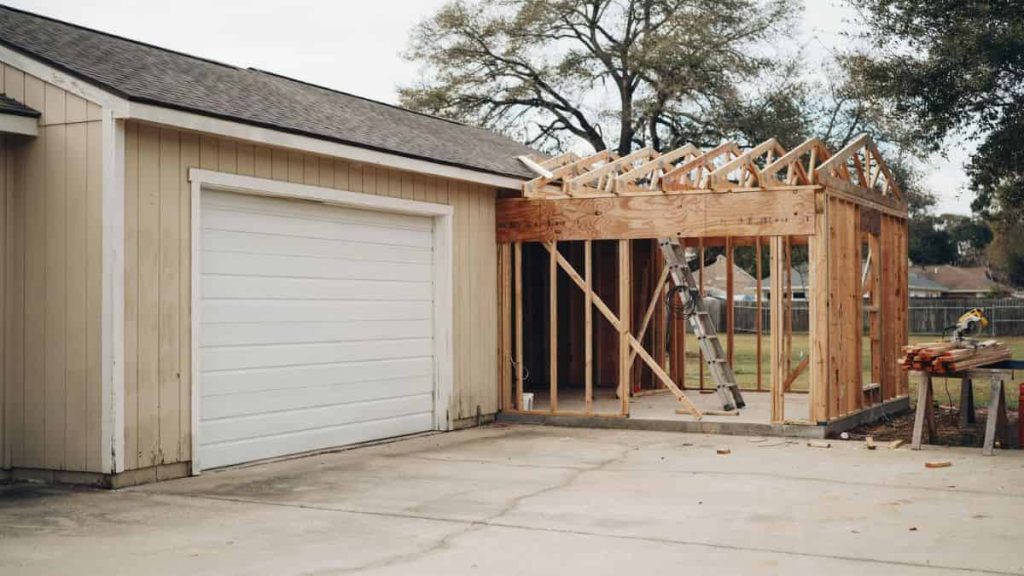
Experienced DIYers can handle framing, sheathing, insulation, drywall, and finish work on a bay expansion without professional help. These phases represent roughly 30–40% of total labor costs, so the savings are real — typically $4,000–$8,000 on a standard project.
Here’s what most people underestimate: foundation work and structural modifications require precision that punishes inexperience quickly. A footing poured at the wrong depth or a header sized incorrectly fails inspection and costs more to fix than hiring a pro from the start.
When Professionals Are Non-Negotiable
3 phases consistently require licensed contractors:
- Foundation and concrete work: Footing depth, rebar placement, and slab thickness must meet IRC (International Residential Code) minimums — mistakes here are expensive and structural.
- Electrical upgrades: Most jurisdictions require a licensed electrician for panel upgrades and new circuit installation. DIY electrical in permitted work gets flagged at inspection.
- Structural modifications: Any work that alters load-bearing walls or roof connections requires an engineer’s stamp and a licensed contractor in most states.
Evaluating and Hiring a Contractor
Get a minimum of 3 itemized quotes — not estimates. An itemized quote separates labor, materials, permits, and contingency so you can compare accurately.
Verify every contractor through your state licensing board, confirm they carry general liability and workers’ compensation insurance, and check their standing with the National Association of Home Builders (NAHB) or local trade associations. Ask specifically for references on garage additions or structural extensions — general remodeling experience does not translate directly to this work.
Making Your Addition Decision
The single factor that derails more garage bay additions than cost or skill is starting construction before confirming zoning setbacks, foundation compatibility, and permit requirements. Pull your property’s plat map from your county assessor’s office this week, measure your available side or rear clearance against local setback rules, and use that number to determine whether a side-by-side or tandem configuration is even feasible on your lot.
Once feasibility is confirmed, get 3 itemized contractor quotes before committing to any DIY scope — the quotes will tell you exactly where professional labor is priced high enough to justify doing it yourself.